Have you ever craved warm, fluffy pita bread but didn’t have yeast on hand? Or perhaps you’re in a hurry and don’t have time for dough to rise? I’ve been there too many times to count! After countless kitchen experiments, I’ve perfected a surprisingly simple 2-ingredient pita bread recipe that requires no yeast, no waiting, and delivers amazing results every time.
This recipe has become my go-to solution for last-minute dinner parties, quick weeknight meals, and those moments when the pita cravings hit unexpectedly. Today, I’m sharing my foolproof method that will have you making delicious pita bread in just 30 minutes from start to finish.
What makes this recipe truly special is its simplicity. With just self-rising flour and Greek yogurt, you can create soft, pillowy pitas with those beautiful pockets perfect for stuffing with your favorite fillings. No need for complicated techniques or specialty equipment—just basic ingredients and a hot skillet.
Why This Yeast-Free Pita Recipe Works
Traditional pita bread typically requires yeast, multiple rises, and a very hot oven. My simplified version eliminates these steps while still delivering authentic taste and texture. Here’s why this recipe works so well:
- Self-rising flour contains baking powder that provides the necessary lift
- Greek yogurt adds moisture, tanginess, and helps activate the leavening agents
- Quick cooking method creates the steam needed for pocket formation
- No proofing time means you can enjoy fresh pita in minutes, not hours
The science behind it is fascinating. When the dough hits the hot cooking surface, moisture in the dough rapidly converts to steam, causing the pita to puff dramatically. As it cools, it flattens slightly but maintains that characteristic pocket we all love.
Ingredients & Equipment Needed
Basic Ingredients:
- 2 cups self-rising flour (plus extra for dusting)
- 1 cup Greek yogurt (full-fat works best)
Optional Flavor Enhancers:
- 1/2 teaspoon salt (if your self-rising flour is unsalted)
- 1 tablespoon olive oil (for softer texture)
- 1 teaspoon honey or sugar (for slight sweetness)
- 1 teaspoon dried herbs like oregano or za’atar (for herbed pita)
Equipment:
- Large mixing bowl
- Measuring cups and spoons
- Clean work surface for kneading
- Rolling pin
- Cast iron skillet, nonstick pan, or griddle
- Tongs or spatula
- Clean kitchen towel (to keep pitas warm)
Making Your Own Self-Rising Flour
Don’t have self-rising flour on hand? No problem! Here’s how to make your own:
| Regular Flour Amount | Baking Powder | Salt |
|---|---|---|
| 1 cup all-purpose flour | 1 1/2 teaspoons baking powder | 1/4 teaspoon salt |
| 2 cups all-purpose flour | 3 teaspoons baking powder | 1/2 teaspoon salt |
| 3 cups all-purpose flour | 4 1/2 teaspoons baking powder | 3/4 teaspoon salt |
Simply whisk these ingredients together thoroughly before using in the recipe. This homemade version works perfectly as a substitute!
Step-by-Step Instructions
1. Prepare The Dough
- In a large bowl, combine the self-rising flour and any optional dry ingredients.
- Create a well in the center and add the Greek yogurt and any optional wet ingredients.
- Mix with a fork until the mixture starts to come together.
- Switch to using your hands and knead briefly in the bowl until it forms a cohesive ball.
- If the dough feels too sticky, add a tablespoon of flour at a time. If it’s too dry, add a teaspoon of yogurt or water.

2. Knead The Dough
- Turn the dough out onto a lightly floured surface.
- Knead for 2-3 minutes until smooth and elastic. The dough should be soft but not sticky.
- Unlike yeast doughs that require extensive kneading, this quick dough only needs minimal working.
- Form the dough into a smooth ball and cover with a clean kitchen towel to rest for 5 minutes. This brief rest helps relax the gluten slightly.
3. Divide And Shape
- Divide the dough into 6-8 equal portions, depending on how large you want your pitas.
- Roll each portion into a ball.
- Using a floured rolling pin, roll each ball into a circle about 1/4 inch thick (approximately 6-7 inches in diameter).
- For perfectly round shapes, you can use a bowl or plate as a guide and trim the edges with a knife.
- Keep the rolled-out pitas covered with a towel to prevent them from drying out as you work.
4. Cook The Pitas
- Heat a cast iron skillet, nonstick pan, or griddle over medium-high heat until very hot.
- Do not add any oil to the pan—the pitas should cook on a dry surface.
- Place one pita in the hot pan and cook for 1-2 minutes until bubbles form on the surface and the bottom has golden-brown spots.
- Flip the pita and cook for another 1-2 minutes until the second side is cooked and the pita puffs up.
- Remove from the pan and wrap in a clean kitchen towel to keep warm and soft.
- Repeat with the remaining pitas.

Troubleshooting Your Pita Bread
| Problem | Possible Cause | Solution |
|---|---|---|
| Pitas don’t puff up | Pan not hot enough | Ensure your cooking surface is thoroughly preheated |
| Dough too thick | Roll pitas thinner (about 1/4 inch) | |
| Dough overworked | Handle the dough gently and don’t over-knead | |
| Pitas too dry | Insufficient moisture | Add a teaspoon more yogurt or a splash of water to the dough |
| Overcooked | Reduce cooking time slightly | |
| Pitas too doughy | Undercooked | Cook longer on each side |
| Dough too thick | Roll out thinner | |
| Pitas too stiff | Cooled without covering | Always wrap warm pitas in a towel right after cooking |
| Made too far in advance | Refresh briefly in a warm oven before serving |
Storing and Reheating
Fresh pita bread is always best when eaten immediately after cooking, but here’s how to store any extras properly:
Short-term Storage:
- Allow pitas to cool completely.
- Store in a zip-top plastic bag or airtight container at room temperature for up to 2 days.
- For best results, place a paper towel in the bag to absorb any excess moisture.
Longer Storage:
- For longer storage, freeze pitas for up to 3 months.
- Place parchment paper between each pita to prevent sticking.
- Store in a freezer bag with the air pressed out.
- Label with the date so you know when they were made.
Reheating Methods:
| Method | Instructions | Best For |
|---|---|---|
| Microwave | Sprinkle with water, wrap in damp paper towel, heat 10-15 seconds | Quick reheating, soft texture |
| Oven | Preheat to 350°F, wrap pitas in foil, heat 5-7 minutes | Best texture restoration |
| Stovetop | Warm in dry skillet 30 seconds per side | Crispy exterior, warm interior |
| Toaster | Toast on lowest setting | Quick crisping for filled pitas |
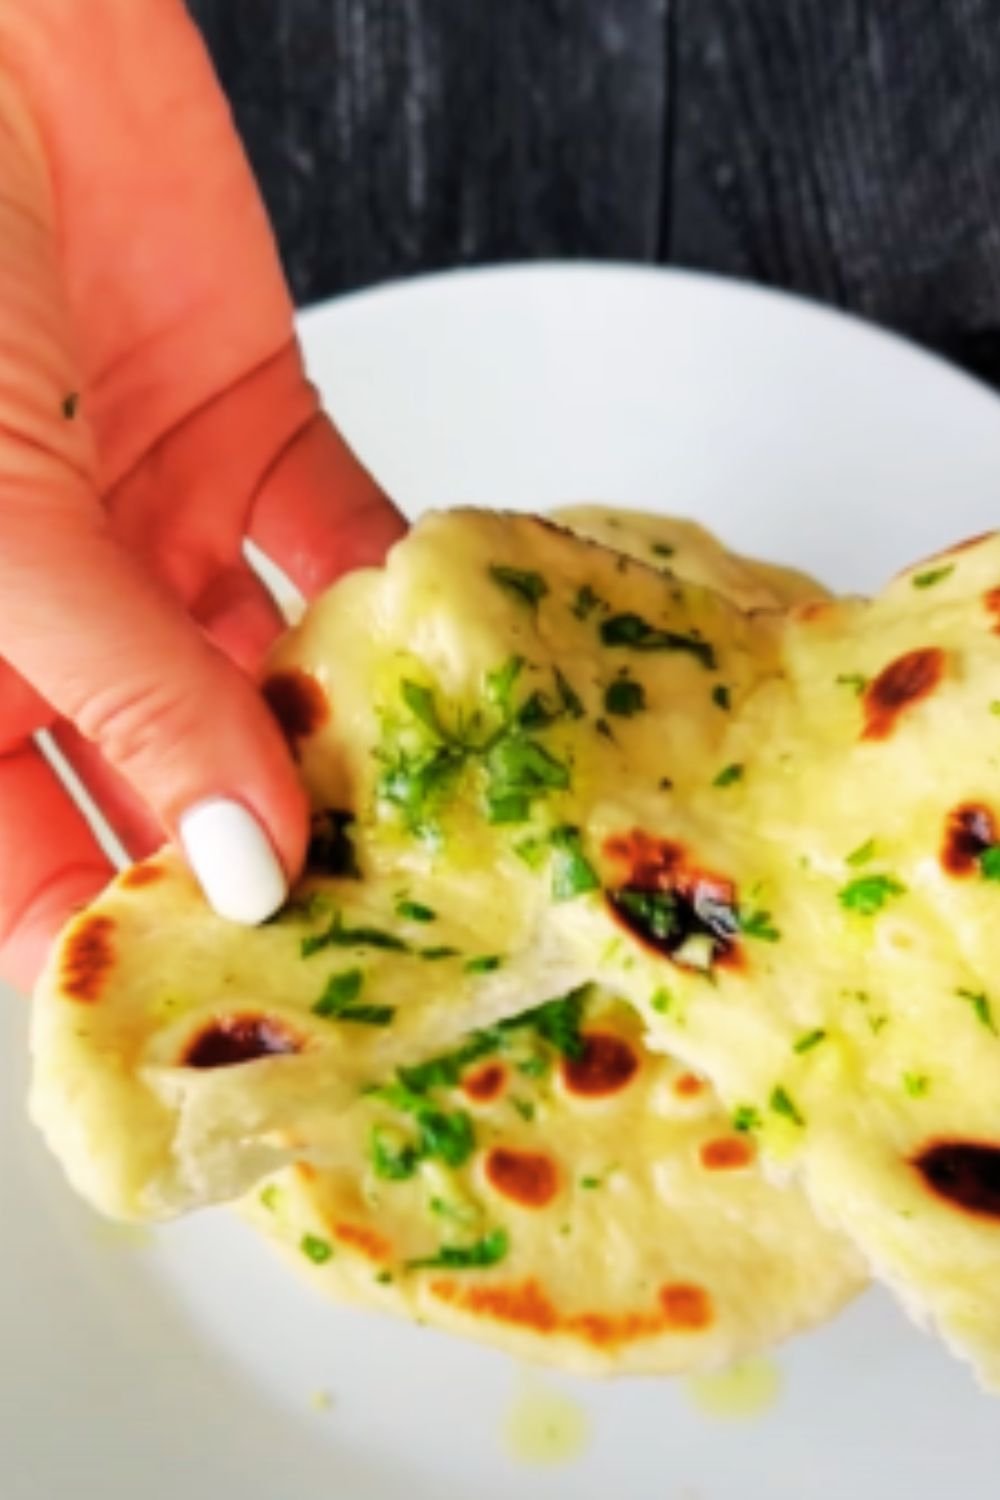
Delicious Ways to Enjoy Your Homemade Pita Bread
These versatile pitas can be used in countless ways. Here are some of my favorite serving suggestions:
Traditional Fillings:
- Falafels with tahini sauce and cucumber-tomato salad
- Grilled chicken or lamb with tzatziki and mixed greens
- Homemade hummus with roasted vegetables
- Shawarma-spiced meat with pickled turnips and garlic sauce
Modern Twists:
- Breakfast pita: Stuff with scrambled eggs, avocado, and salsa
- Mediterranean pizza: Use as a base topped with olive oil, feta, and fresh herbs
- Sweet treat: Fill with Greek yogurt, honey, and berries
- Pita chips: Cut into triangles, brush with olive oil, sprinkle with seasonings, and bake until crisp
Perfect Accompaniments:
- Homemade dips like baba ganoush, muhammara, or tzatziki
- Fresh vegetable crudités
- Marinated olives and feta cheese
- Middle Eastern pickles
- Traditional tabbouleh or fattoush salad

Nutritional Information
For those watching their nutrition, here’s a breakdown of what you can expect from this recipe (per pita, based on making 8 pitas from the recipe):
| Nutrient | Amount |
|---|---|
| Calories | ~120 calories |
| Carbohydrates | ~22g |
| Protein | ~4g |
| Fat | ~1-2g |
| Fiber | ~1g |
| Sodium | Varies based on salt added |
These values are approximate and will vary based on the specific brands of ingredients used and any additions to the basic recipe.
Variations to Try
While the basic recipe is delicious on its own, here are some exciting variations to experiment with:
Whole Wheat Pita
Replace half the self-rising flour with whole wheat flour for a nuttier taste and more fiber. You may need to add a touch more yogurt as whole wheat flour absorbs more moisture.
Garlic and Herb Pita
Add 2 minced garlic cloves and 1 tablespoon of fresh chopped herbs (like parsley, dill, or mint) to the dough for a fragrant, flavorful pita.
Seeded Pita
Sprinkle sesame seeds, nigella seeds, or za’atar on one side of the rolled-out dough before cooking for added texture and flavor.
Gluten-Free Option
Use a good quality gluten-free self-rising flour blend plus 1/2 teaspoon of xanthan gum. The texture may be slightly different, but still delicious.
Flavored Yogurt Variations
Try using different flavored Greek yogurts like garlic & herb or spinach for exciting flavor combinations in savory applications.
Why Make Your Own Pita Bread?
Making your own pita bread has numerous advantages over store-bought versions:
- Freshness: Nothing compares to warm, fresh pita straight from the pan
- Cost: Homemade pita costs a fraction of store-bought varieties
- Control: You decide exactly what goes into your bread—no preservatives or additives
- Customization: Adjust thickness, size, and flavor to your preference
- Convenience: No need to run to the store when you have the basic ingredients on hand
- Satisfaction: The pride that comes from creating something delicious from scratch
Plus, there’s something magical about watching flat dough transform into puffy bread before your eyes—it never gets old, even after making hundreds of pitas!
Commonly Asked Questions About No-Yeast Pita Bread
Q: Can I use regular yogurt instead of Greek yogurt? While regular yogurt can work, it contains more moisture than Greek yogurt. If using regular yogurt, strain it through a coffee filter or cheesecloth for 30 minutes first, or use about 2-3 tablespoons less and add more flour as needed until the dough reaches the right consistency.
Q: Why didn’t my pitas form pockets? The pocket forms when moisture in the dough turns to steam in a hot pan. Make sure your cooking surface is thoroughly preheated, your dough isn’t too thick, and you’ve kneaded it just enough to activate the gluten without overworking it.
Q: Can I make these pitas ahead of time for a party? Absolutely! Make them up to a day ahead and store at room temperature in an airtight container. Refresh them briefly in a warm oven wrapped in foil before serving. For longer storage, freeze and reheat following the instructions above.
Q: Is this pita bread vegan? The basic recipe is not vegan as it contains Greek yogurt. However, you can substitute thick coconut yogurt or unsweetened dairy-free yogurt alternatives for a vegan version.
Q: Can I bake these in the oven instead of on the stovetop? Yes! Preheat your oven to 500°F (260°C) with a baking stone or inverted baking sheet inside. Place the pitas directly on the hot surface and bake for 3-4 minutes until puffed and lightly golden.
Q: How do I fix dough that’s too sticky? Add flour, a tablespoon at a time, kneading after each addition until the dough is smooth and no longer sticks to your hands. Humidity in your kitchen can affect the dough, so adjustments are sometimes necessary.
Q: Can I add different flavors to the dough? Absolutely! Add dried herbs, spices, minced garlic, or even a touch of honey for different flavor profiles. Just be careful not to add too many wet ingredients, which could throw off the dough consistency.
Q: My pitas turned out tough. What went wrong? Tough pitas usually result from overworking the dough. Keep kneading to a minimum—just enough to form a smooth, cohesive dough. Also, make sure you’re wrapping them in a towel immediately after cooking to trap steam and keep them soft.
Final Thoughts
Making your own 2-ingredient pita bread without yeast is one of those simple cooking skills that pays enormous dividends. Once you’ve experienced the satisfaction of watching your homemade pitas puff up in the pan and tasted their fresh, warm goodness, you might never go back to store-bought varieties again.
What I love most about this recipe is how it makes traditionally complex bread-making accessible to anyone, regardless of baking experience. It’s perfect for busy weeknights, unexpected guests, or anytime you want to elevate your meal with freshly made bread.
Remember that practice makes perfect—your first batch might not be flawless, but each time you make these pitas, you’ll refine your technique and develop an intuitive feel for the dough. Soon, you’ll be making perfect pita bread without even measuring the ingredients!
So pull out that flour and yogurt, heat up your skillet, and get ready to enjoy the simple pleasure of homemade pita bread—no yeast, no fuss, just delicious results.