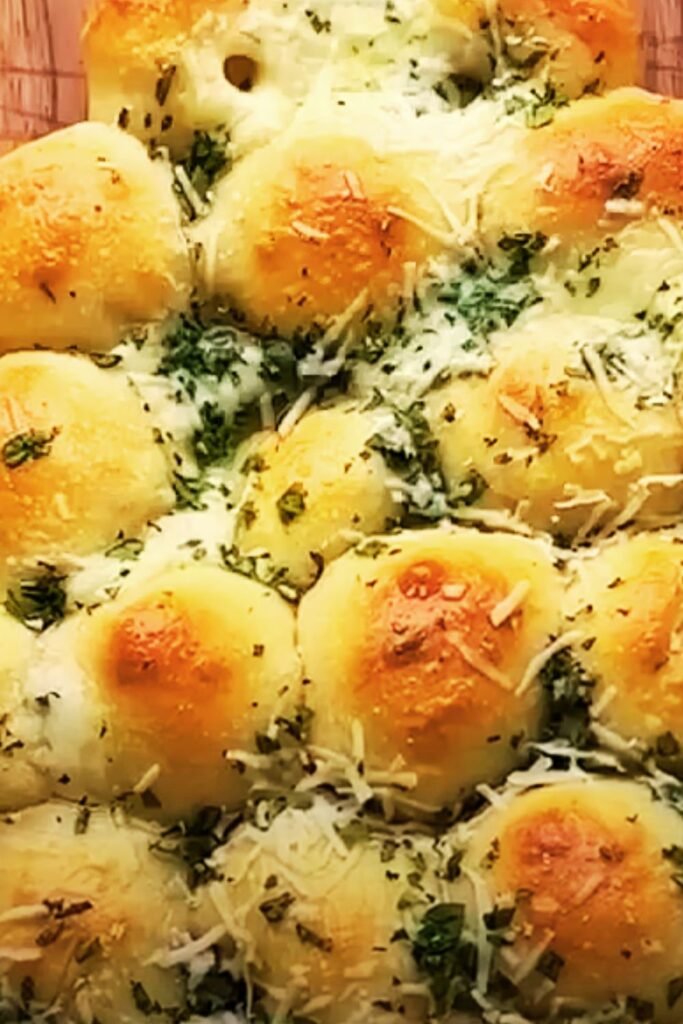
There’s something undeniably magical about the aroma of freshly baked bread wafting through the kitchen. When that bread happens to be infused with garlic and Parmesan, well, that’s when true culinary enchantment occurs. I’ve spent years perfecting my Garlic Parmesan Pull-Apart Rolls recipe, and today I’m thrilled to share it with you. These pillowy soft, flavor-packed rolls are guaranteed to steal the spotlight at any meal, from casual family dinners to special holiday feasts.
The History Behind Pull-Apart Bread
Before diving into the recipe, let me share a bit about the fascinating origins of pull-apart bread. This communal style of bread has roots in many cultures around the world. From Eastern European “bubble bread” to American “monkey bread,” the concept of creating bread designed to be shared by pulling off individual portions has brought people together around the table for generations.
What makes pull-apart bread special isn’t just its delicious taste—it’s the experience of sharing. There’s something inherently social about reaching for the warm bread in the center of the table, pulling off your portion, and passing the rest along. It creates connection, conversation, and community.
The garlic and Parmesan variation we’re making today draws inspiration from Italian cuisine, where these two powerful flavors are celebrated staples. By incorporating them into a pull-apart format, we’re creating the perfect marriage of flavor and function.
Why These Rolls Will Become Your New Favorite
After testing dozens of variations, I can confidently say this recipe stands out for several reasons:
- The dough achieves the perfect balance of softness and structure
- The garlic butter infuses every nook and cranny with flavor
- The combination of cheeses creates complex, savory notes
- The pull-apart format makes them fun to eat and perfect for sharing
- They’re surprisingly straightforward to make despite their impressive appearance
Let me walk you through the entire process, from mixing the first ingredients to serving these glorious rolls hot from the oven.
Ingredients Breakdown
Understanding the role of each ingredient helps you appreciate how they work together to create these amazing rolls:
Dough Ingredients: : 4 cups all-purpose flour : 1 tablespoon active dry yeast : 1 cup warm milk (110°F) : ¼ cup granulated sugar : ⅓ cup unsalted butter, melted : 2 large eggs, room temperature : 1 teaspoon salt
Garlic Parmesan Filling: : ½ cup unsalted butter, softened : 6 cloves garlic, minced : ¼ cup fresh parsley, finely chopped : 1 cup Parmesan cheese, freshly grated : ¼ cup Romano cheese, grated (optional but recommended) : 1 teaspoon Italian seasoning : ½ teaspoon black pepper : ¼ teaspoon red pepper flakes (optional)
Topping: : 2 tablespoons unsalted butter, melted : 2 tablespoons Parmesan cheese, grated : 1 teaspoon fresh parsley, chopped : ¼ teaspoon garlic powder
Essential Equipment
To ensure success with this recipe, here’s what you’ll need:
- Stand mixer with dough hook (or strong arms for kneading by hand!)
- Large mixing bowl
- Measuring cups and spoons
- 12-inch cast iron skillet or 9×13 baking dish
- Rolling pin
- Pastry brush
- Kitchen thermometer (helpful but not essential)
Step-by-Step Instructions
Preparing the Dough
- In the bowl of your stand mixer, combine warm milk (110°F) with sugar and yeast. Let it sit for 5-10 minutes until foamy. This tells you your yeast is alive and ready to work!
- Add melted butter, eggs, and salt to the yeast mixture and mix briefly to combine.
- With the mixer on low speed, gradually add the flour, about one cup at a time, until the dough comes together.
- Increase speed to medium-low and knead with the dough hook for 7-8 minutes until smooth and elastic. The dough should pull away from the sides of the bowl but still be slightly tacky to the touch.
- Place the dough in a lightly greased bowl, cover with plastic wrap or a clean kitchen towel, and let rise in a warm place for about 1 hour, or until doubled in size.
Pro Tip: If your kitchen is cold, create a warm environment by turning your oven on to its lowest setting for just a minute, then turning it off. Place the dough inside the slightly warmed (but definitely turned off) oven to rise.
Making the Garlic Parmesan Filling
While the dough is rising, prepare your filling:
- In a medium bowl, mix the softened butter with minced garlic, chopped parsley, Italian seasoning, black pepper, and red pepper flakes (if using).
- Add ¾ cup of the Parmesan cheese and all of the Romano cheese (if using), reserving the remaining Parmesan for later. Mix until well combined.
- Set aside at room temperature so it remains spreadable. If your kitchen is particularly warm and the butter starts to melt, refrigerate the mixture for a few minutes, but don’t let it harden completely.
Shaping the Rolls
- After the dough has doubled in size, punch it down gently to release air bubbles.
- Transfer to a lightly floured surface and roll into a rectangle approximately 18×12 inches. The dough should be about ¼ inch thick.
- Using a pastry brush, spread the garlic Parmesan filling evenly over the entire surface of the dough, leaving about a ½-inch border along one long edge.
- Starting from the long edge that has filling all the way to the edge, roll the dough tightly into a log, pinching the seam to seal.
- With a sharp knife or unflavored dental floss, cut the log into 12-15 even pieces, each about 1½ inches thick.
Assembly and Second Rise
- Grease a 12-inch cast iron skillet or 9×13 baking dish generously with butter.
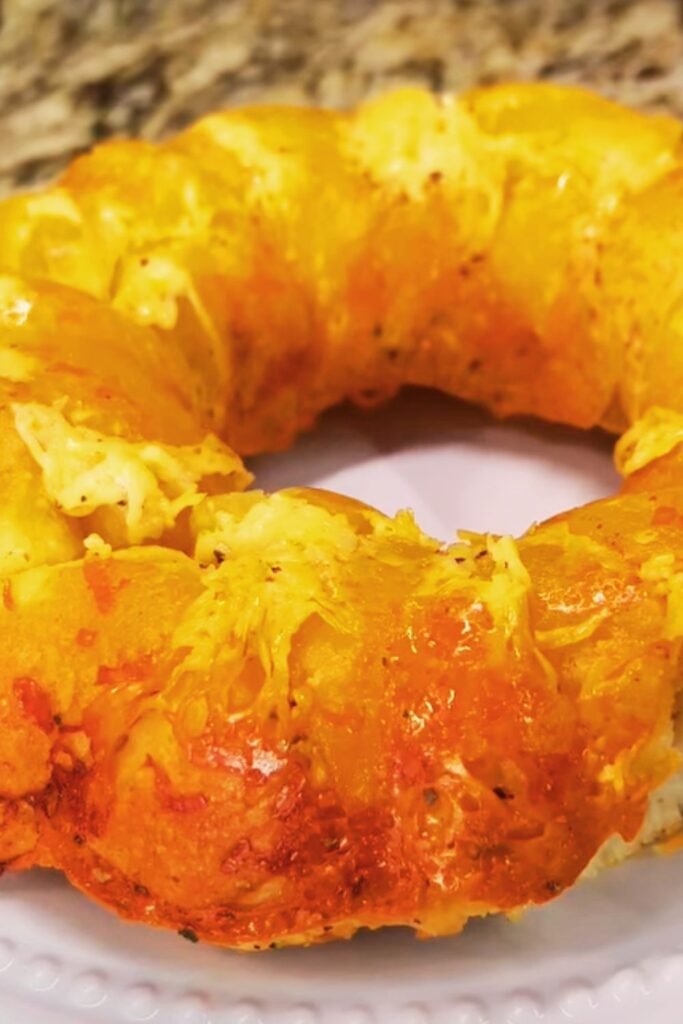
- Arrange the cut rolls in the skillet, placing one in the center and the rest around it, cut side up. Leave a little space between each roll as they will expand during the second rise and while baking.
- Cover the skillet with a clean kitchen towel and let the rolls rise again for 30-45 minutes, until puffy and nearly doubled in size.
- During the last 15 minutes of rising time, preheat your oven to 375°F (190°C).
Baking to Perfection
- Once the rolls have completed their second rise, bake in the preheated oven for 25-30 minutes, until golden brown. If they start browning too quickly, loosely cover with aluminum foil.
- While the rolls are baking, prepare the topping by mixing melted butter with garlic powder.
- As soon as the rolls come out of the oven, brush them with the garlic butter mixture and sprinkle with the remaining Parmesan cheese and chopped parsley.
- Allow the rolls to cool for 5-10 minutes before serving. This cooling period allows the cheese to set slightly and makes them easier to pull apart.
Troubleshooting Common Issues
Even experienced bakers encounter challenges. Here’s how to solve potential problems:
| Issue | Possible Cause | Solution |
|---|---|---|
| Dough isn’t rising | Inactive yeast or too-cold environment | Make sure your yeast is fresh and create a warmer rising environment |
| Rolls are doughy in the center | Undercooked or rolled too tightly | Extend baking time and ensure proper spacing between rolls |
| Filling leaks out during baking | Too much butter in filling or not sealed properly | Reduce butter slightly or ensure rolls are placed close together |
| Rolls are too brown outside, raw inside | Oven temperature too high | Lower temperature by 25°F and cover with foil partway through baking |
| Rolls are tough | Overworked dough or too much flour | Handle dough gently and measure flour precisely |
| Uneven roll sizes | Inconsistent cutting | Use dental floss or a bench scraper for clean, even cuts |
Make-Ahead and Storage Options
I understand that timing isn’t always perfect when preparing for a gathering. Here are some make-ahead options:
Make-Ahead Options:
Overnight Refrigeration Method:
- Follow the recipe through shaping the rolls and placing them in the skillet.
- Cover tightly with plastic wrap and refrigerate overnight (up to 12 hours).
- The next day, remove from refrigerator and let stand at room temperature for 1-2 hours before baking.
- Bake as directed, adding 2-3 minutes to the baking time if needed.
Freezer Method (Unbaked):
- Prepare rolls through the shaping step.
- Place rolls on a parchment-lined baking sheet, not touching, and freeze until solid (about 2 hours).
- Transfer frozen rolls to a freezer bag and store for up to 1 month.
- When ready to bake, arrange frozen rolls in a buttered skillet, cover, and let thaw and rise at room temperature (about 4-5 hours) before baking as directed.
Freezer Method (Baked):
- Bake rolls completely and allow to cool.
- Wrap tightly in aluminum foil and freeze for up to 2 months.
- Reheat wrapped rolls in a 300°F oven for 15-20 minutes, or until heated through.
Storage Instructions:
Fresh-baked rolls will keep at room temperature, covered in plastic wrap or in an airtight container, for up to 2 days. For longer storage, refrigerate for up to 5 days or freeze as directed above.
Nutritional Information
Understanding the nutritional content helps you plan how these delicious rolls fit into your overall meal. Here’s the breakdown per roll (based on 12 rolls):
| Nutrient | Amount per Roll |
|---|---|
| Calories | 325 |
| Total Fat | 18g |
| Saturated Fat | 11g |
| Cholesterol | 75mg |
| Sodium | 420mg |
| Total Carbohydrates | 32g |
| Dietary Fiber | 1g |
| Sugars | 5g |
| Protein | 8g |
| Calcium | 150mg |
| Iron | 2mg |
Serving Suggestions
These Garlic Parmesan Pull-Apart Rolls pair beautifully with so many dishes. Here are my favorite serving suggestions:
- Alongside pasta dishes, especially those with tomato-based sauces
- With hearty soups like minestrone or tomato bisque
- As an accompaniment to roasted chicken or beef
- As part of an antipasto spread with olives, cheeses, and cured meats
- With a simple green salad for a light lunch
- Served with warm marinara sauce for dipping
For a complete meal experience, I love serving these rolls with my Tuscan White Bean Soup and a crisp Caesar salad. The combination of flavors is simply unbeatable.

Variations to Try
While this classic version is my go-to, here are some delicious variations you might want to experiment with:
Herb Garden Version
Add 2 tablespoons each of fresh chopped rosemary, thyme, and basil to the filling for an herbal twist.
Three-Cheese Explosion
Add ¼ cup each of shredded mozzarella and crumbled feta to the filling for a more complex cheese profile.
Caramelized Onion and Gruyère
Replace half the Parmesan with Gruyère and add ½ cup of caramelized onions to the filling.
Sun-Dried Tomato and Basil
Add ⅓ cup finely chopped sun-dried tomatoes and 2 tablespoons fresh basil to the filling.
Whole Wheat Option
Replace half the all-purpose flour with whole wheat flour for a nuttier flavor and additional fiber.
Expert Tips for Success
After making these rolls countless times, I’ve collected these tips to ensure your success:
- Temperature matters: Make sure your milk is warm (about 110°F), not hot, as too-hot liquid can kill the yeast.
- Fresh ingredients: Use freshly grated Parmesan cheese rather than pre-grated. The flavor difference is remarkable.
- Don’t rush: The rising time is crucial for developing both texture and flavor. Be patient!
- Proper kneading: The dough should be smooth and elastic after kneading. It should pass the “windowpane test” – when a small piece can be stretched thin enough to see light through without tearing.
- Even cutting: For the most professional-looking rolls, use dental floss to cut the log into even pieces.
- Cast iron advantage: If you have a cast iron skillet, use it! The heat retention creates a perfect crust while keeping the interior soft.
- Visual doneness: Beyond timing, look for golden brown tops and a hollow sound when tapped as indicators that your rolls are done.
- Serve warm: These rolls are at their absolute best when served warm, about 10 minutes after coming out of the oven.
Frequently Asked Questions
Q: Can I make these rolls without a stand mixer? A: Absolutely! You can mix the dough with a wooden spoon and then knead by hand on a floured surface for about 10-12 minutes until smooth and elastic.
Q: Is active dry yeast interchangeable with instant yeast in this recipe? A: Yes, you can use instant yeast instead of active dry. Use the same amount, but you can skip the proofing step and add it directly to the dry ingredients.
Q: Can I use pre-minced garlic from a jar? A: Fresh garlic provides the best flavor, but in a pinch, you can substitute 3 teaspoons of pre-minced garlic for the 6 cloves. Just be aware that the flavor won’t be quite as vibrant.
Q: How do I know when the dough has risen enough? A: The dough should roughly double in size. A good test is to gently press a finger into the dough – if the indentation remains, it’s ready.
Q: Can I make these dairy-free? A: Yes, you can substitute plant-based butter and milk, though the texture might be slightly different. For the cheese, nutritional yeast can provide a similar flavor profile, though it won’t melt the same way.
Q: Why did my filling leak out during baking? A: This usually happens if the butter in the filling is too soft or if the rolls aren’t placed close enough together. Make sure your filling is spreadable but not runny, and place the rolls so they’re nearly touching in the pan.
Q: How can I make these rolls ahead for a holiday dinner? A: Follow the make-ahead instructions in the article. My preferred method is refrigerating the shaped, unbaked rolls overnight and bringing them to room temperature before baking the next day.
Q: Can I halve this recipe? A: Yes, all ingredients can be halved for a smaller batch. Use an 8×8 inch baking dish or a 9-inch round pan instead of the larger skillet.
A Personal Note
I first developed this recipe when I was looking for something special to serve at my daughter’s graduation dinner. The rolls were such a hit that they’ve become a tradition at family gatherings. There’s something about breaking bread together – especially when it’s infused with garlic and cheese – that brings people closer.
What I love most about these rolls is their versatility. They’re elegant enough for special occasions but simple enough for everyday meals. The look on people’s faces when you place that skillet of golden, aromatic rolls on the table is priceless.
I hope these Garlic Parmesan Pull-Apart Rolls bring as much joy to your table as they have to mine. Food has always been my way of showing love, and these rolls are one of my favorite expressions of that sentiment.
Happy baking!
Q&A Section
Q: How important is it to use freshly grated Parmesan versus pre-grated? A: Freshly grated Parmesan makes a significant difference in this recipe. Pre-grated cheese often contains anti-caking agents that can affect both texture and flavor. When you grate the cheese yourself, you get a fresher taste and better melt. If you must use pre-grated, try to find one without added cellulose.
Q: My kitchen is quite cold. What’s the best way to help the dough rise? A: There are several methods for creating a warm environment for your dough. You can preheat your oven to the lowest setting for just a minute, then turn it off and place the covered dough inside. Another option is to place the dough on top of a refrigerator or near (not on) a heating vent. You can also place the bowl of dough in a larger bowl of warm (not hot) water.
Q: Can these rolls be made gluten-free? A: Yes, though it requires some adjustments. Replace the all-purpose flour with a cup-for-cup gluten-free flour blend that contains xanthan gum. Add an extra egg to help with binding, and be aware that the texture will be slightly different. The rise time may also need to be extended.
Q: What’s the best way to store leftover garlic butter if I make too much? A: Leftover garlic butter can be stored in an airtight container in the refrigerator for up to 1 week. You can also freeze it for up to 3 months. Let it come to room temperature before using it. It’s delicious on toasted bread, steamed vegetables, or pasta!