There’s something magical about watching pita bread puff up in the oven, creating that perfect pocket ready to be filled with your favorite ingredients. As a sourdough enthusiast with a perpetual jar of discard in my fridge, I’ve discovered that this “waste” product makes the most flavorful, tender pita breads imaginable. Today, I’m sharing my tried-and-true recipe for sourdough discard pita bread that will transform your homemade Mediterranean meals and help you reduce kitchen waste at the same time.
The Magic of Sourdough Discard
Before diving into the recipe, let’s talk about why sourdough discard makes such fantastic pita bread. When maintaining a sourdough starter, most of us “discard” a portion before feeding to keep the starter at a manageable size. This discard is full of flavor, wild yeasts, and beneficial bacteria that can add complexity and tang to your baked goods.
Using discard in recipes like pita bread:
- Reduces food waste in your kitchen
- Adds complex flavor to simple breads
- Improves digestibility through fermentation
- Creates better texture and chew
- Extends shelf life naturally
I used to toss my discard without a second thought, but once I started incorporating it into flatbreads, I realized I was throwing away liquid gold! Sourdough discard pita breads have become a weekly tradition in my household, and I’m constantly amazed at how such a simple recipe can yield such impressive results.
The Science Behind the Perfect Pocket
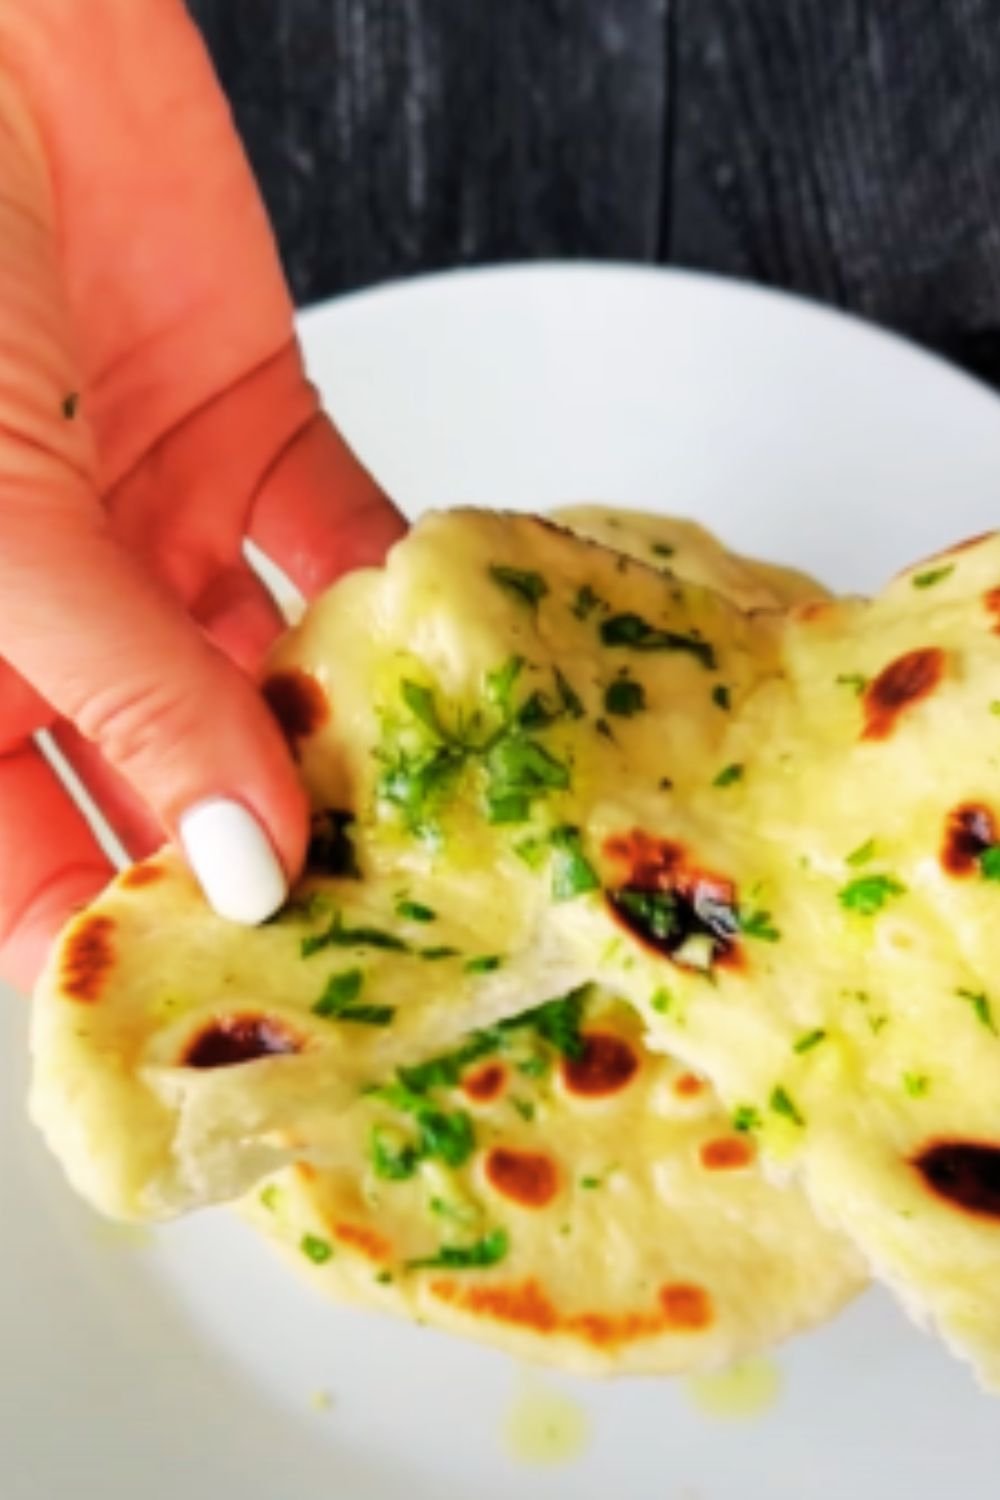
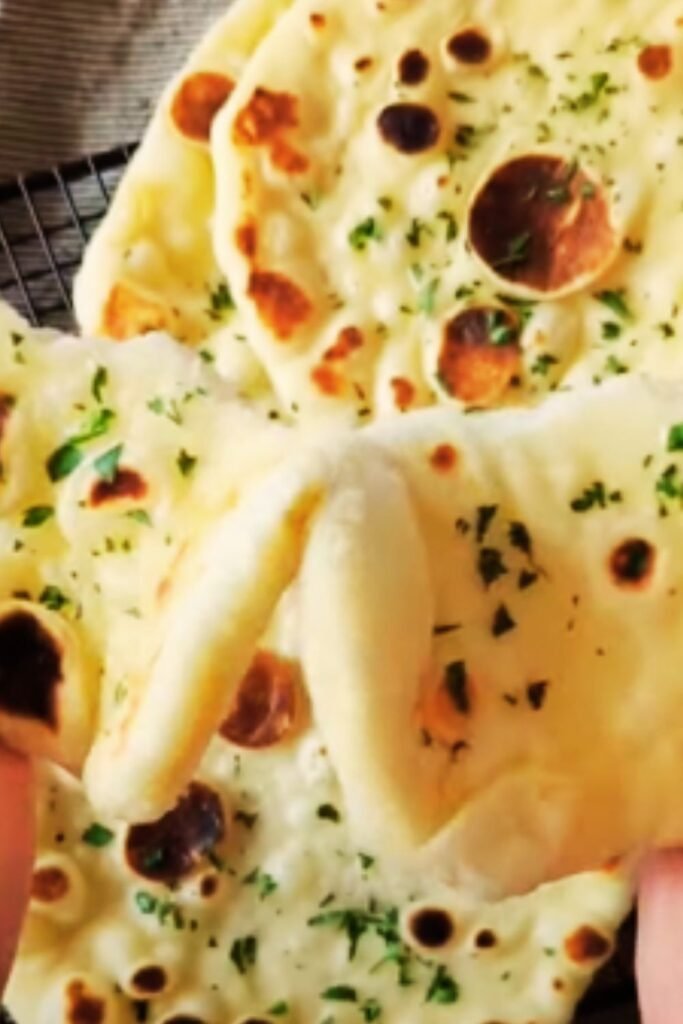
The distinctive pocket in pita bread isn’t magic—it’s science! When the dough hits the hot oven, the moisture inside rapidly turns to steam. This steam expands, pushing the top and bottom surfaces apart and creating that signature pocket.
Several factors influence successful pocket formation:
Temperature: A blazing hot oven (at least 450°F/232°C) is crucial for that dramatic steam expansion. Thickness: The dough must be rolled to an even thickness—too thin and it will crisp before puffing; too thick and it becomes more like naan. Moisture: The dough needs enough hydration to create steam but not so much that it’s sticky. Proofing: Proper fermentation creates the gluten structure necessary to trap steam effectively.
The addition of sourdough discard enhances all these factors! The acidity from the discard strengthens gluten bonds while the existing fermentation gives the dough a head start, creating more consistent pockets than traditional recipes.
Essential Ingredients and Equipment
For the Pita Dough
| Ingredient | Amount | Purpose |
|---|---|---|
| Sourdough discard | 1 cup (240g) | Adds flavor, acidity, and some rising power |
| All-purpose flour | 2½ cups (300g) | Forms the base structure of the dough |
| Whole wheat flour | ½ cup (60g) | Adds nutrition and subtle nuttiness |
| Warm water | ⅔ cup (150g) | Hydrates the dough and activates yeast |
| Active dry yeast | 1 teaspoon (3g) | Ensures reliable rise (even with less active discard) |
| Salt | 1½ teaspoons (9g) | Enhances flavor and controls fermentation |
| Olive oil | 2 tablespoons (30ml) | Improves texture and flavor |
| Honey or sugar | 1 teaspoon (7g) | Provides food for yeast and balances flavor |
Equipment You’ll Need
- Kitchen scale (highly recommended for accuracy)
- Large mixing bowl
- Wooden spoon or dough whisk
- Clean work surface for kneading
- Rolling pin
- Baking sheet or pizza stone
- Kitchen towels for covering dough
- Parchment paper
- Pizza peel (optional but helpful)
- Cooling rack
Having everything prepared before starting makes the process much more enjoyable. I find that weighing ingredients rather than using volume measurements produces the most consistent results.
Step-by-Step Preparation
Preparing the Dough
- Mix the dry ingredients: In a large bowl, whisk together all-purpose flour, whole wheat flour, instant yeast, and salt until evenly distributed.
- Combine wet ingredients: In a separate container, mix the sourdough discard, warm water, olive oil, and honey until well combined.
- Form the dough: Make a well in the center of the dry ingredients and pour in the wet mixture. Stir with a wooden spoon until a shaggy dough forms.
- Initial kneading: Turn the dough onto a lightly floured surface and knead for 5-7 minutes until smooth and elastic. The dough should be slightly tacky but not sticky—add small amounts of flour if needed.
- First rise: Place the dough in an oiled bowl, cover with a damp kitchen towel, and let rise in a warm spot for 1-2 hours, or until doubled in size.

Shaping and Baking
- Preheat your oven: Place a baking steel, stone, or inverted baking sheet in the oven and heat to 475°F (245°C). Allow at least 30 minutes for proper preheating.
- Divide the dough: Punch down the risen dough and divide it into 8 equal portions (about 90g each).
- Shape into balls: Roll each portion into a tight ball by gathering the edges toward the center and pinching them together, then rolling between your palms until smooth.
- Rest the dough balls: Cover the dough balls with a kitchen towel and let rest for 15 minutes to relax the gluten.
- Roll out the pitas: On a lightly floured surface, roll each ball into a circle about 6-7 inches (15-18cm) in diameter and ¼ inch (6mm) thick. Try to maintain even thickness throughout.
- Final rise: Cover the rolled-out pitas with a towel and let rest for another 10 minutes.
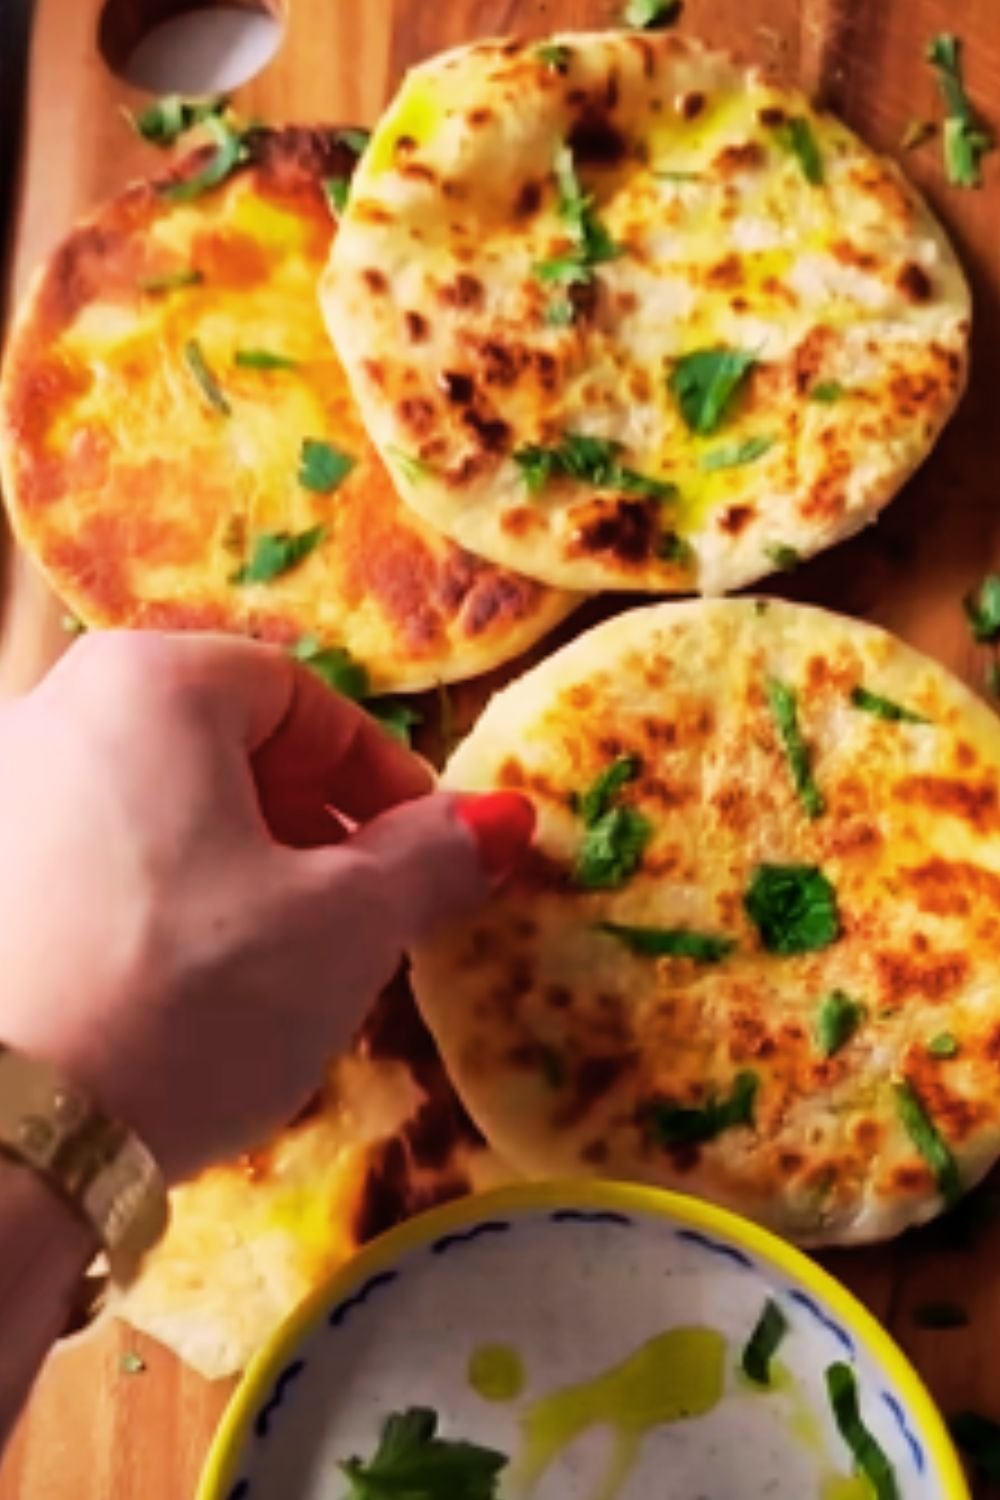
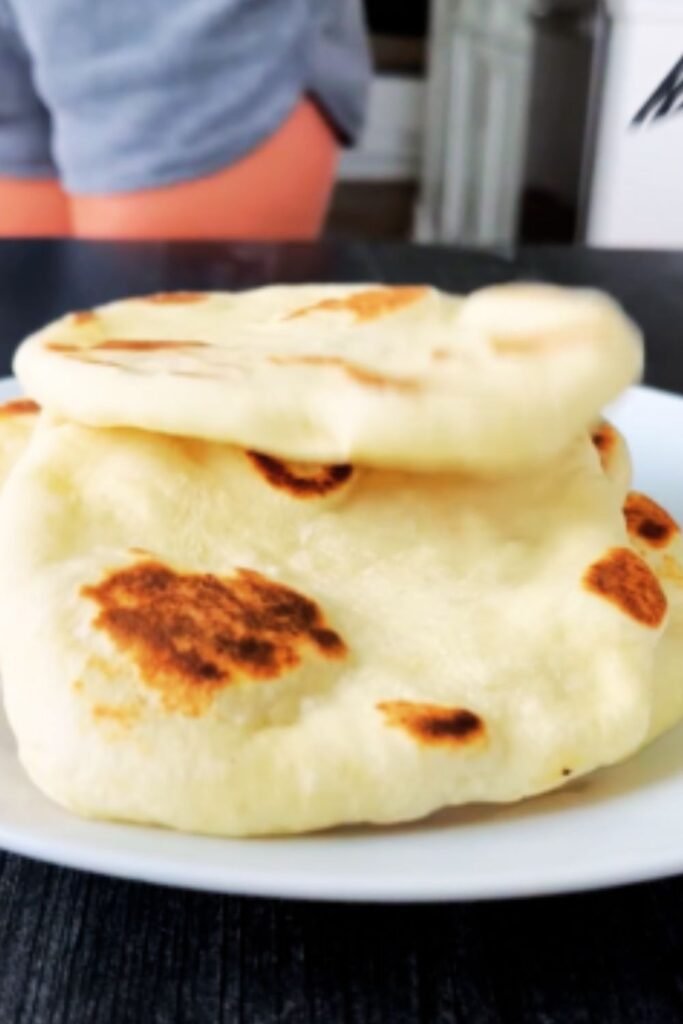
- Baking: Place 1-2 pitas directly on the preheated baking surface. Bake for 2-3 minutes until fully puffed and lightly golden around the edges.
- Cooling: Remove the pitas from the oven and immediately place them in a cloth-lined basket or between kitchen towels to stay soft as they cool.
The entire process from mixing to finished pitas takes about 3-4 hours, but most of that is hands-off time. The active work is minimal, making this an accessible project even for busy days.
Troubleshooting Your Pita Bread
Even experienced bakers sometimes encounter issues with pita bread. Here are solutions to common problems:
| Problem | Possible Cause | Solution |
|---|---|---|
| Pitas won’t puff | Oven not hot enough | Preheat longer; increase temperature |
| Dough rolled unevenly | Practice even rolling; use guide rings | |
| Too much flour during rolling | Use minimal flour; brush off excess | |
| Pitas too crispy | Overbaked | Reduce baking time by 30 seconds |
| Rolled too thin | Aim for ¼ inch thickness | |
| Tough texture | Overworked dough | Knead gently and minimally |
| Too much flour added | Measure ingredients by weight | |
| Sour flavor too strong | Very active discard | Reduce discard amount or use fresher discard |
| Not enough tang | Discard too young | Use discard that’s been stored longer |
Remember that every sourdough discard is unique, with varying levels of activity and acidity. You may need to adjust the recipe slightly based on your particular starter’s characteristics and the ambient conditions in your kitchen.
Storing and Freezing
Fresh sourdough pita bread is at its absolute best on the day it’s made, when the contrast between the crisp exterior and tender interior is most pronounced. However, proper storage can maintain quality for several days:
Short-term storage (1-2 days): Allow pitas to cool completely, then store in a sealed plastic bag at room temperature. To refresh before serving, lightly sprinkle with water and warm in a 350°F (175°C) oven for 3-5 minutes.
Medium-term storage (3-4 days): Store in the refrigerator in a sealed container. To serve, bring to room temperature, then warm as described above.
Long-term storage (up to 3 months): Wrap cooled pitas individually in plastic wrap, then place in a freezer bag, removing as much air as possible. To use, thaw at room temperature for 1 hour, then reheat.
I find that freezing pitas individually allows me to pull out exactly what I need for a quick lunch without defrosting the entire batch.
Creative Uses for Your Sourdough Pita
The versatility of sourdough pita bread extends far beyond the traditional pocket sandwich. Here are some of my favorite ways to use these flavorful flatbreads:
As a Dipper
- Cut into triangles and toast until crisp for homemade pita chips
- Serve alongside hummus, baba ganoush, or tzatziki
- Use as a scoop for shakshuka or other saucy dishes
As a Base
- Create quick personal pizzas with your favorite toppings
- Build Mediterranean-inspired open-faced sandwiches
- Use as a base for breakfast, topping with eggs and vegetables
As a Wrapper
- Fill with falafel, vegetables, and tahini sauce
- Create gyros with grilled meats and tzatziki
- Make breakfast pockets with scrambled eggs and cheese
Creative Twists
- Brush with olive oil and za’atar before baking
- Sprinkle with sumac and sesame seeds after rolling
- Add herbs to the dough like chopped rosemary or thyme
- Use part specialty flour like spelt or einkorn for unique flavors
My personal favorite is turning day-old pitas into crispy chips dusted with my homemade za’atar blend, perfect for scooping up labneh or hummus.
Serving Suggestions
A good pita deserves good company! Here are some classic and creative pairings that complement the tangy notes of sourdough pita bread:
Mediterranean Classics
- Hummus: The creamy texture contrasts beautifully with warm pita
- Baba Ganoush: Smoky eggplant dip that highlights pita’s mild flavor
- Falafel: Crispy chickpea fritters are the perfect pita filling
- Kofta: Spiced meat skewers work perfectly with the slight sourness
- Greek salad: Fresh vegetables and briny feta balance the bread
Refreshing Drinks
- Mint tea: The cooling effect complements the bread
- Cucumber-infused water: Light and refreshing
- Fruit spritzers: Bubbly and fruity to cut through rich fillings
- Kefir: Probiotic drink that pairs well with the fermented bread
- Fresh lemonade: Bright acidity balances the bread’s complexity
Sweet Applications
- Spread with labneh and honey for a simple dessert
- Fill with Greek yogurt and fresh berries
- Drizzle with date syrup and sprinkle with chopped nuts
- Spread with nut butter and sliced bananas
Historical Context: From Ancient Times to Your Kitchen
Pita bread has a rich history dating back thousands of years. The word “pita” comes from Greek, but similar pocket breads are found throughout the Middle East and Mediterranean regions under different names.
Ancient Egyptians were likely among the first to discover the technique of baking flatbreads that puff up to form pockets. The bread was baked in extremely hot stone ovens similar to modern pizza ovens, creating the perfect environment for that characteristic puff.
What makes our sourdough version historically interesting is that it actually returns pita bread to its roots. Before commercial yeast became widely available, all bread was naturally leavened through wild fermentation—essentially, all bread was sourdough! By using discard in this recipe, we’re connecting with thousands of years of baking tradition.
Throughout history, pita bread has been more than just food; it’s been an essential eating utensil. In many cultures, pieces of pita are torn and used to scoop up sauces, dips, and stews, eliminating the need for separate utensils. This practice continues today and is part of what makes pita so universally loved.
Health Benefits of Sourdough Pita
Beyond the incredible flavor and texture, sourdough discard pita offers several health advantages over commercially-produced pita:
| Benefit | Explanation |
|---|---|
| Improved digestibility | The long fermentation breaks down hard-to-digest components of wheat |
| Lower glycemic impact | Fermentation reduces the bread’s effect on blood sugar levels |
| Enhanced nutrient absorption | Phytic acid reduction allows better mineral absorption |
| Prebiotic properties | Contains beneficial compounds that feed gut bacteria |
| No artificial additives | Homemade means no preservatives or dough conditioners |
The fermentation process initiated in your sourdough starter continues in the discard, pre-digesting complex carbohydrates and producing beneficial organic acids. Many people who have difficulty with commercial bread products find sourdough versions more digestible.
Additionally, making pita at home allows you to control the quality of ingredients. I prefer using organic flour and high-quality olive oil, choices that aren’t always available in store-bought alternatives.
Frequently Asked Questions
Q: Can I use discard straight from the refrigerator? Yes! Cold discard works perfectly fine in this recipe. The added yeast ensures reliable rising even if your discard isn’t at peak activity. Allow about 15 minutes for the cold discard to come to room temperature before mixing.
Q: Do I really need to add commercial yeast if I’m using sourdough discard? While not strictly necessary, adding a small amount of commercial yeast ensures consistent results, especially for beginners. As you become more comfortable with the recipe, you can reduce or eliminate the commercial yeast and extend the rising time.
Q: My discard is very liquid. Should I adjust the recipe? Yes. If your discard has a pancake batter consistency (100% hydration or higher), reduce the water in the recipe by 2-3 tablespoons. Conversely, if your discard is very stiff, you may need to add slightly more water.
Q: Can I make whole wheat sourdough pita? Absolutely! Start by replacing half the all-purpose flour with whole wheat. For 100% whole wheat pitas, you’ll need to increase both the water and the kneading time slightly, as whole wheat absorbs more moisture and develops gluten more slowly.
Q: Why didn’t my pitas puff up completely? The most common reasons are insufficient oven heat, uneven rolling, or too much flour during shaping. Make sure your oven and baking surface are thoroughly preheated, aim for even thickness when rolling, and use only the minimum flour needed to prevent sticking.
Q: How can I make my pitas softer? For extra-soft pitas, place them in a cloth-lined basket and cover immediately after removing from the oven. The trapped steam will keep them pliable. You can also brush them with a little olive oil while still warm.
Q: Can this recipe be made gluten-free? Traditional pita relies heavily on gluten for its characteristic pocket. While you can make flatbreads with gluten-free flours and sourdough discard, achieving the pocket effect is challenging. I recommend a specialized gluten-free pita recipe rather than trying to adapt this one.
Q: How active should my discard be for this recipe? This recipe works with discard of varying activity levels. Very fresh discard (just removed during feeding) will provide less flavor but work fine with the added yeast. Older discard (3-7 days in the refrigerator) will contribute more tang and some leavening power.
Final Thoughts
Transforming sourdough discard into perfect pocket pitas has become one of my favorite baking projects. There’s something deeply satisfying about rescuing what might have been waste and turning it into something so delicious and versatile.
The slight tanginess from the fermented discard elevates these pitas beyond basic bread, creating a perfect canvas for countless meals. Whether you’re an experienced sourdough baker or just starting your fermentation journey, these pitas are an accessible way to expand your repertoire and reduce kitchen waste simultaneously.
I encourage you to experiment with the recipe once you’ve mastered the basic version. Add different spices to the dough, try various flour combinations, or play with thickness for different applications. The possibilities are as endless as your culinary imagination!
Remember that sourdough baking is as much art as science—embrace the variables and learn from each batch. Before long, you’ll be pulling perfectly puffed pitas from your oven with confidence, ready to share this ancient bread technique with a modern sustainable twist.