
Have you ever craved something that combines the tangy creaminess of cheesecake with the rich, velvety taste of red velvet cake? I’ve been there too! After countless experiments in my kitchen, I’ve perfected these Red Velvet Cheesecake Bites that are not only delicious but also incredibly simple to make thanks to the shortcut of using boxed cake mix.
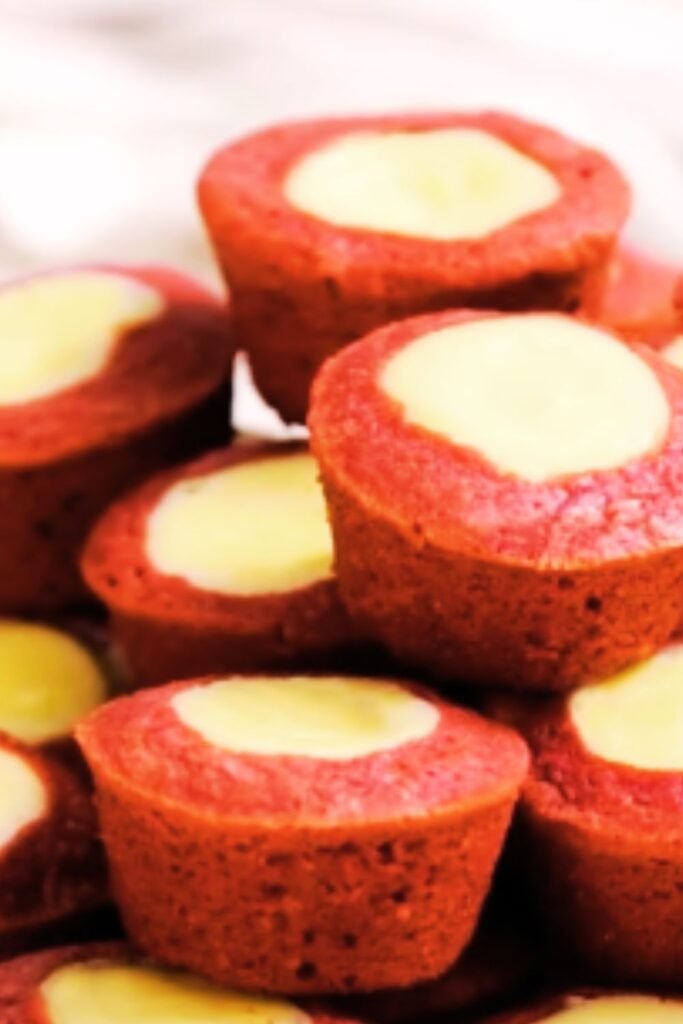
These bite-sized treasures have become my go-to dessert for gatherings, holiday parties, or whenever I need a sweet pick-me-up. The vibrant red cake contrasted with creamy white cheesecake filling creates a visual masterpiece that tastes even better than it looks. And the best part? You don’t need to be a professional baker to create these impressive treats.
What Makes These Cheesecake Bites Special
What sets these red velvet cheesecake bites apart is the perfect balance of flavors and textures. The outer layer offers that distinctive cocoa-infused red velvet taste, while the inner cheesecake filling provides a smooth, tangy contrast. The combination creates a flavor explosion that’s simply irresistible.
I’ve also simplified the process by using a boxed cake mix, reducing prep time without sacrificing flavor. Whether you’re a beginner in the kitchen or an experienced baker looking for a quick dessert solution, these bites will exceed your expectations.
Ingredients You’ll Need
For the Red Velvet Layer:
- 1 box (15.25 oz) red velvet cake mix
- 3 large eggs
- 1/3 cup vegetable oil
- 1/4 cup water
- 1 teaspoon pure vanilla extract
For the Cheesecake Filling:
- 16 oz cream cheese, softened to room temperature
- 2/3 cup granulated sugar
- 2 large eggs, at room temperature
- 1 teaspoon vanilla extract
- 1/4 teaspoon salt
- 3 tablespoons all-purpose flour
For the Optional Toppings:
- White chocolate for drizzling
- Crushed Oreo cookies
- Fresh berries
- Powdered sugar for dusting
Essential Kitchen Tools
Before we dive into the recipe, let’s make sure you have everything you need:
- 9×13 inch baking pan
- Parchment paper
- Mixing bowls (2 large)
- Electric mixer (stand or hand)
- Rubber spatula
- Measuring cups and spoons
- Wire cooling rack
- Sharp knife for cutting
Step-by-Step Instructions
Preparing Your Baking Pan and Oven
- Preheat your oven to 325°F (165°C). This slightly lower temperature ensures even baking.
- Line your 9×13 inch baking pan with parchment paper, leaving some overhang on the sides. This will make it much easier to remove the cheesecake bites later.
- Lightly spray the parchment paper with non-stick cooking spray.
Creating the Red Velvet Base
- In a large mixing bowl, combine the red velvet cake mix, 3 eggs, vegetable oil, water, and vanilla extract.
- Mix with an electric mixer on medium speed for about 2 minutes until smooth and well combined. The batter will be thicker than a typical cake batter.
- Reserve about 1/3 of the red velvet batter for the top layer (approximately 1 1/2 cups).
- Spread the remaining batter evenly into your prepared baking pan. This will form the bottom layer of your cheesecake bites.
Preparing the Cheesecake Filling
- In another large bowl, beat the softened cream cheese with an electric mixer until completely smooth, about 2 minutes. It’s crucial that your cream cheese is at room temperature to avoid lumps.
- Add the sugar and beat for another minute until creamy and well incorporated.
- Add the eggs one at a time, mixing well after each addition, but don’t overmix.
- Stir in the vanilla extract and salt.
- Finally, fold in the flour using a rubber spatula until just combined. The flour helps stabilize the cheesecake layer.
Assembling the Layers
- Pour the cheesecake filling over the red velvet base layer, spreading it evenly with a spatula.
- Take the reserved red velvet batter and drop spoonfuls over the cheesecake layer.
- Using a knife or toothpick, gently swirl the red velvet batter into the cheesecake layer to create a marbled effect. Don’t over-swirl, as you want distinct areas of red and white.
Baking to Perfection
- Bake in your preheated oven for 35-40 minutes, or until the edges are set but the center still has a slight jiggle.
- To test doneness, gently shake the pan – the center should move only slightly while the edges remain firm.
- Remove from the oven and place on a wire rack to cool completely at room temperature, about 1 hour.
- Once cooled, cover with plastic wrap and refrigerate for at least 3 hours, but preferably overnight. This chilling time is crucial for the best texture and flavor development.
Cutting and Serving
- Once thoroughly chilled, remove from the refrigerator and lift out of the pan using the parchment paper overhang.
- Using a sharp knife, cut into squares. For clean cuts, wipe the knife with a warm, damp cloth between slices.
- For bite-sized treats, aim for roughly 1.5-inch squares, which should yield about 24 pieces from a 9×13 pan.
Optional Decorating Ideas
To make your red velvet cheesecake bites even more special:
- Drizzle with melted white chocolate for an elegant finish.
- Sprinkle with crushed Oreo cookies for added texture and flavor.
- Top with fresh berries like raspberries or strawberries for a pop of color and freshness.
- Dust lightly with powdered sugar just before serving for a beautiful presentation.
Nutritional Information
For those watching their intake, here’s an approximate nutritional breakdown per bite (based on 24 pieces):
| Nutrient | Amount |
|---|---|
| Calories | 215 kcal |
| Total Fat | 12g |
| Saturated Fat | 5g |
| Cholesterol | 55mg |
| Sodium | 190mg |
| Total Carbohydrates | 24g |
| Dietary Fiber | 0.5g |
| Sugars | 15g |
| Protein | 3g |
Storage Tips and Make-Ahead Options
These cheesecake bites are perfect for preparing in advance:
- Refrigerator Storage: Store in an airtight container in the refrigerator for up to 5 days. I’ve found they actually taste better on day 2 or 3 as the flavors have time to meld.
- Freezer Storage: These freeze beautifully! Place the cut bites on a baking sheet and freeze until solid, then transfer to a freezer-safe container or zip-top bag. They’ll keep for up to 3 months.
- Thawing: When ready to enjoy frozen bites, thaw in the refrigerator overnight or at room temperature for about 30 minutes.
Customization Options
One of the things I love most about this recipe is how versatile it is. Here are some ways to make it your own:
Flavor Variations
- Mint Chocolate: Add 1/2 teaspoon peppermint extract to the cheesecake filling and sprinkle with mini chocolate chips.
- Orange-Infused: Add 1 tablespoon of orange zest to the red velvet batter for a citrusy twist.
- Mocha: Mix 1 tablespoon of instant coffee powder into the red velvet batter for a coffee kick.
Different Base Options
- Chocolate Chip: Add 1/2 cup mini chocolate chips to the red velvet batter.
- Cookie Crust: Replace the bottom red velvet layer with a crushed Oreo cookie crust.
- Nutty: Add 1/2 cup finely chopped pecans or walnuts to the red velvet batter.
Troubleshooting Common Issues
| Problem | Possible Cause | Solution |
|---|---|---|
| Cheesecake is cracked | Baked at too high temperature or over-baked | Lower oven temperature by 25°F and check for doneness earlier |
| Cheesecake layer is too soft | Not chilled long enough | Ensure at least 4 hours of chilling, preferably overnight |
| Red velvet layer is dry | Over-baked or ingredient measurements off | Double-check measurements and reduce baking time by 3-5 minutes |
| Bites are difficult to cut cleanly | Knife is not clean between cuts | Wipe knife with warm water between each cut |
| Filling is lumpy | Cream cheese not at room temperature | Ensure cream cheese is completely softened before mixing |
Serving Suggestions
These red velvet cheesecake bites are versatile enough for any occasion:
- Arrange on a tiered serving platter for an elegant dessert display at parties.
- Pack in decorative boxes tied with ribbon for homemade gifts during the holidays.
- Serve alongside fresh fruit for a beautiful color contrast.
- Create a dessert charcuterie board with these bites as the centerpiece, surrounded by cookies, fruits, and chocolates.
- For a special touch, serve with a small scoop of vanilla ice cream and a light drizzle of chocolate sauce.
Frequently Asked Questions
Q: Can I use a different flavor of cake mix instead of red velvet?
Absolutely! While the classic red velvet look is stunning, you can experiment with chocolate, vanilla, or even lemon cake mix for different variations.
Q: Do I have to use cream cheese at room temperature?
Yes, this is crucial. Cold cream cheese will result in a lumpy filling. I recommend taking it out of the refrigerator at least 1-2 hours before you plan to make the recipe.
Q: Can I make these gluten-free?
Yes! Use a gluten-free red velvet cake mix and replace the all-purpose flour in the cheesecake filling with a gluten-free 1:1 baking flour.
Q: Why did my cheesecake layer sink into the cake layer?
This usually happens if the base layer isn’t spread evenly or if the batters have significantly different consistencies. Make sure to spread the red velvet base evenly and don’t overmix the cheesecake filling.
Q: How do I know when they’re done baking?
The edges should be set, but the center should still have a slight jiggle when you gently shake the pan. Over-baking will lead to dry, cracked cheesecake.
Q: Can I reduce the sugar in this recipe?
You can reduce the sugar in the cheesecake filling by up to 1/4 cup without significantly affecting the texture. However, I wouldn’t recommend reducing it further as sugar contributes to the structure.
Q: My red velvet color isn’t vibrant enough. What can I do?
If using a boxed mix, the color should be quite vibrant. However, you can add 1-2 teaspoons of red food coloring to intensify the color if desired.
Q: Can I make these in a different sized pan?
Yes, but you’ll need to adjust the baking time accordingly. An 8×8 inch pan will require about 5-10 minutes longer baking time, while a larger pan like 10×15 may need 5 minutes less.
Why This Recipe Works
As someone who’s tested countless dessert recipes, I can tell you these red velvet cheesecake bites hit all the right notes:
- The boxed cake mix provides consistency and convenience without sacrificing flavor.
- The contrast between the tangy cheesecake and slightly chocolate-flavored red velvet creates a perfect flavor balance.
- The make-ahead nature of this dessert makes it ideal for entertaining.
- The visual appeal of the red and white layers makes these bites stand out on any dessert table.
- They’re substantial enough to feel indulgent yet portioned to prevent overindulgence.
Final Tips for Success
After making these dozens of times, here are my top tips for perfect red velvet cheesecake bites every time:
- Don’t rush the chilling process – overnight is ideal for the best texture and ease of cutting.
- For the cleanest cuts, freeze the bars for about 30 minutes before slicing.
- If you’re making these for a special occasion, do a test batch first to perfect your technique.
- Allow all ingredients to come to room temperature before mixing for the smoothest texture.
- Invest in quality cream cheese – the store brand works fine, but a premium brand often yields a richer flavor.
- Don’t overbake! A slightly jiggly center is what you want, as the cheesecake will continue to set as it cools.
These red velvet cheesecake bites have become my signature dessert, requested at every family gathering and holiday celebration. With their striking appearance and incredible taste, they’ve earned their place as a dessert that impresses without requiring professional baking skills. Give them a try, and I’m confident they’ll become a favorite in your recipe collection too!

