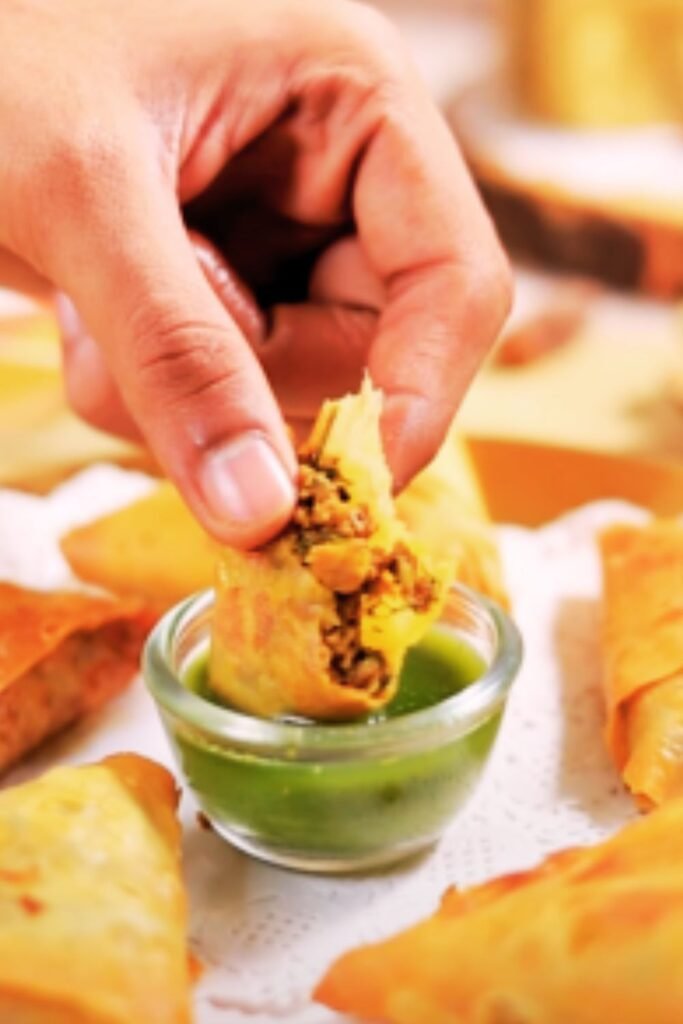
There’s something magical about biting into a perfectly crisp samosa and discovering the aromatic, spiced keema filling inside. As someone who’s been making these delicious triangular treats for over a decade, I can tell you that mastering the art of keema samosa isn’t just about following a recipe—it’s about understanding the nuances that make this Indian snack truly exceptional.
Today, I’m sharing my tried-and-true recipe for Keema Samosa, also known as Patti Samosa in many parts of the Indian subcontinent. These meat-filled pastries feature a delicate, layered crust (patti) and a richly spiced minced meat filling that will make your taste buds dance. Whether you’re planning a festive gathering, looking for the perfect Ramadan iftar treat, or simply craving a satisfying snack, these keema samosas are guaranteed to impress.
What Are Keema Samosas?
Keema samosas are savory pastries filled with spiced minced meat (keema), typically beef or lamb. Unlike the more common potato-filled samosas, these meat-filled versions offer a protein-rich alternative with a complex flavor profile. The word “patti” refers to the layered pastry technique that creates an ultra-crisp exterior.
The beauty of keema samosas lies in their versatility. They’re popular across South Asia, from Pakistan and India to Bangladesh and beyond, with each region adding its own special touch. What makes my recipe special is the balance of spices and the technique for achieving that perfect flaky crust that shatters beautifully with each bite.
Ingredients You’ll Need
For the Outer Covering (Patti)
- 2 cups all-purpose flour (maida)
- ¼ teaspoon salt
- 3 tablespoons ghee or oil
- ⅔ cup warm water (approximate)
- 1 teaspoon carom seeds (ajwain) – optional but recommended
- 1 tablespoon semolina (sooji) – for extra crispness
For the Keema Filling
- 500g minced meat (lamb, beef, or chicken)
- 3 tablespoons vegetable oil
- 1 large onion, finely chopped
- 2 green chilies, finely chopped
- 1 tablespoon ginger-garlic paste
- 1 teaspoon cumin seeds
- 1 teaspoon coriander powder
- 1 teaspoon red chili powder (adjust to taste)
- ½ teaspoon turmeric powder
- ½ teaspoon garam masala
- ¼ teaspoon black pepper
- Salt to taste
- 2 tablespoons chopped fresh coriander (cilantro)
- 1 tablespoon chopped mint leaves
- ½ cup green peas (fresh or frozen)
- 1 medium potato, boiled and diced small (optional)
- 1 tablespoon lemon juice
For Frying
- Oil for deep frying (vegetable or canola oil)
For the Sealing Paste
- 2 tablespoons all-purpose flour
- 3-4 tablespoons water
Kitchen Equipment
- Large mixing bowl
- Heavy-bottomed pan or kadai
- Wooden spoon
- Rolling pin
- Clean kitchen cloth
- Deep fryer or deep pan for frying
- Slotted spoon
- Kitchen thermometer (optional but helpful)
- Paper towels
Step-by-Step Instructions
Preparing the Dough
- In a large mixing bowl, combine the flour, salt, carom seeds, and semolina.
- Add the ghee or oil to the flour mixture and rub it in with your fingertips until it resembles breadcrumbs. This is crucial for creating flaky layers.
- Gradually add warm water and knead to form a firm but pliable dough. Be careful not to add too much water at once.
- Cover the dough with a damp cloth and let it rest for at least 30 minutes. This relaxes the gluten and makes the dough easier to work with.
Making the Keema Filling
- Heat oil in a heavy-bottomed pan over medium heat.
- Add cumin seeds and let them splutter.
- Add the finely chopped onions and sauté until they turn golden brown (about 5-7 minutes).
- Add the ginger-garlic paste and green chilies. Sauté for another 2 minutes until the raw smell disappears.
- Add the minced meat and cook on high heat, breaking up any lumps with a wooden spoon.
- Once the meat begins to change color, add turmeric, red chili powder, coriander powder, and salt. Mix well.
- Cook the meat on medium heat until it’s done and the moisture has largely evaporated (about 15-20 minutes).
- Add green peas (and diced potato if using) and cook for another 5 minutes.
- Finish with garam masala, black pepper, lemon juice, fresh coriander, and mint leaves.
- Allow the mixture to cool completely before filling the samosas. A warm filling can make the dough soggy.
Preparing the Samosa Sheets
- Divide the rested dough into 6-8 equal portions.
- Roll each portion into a ball and then roll it out into a circle about 6-7 inches in diameter.
- Cut each circle in half to form two semicircles. These will form your samosa cones.
- Make a sealing paste by mixing flour and water to a thick but flowing consistency.
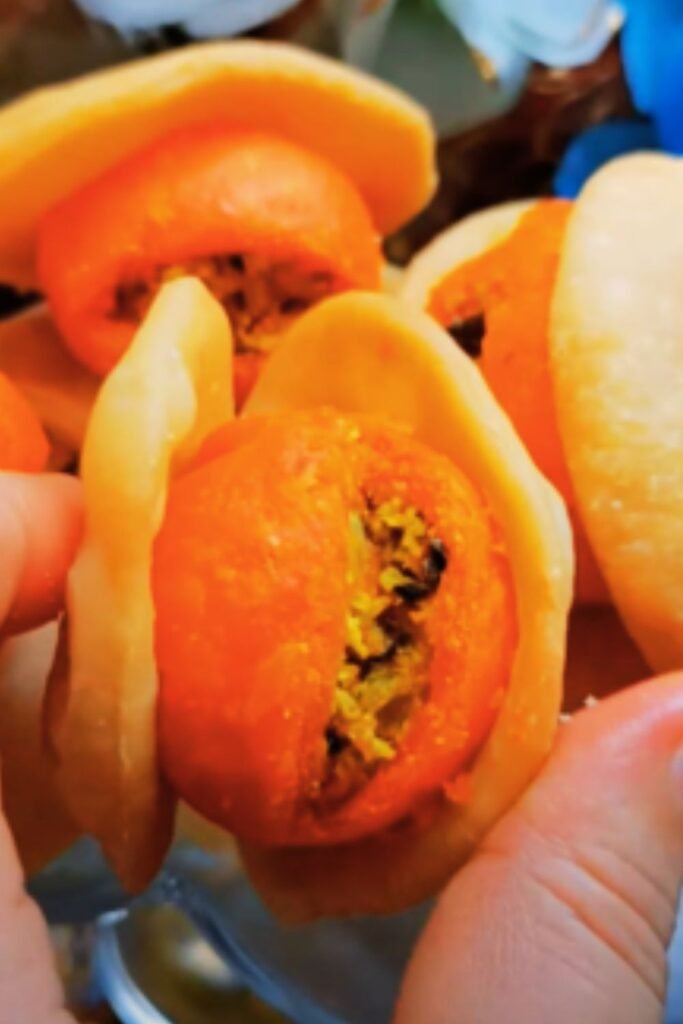
Shaping and Filling the Samosas
- Take one semicircle and moisten the straight edge with the sealing paste.
- Form a cone by bringing the two corners of the straight edge together, overlapping slightly, and pressing firmly to seal.
- Hold the cone in your hand and fill it with approximately 2 tablespoons of the keema filling, being careful not to overfill.
- Apply the sealing paste along the open edge of the cone.
- Press the edges together firmly to seal, creating a triangular shape.
- Make sure there are no openings where the filling might escape during frying.
- Repeat the process with the remaining dough and filling.
Frying the Samosas
- Heat oil in a deep pan or kadai to around 325°F (165°C). The oil should be moderately hot but not smoking.
- Gently slide 3-4 samosas into the hot oil, depending on the size of your pan. Don’t overcrowd.
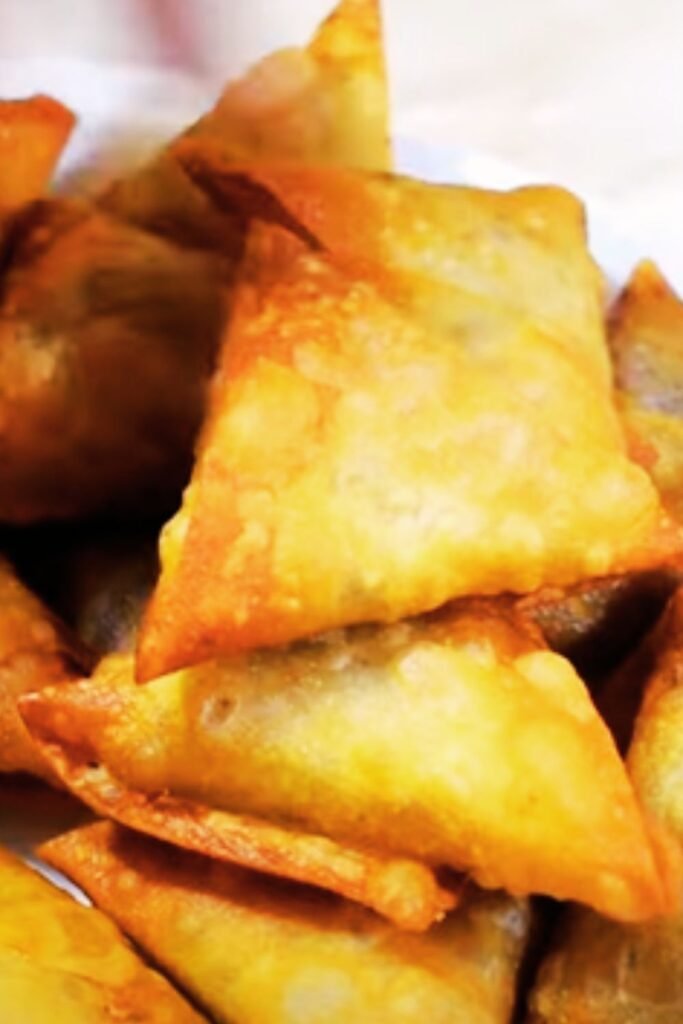
- Fry on medium heat until golden brown and crisp, about 7-10 minutes, turning occasionally for even cooking.
- Use a slotted spoon to remove the samosas and drain them on paper towels.
- Always maintain the oil temperature between 325-350°F for perfectly crisp samosas that aren’t greasy.
Pro Tips for Perfect Keema Samosas
- Rest your dough: Giving the dough adequate resting time is non-negotiable. It makes rolling easier and results in flakier samosas.
- Cool the filling completely: Hot filling creates steam, which can make your samosas soggy or even burst during frying.
- Seal with care: Proper sealing is crucial to prevent the samosas from opening during frying. Use enough sealing paste and press firmly.
- Watch your oil temperature: Too hot, and the samosas will brown quickly without cooking through; too cool, and they’ll absorb too much oil.
- Fry in batches: Overcrowding the pan lowers the oil temperature and results in greasy samosas.
- Double-fry technique: For extra crispness, you can fry the samosas at a lower temperature first (around 300°F) for 5 minutes, then increase to 350°F to finish.
- Add vinegar to the dough: A teaspoon of vinegar in the dough can help make it crispier.
Nutritional Information
| Nutrient | Amount per Serving (2 samosas) |
|---|---|
| Calories | 320 kcal |
| Total Fat | 18g |
| Saturated Fat | 5g |
| Cholesterol | 45mg |
| Sodium | 390mg |
| Total Carbohydrates | 28g |
| Dietary Fiber | 2g |
| Sugars | 1g |
| Protein | 14g |
| Calcium | 20mg |
| Iron | 2mg |
Note: Nutritional values are approximate and will vary based on exact ingredients and portion sizes.
Variations to Try
Chicken Keema Samosa
Substitute the beef or lamb with ground chicken for a lighter version. Chicken cooks faster, so adjust your cooking time accordingly.
Vegetarian Alternative
Replace meat with a mixture of finely chopped mushrooms, paneer (Indian cottage cheese), and extra vegetables for a vegetarian version with similar texture.
Spicy Keema Samosa
Add 1-2 extra green chilies and ½ teaspoon of cayenne pepper to amp up the heat level.
Pakistani-Style Keema Samosa
Add ½ teaspoon of anardana (dried pomegranate seeds) powder and a pinch of chaat masala for a tangy flavor profile.
Baked Samosas
For a healthier version, brush the samosas with oil and bake at 375°F (190°C) for 25-30 minutes, turning halfway through, until golden brown.
Storage and Reheating
Keema samosas can be stored in multiple ways:
- Refrigeration: Cooked samosas can be refrigerated for up to 3 days in an airtight container.
- Freezing Uncooked: Prepare the samosas up to the filling and shaping stage, but don’t fry them. Place them on a tray in a single layer, freeze until solid, then transfer to freezer bags. They’ll keep for up to 2 months.
- Freezing Cooked: Let the fried samosas cool completely, then freeze in a single layer before transferring to freezer bags. They’ll keep for up to 1 month.
Reheating Methods
- Oven: Preheat to 350°F (175°C) and bake for 10-15 minutes until hot and crisp.
- Air Fryer: 3-4 minutes at 350°F (175°C).
- Microwave: Use only in a pinch, as it makes the crust soggy. 30 seconds on high, then crisp in a pan if possible.
Serving Suggestions
Keema samosas are delicious on their own, but they become even more enjoyable when paired with the right accompaniments:
Traditional Accompaniments
- Mint-coriander chutney (pudina chutney)
- Sweet tamarind chutney (imli chutney)
- Thinly sliced onions sprinkled with chaat masala
- Raita (yogurt dip with spices and vegetables)
Modern Pairings
- Sriracha mayo
- Tomato ketchup
- Greek yogurt with grated cucumber and garlic
- Mango salsa for a sweet-spicy contrast
Complete Meal Ideas
- Serve with masala chai for a traditional snack time
- Pair with a chickpea curry (chole) and rice for a hearty meal
- Include in a chaat platter with aloo tikki, papdi chaat, and dahi vada
Detailed Comparison: Keema Samosa vs. Traditional Aloo Samosa
| Aspect | Keema Samosa | Aloo (Potato) Samosa |
|---|---|---|
| Main Filling | Minced meat (lamb, beef, chicken) | Spiced potatoes with peas |
| Texture | Dense, meaty | Soft, starchy |
| Protein Content | High (10-15g per samosa) | Low (3-5g per samosa) |
| Spice Level | Typically spicier | Can range from mild to medium |
| Preparation Time | Longer due to meat cooking | Relatively quicker |
| Shelf Life | Shorter due to meat content | Longer |
| Regional Popularity | Pakistan, North India, Bangladesh | All over India, especially North India |
| Cost to Make | Higher | Lower |
| Traditional Occasions | Eid, family gatherings | Everyday snack, religious gatherings |
| Calorie Content | Slightly higher | Slightly lower |
Troubleshooting Common Issues
Problem: Samosas Breaking During Frying
Solution: Ensure your sealing paste is thick enough and the edges are pressed firmly. Also, the oil might be too hot—reduce the temperature slightly.
Problem: Doughy or Undercooked Pastry
Solution: The oil temperature is likely too high, causing the outside to brown before the inside cooks. Lower the heat and fry for longer.
Problem: Greasy Samosas
Solution: The oil isn’t hot enough. Maintain a temperature of 325-350°F, and make sure to drain well on paper towels after frying.
Problem: Bland Filling
Solution: Taste and adjust seasonings before filling your samosas. Remember that the pastry is plain, so the filling needs to be well-seasoned.
Problem: Hard or Tough Crust
Solution: You might have over-kneaded the dough or not added enough fat. Make sure to incorporate the ghee or oil thoroughly and rest the dough adequately.
Questions & Answers
Q: Can I make the samosa dough without ghee? Yes, you can substitute ghee with neutral vegetable oil or even melted butter. The key is having some fat in the dough to create those flaky layers. For a vegan version, use vegetable oil.
Q: How do I know when the oil is at the right temperature if I don’t have a thermometer? Drop a small piece of dough into the oil. If it rises to the surface gradually with small bubbles forming around it, the oil is ready. If it rises too quickly or browns too fast, the oil is too hot. If it sinks and doesn’t rise, the oil isn’t hot enough.
Q: Can I bake these samosas instead of frying them? Absolutely! While traditional samosas are deep-fried, baking is a healthier alternative. Preheat your oven to 375°F (190°C), brush the samosas with oil on both sides, and bake for 25-30 minutes, turning halfway through, until golden brown and crisp.
Q: How far in advance can I prepare samosas for a party? You can prepare and shape the samosas up to 24 hours in advance and store them in the refrigerator, covered with a slightly damp cloth. Alternatively, you can freeze uncooked samosas for up to 2 months. Fry them directly from frozen, adding just a few extra minutes to the cooking time.
Q: My samosas always burst open during frying. What am I doing wrong? There are a few possible causes: your filling might be too moist, you might be overfilling the samosas, or your sealing might not be secure enough. Make sure the filling is relatively dry, use just 1-2 tablespoons per samosa, and seal the edges firmly with the flour paste.
Q: Can I use ready-made pastry sheets for samosas? While traditional samosas use homemade dough, you can use spring roll wrappers or phyllo dough in a pinch. The texture will be different—crunchier rather than flaky—but they’ll still be delicious.
Q: How do I ensure my keema isn’t dry? The key is not overcooking the meat. Cook until the meat is just done and most (but not all) of the moisture has evaporated. Adding a small amount of ghee at the end of cooking can also help keep the keema moist.
Q: What’s the difference between a Punjabi samosa and a Patti samosa? Punjabi samosas typically have a thicker crust and are larger in size with a potato-based filling. Patti samosas feature a thinner, layered crust (patti means “sheet” or “layer”) and are often filled with keema. The patti style creates more crisp, flaky layers.
Cultural Significance of Keema Samosas
Samosas are more than just a delicious snack; they’re deeply embedded in South Asian culture and history. Believed to have originated in the Middle East before the 10th century, these savory pastries traveled to South Asia with traders and have since become an integral part of the region’s cuisine.
Keema samosas, in particular, hold special significance during Ramadan, when they’re commonly served as part of the iftar meal to break the daily fast. They’re also a festive treat during Eid celebrations and family gatherings.
In many South Asian households, the process of making samosas is a communal activity where family members gather to prepare large batches, sharing stories and strengthening bonds. This tradition has been passed down through generations, with each family adding their own special touches to make their recipe unique.
Today, samosas have transcended cultural boundaries to become one of the most recognized and beloved Indian foods worldwide, appearing on menus from casual street food stalls to upscale restaurants around the globe.
Final Thoughts
Creating the perfect keema samosa is as much an art as it is a science. The delicate balance of spices, the careful preparation of the layered dough, and the technique of shaping and frying all contribute to this beloved treat. While it might seem intimidating at first, with a little practice, you’ll be creating restaurant-quality samosas right in your own kitchen.
Remember, the key to truly exceptional samosas lies in the details: taking the time to properly brown your onions, allowing your dough to rest adequately, and frying at the right temperature. These small steps make all the difference between a good samosa and a great one.
I hope this recipe inspires you to create your own batch of crispy, flavorful keema samosas. Whether you’re making them for a special occasion or simply because you’re craving something delicious, I’m confident these will become a favorite in your recipe collection.
So gather your ingredients, clear some counter space, and get ready to experience the joy of biting into a freshly fried, homemade keema samosa. Your taste buds—and anyone lucky enough to share them with you—will thank you!