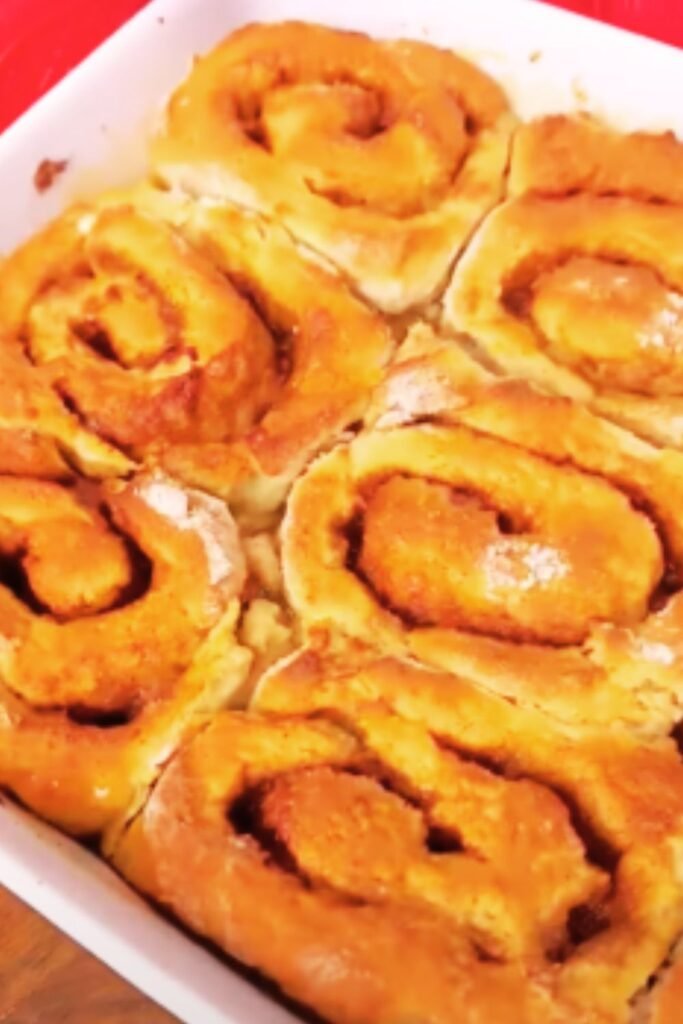
There’s something magical about the aroma of cinnamon and caramel wafting through my kitchen on a crisp autumn morning. When I first attempted these Caramel-Apple Cinnamon Buns three years ago, I knew I’d stumbled upon something extraordinary. The combination of tender, pillowy dough swirled with cinnamon-sugar, studded with caramelized apples, and topped with a rich caramel glaze creates a symphony of flavors that transforms any ordinary day into a celebration.
These aren’t your average cinnamon rolls. I’ve spent countless hours perfecting this recipe, tweaking the dough consistency, experimenting with different apple varieties, and mastering the art of homemade caramel. What emerged is a recipe that captures the essence of fall in every bite while remaining surprisingly achievable for home bakers of all skill levels.
The Science Behind Perfect Cinnamon Buns
Understanding the mechanics of yeast dough is crucial for success. The enriched dough I use contains eggs, butter, and milk, which create the tender crumb structure that makes these buns irresistible. The protein in eggs provides structure, while the fat from butter and milk creates tenderness and flavor. When I knead the dough, I’m developing gluten strands that will trap the carbon dioxide produced by the yeast, creating those beautiful air pockets.
Temperature plays a critical role throughout the process. I’ve learned that maintaining the right environment for yeast activation and dough rising makes the difference between dense, heavy buns and light, fluffy ones. The ideal temperature for yeast activation ranges between 105-110°F (40-43°C), while dough rises best in a warm, draft-free environment around 75-80°F (24-27°C).
Essential Ingredients Breakdown
Yeast Selection : Active dry yeast works perfectly for this recipe, though instant yeast can be substituted at a 1:1 ratio. I prefer active dry yeast because it allows me to test viability before committing to the full recipe.
Flour Considerations
: All-purpose flour creates the ideal texture balance. Bread flour produces too chewy a result, while cake flour lacks sufficient protein for proper structure.
Apple Varieties : Honeycrisp, Granny Smith, and Braeburn apples hold their shape well during baking. I avoid Red Delicious or Gala varieties as they become mushy when cooked.
Caramel Components : Granulated sugar, heavy cream, and unsalted butter form the foundation of my homemade caramel. The key lies in achieving the perfect amber color without burning.
Step-by-Step Preparation Method
Preparing the Dough Foundation
I begin by warming milk to exactly 110°F using a digital thermometer. Into this warm milk, I dissolve one packet of active dry yeast along with a tablespoon of granulated sugar. The mixture should foam within five minutes, indicating active yeast. If no foaming occurs, I start over with fresh yeast.
In my stand mixer bowl, I combine four cups of all-purpose flour with half a teaspoon of salt. Creating a well in the center, I add the yeast mixture, two beaten eggs, and four tablespoons of melted butter. Using the dough hook attachment, I mix on low speed until ingredients combine, then increase to medium speed for eight minutes until the dough becomes smooth and elastic.
The properly developed dough should pass the windowpane test—when stretched thin, it becomes translucent without tearing. I place this dough in a greased bowl, cover with a damp towel, and let it rise in a warm spot for one hour until doubled in size.
Creating the Apple-Cinnamon Filling
While the dough rises, I prepare my signature filling. Three large apples, peeled and diced into quarter-inch pieces, get sautéed in two tablespoons of butter over medium heat. I add half a cup of brown sugar, two teaspoons of ground cinnamon, quarter teaspoon of nutmeg, and a pinch of salt. The mixture cooks for five minutes until apples soften slightly but retain some firmness.
The cinnamon-sugar mixture requires equal attention. I combine three-quarters cup of brown sugar with two tablespoons of ground cinnamon, creating a fragrant blend that will caramelize beautifully during baking.
Assembly Techniques
After the first rise, I punch down the dough and roll it into a 15×18-inch rectangle on a floured surface. The dough should be approximately quarter-inch thick—thin enough to roll easily but thick enough to contain the filling without tearing.
I brush the entire surface with melted butter, leaving a one-inch border along one long edge. The cinnamon-sugar mixture gets sprinkled evenly across the buttered surface, followed by the cooled apple mixture. Distribution must be uniform to ensure every bite contains the perfect balance of flavors.
Rolling requires patience and technique. Starting from the filled long edge, I roll tightly but gently, maintaining even pressure to prevent air pockets. The seam gets pinched closed and positioned face-down. Using a sharp knife or dental floss, I cut the log into twelve equal pieces, each approximately 1.5 inches wide.
Baking Process and Temperature Control
| Baking Stage | Temperature | Duration | Visual Cues |
|---|---|---|---|
| Second Rise | Room temp | 45-60 min | Doubled in size |
| Initial Bake | 350°F | 25-30 min | Golden brown tops |
| Caramel Application | Cool 10 min | 5 min | Slightly warm buns |
| Final Rest | Room temp | 15 min | Caramel set |
I arrange the cut buns in a greased 9×13-inch baking dish, leaving small gaps between each roll for expansion. The second rise takes place at room temperature for 45-60 minutes until the buns nearly touch each other and appear puffy.
Preheating the oven to 350°F ensures even baking. I’ve found this temperature provides the perfect balance—hot enough to create a golden exterior while allowing the centers to cook through completely. The baking time ranges from 25-30 minutes, with the tops achieving a beautiful golden-brown color.
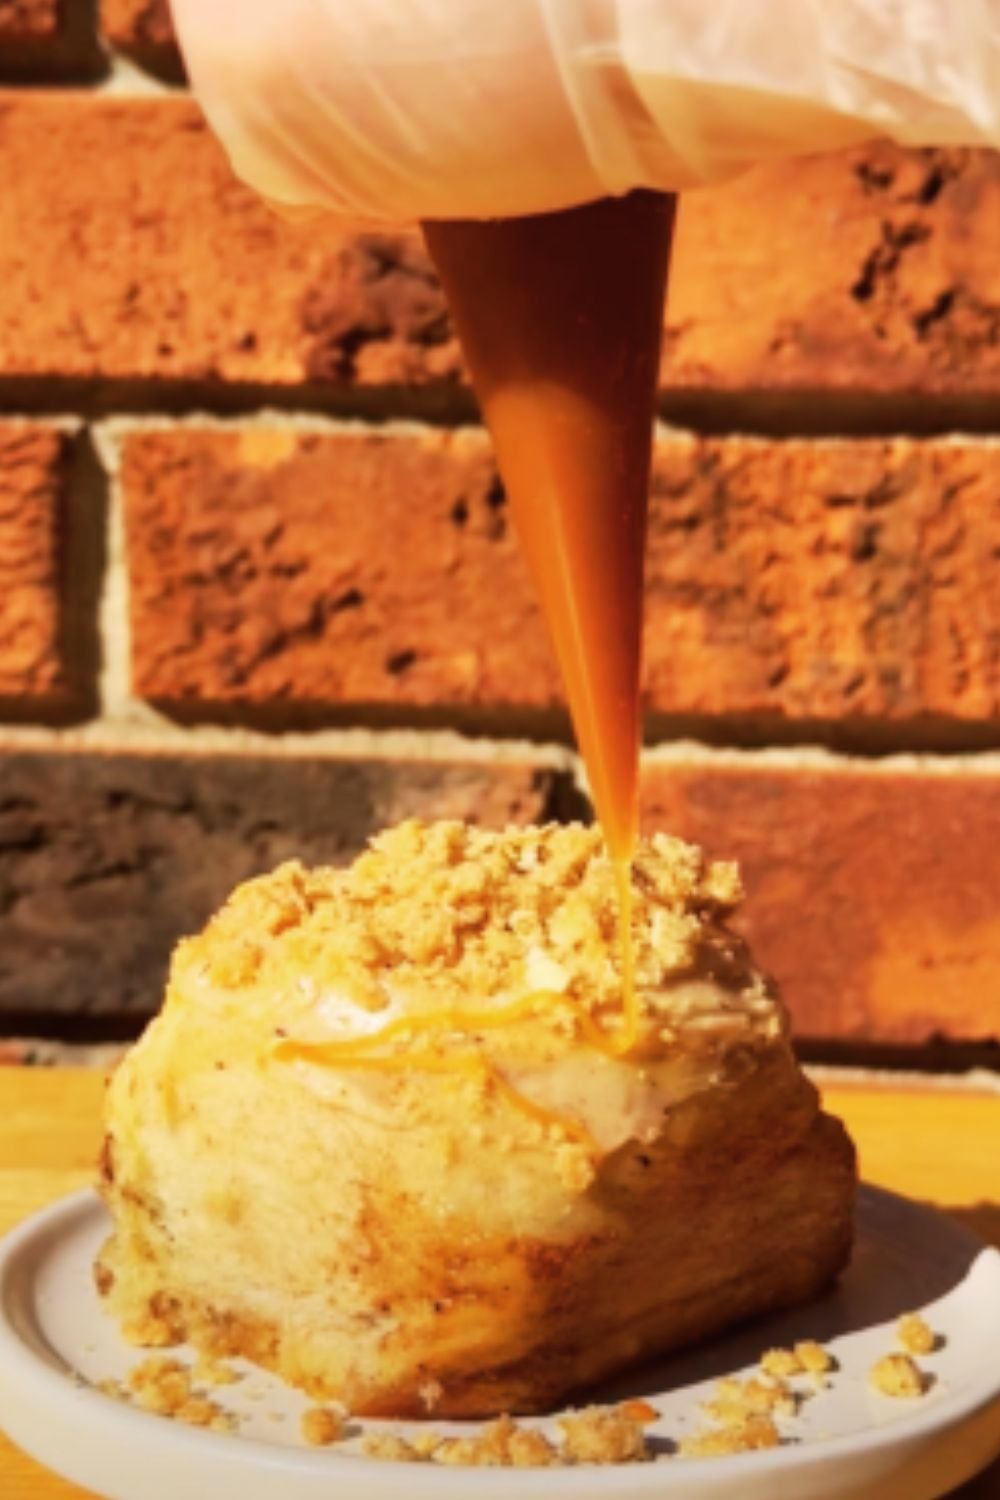
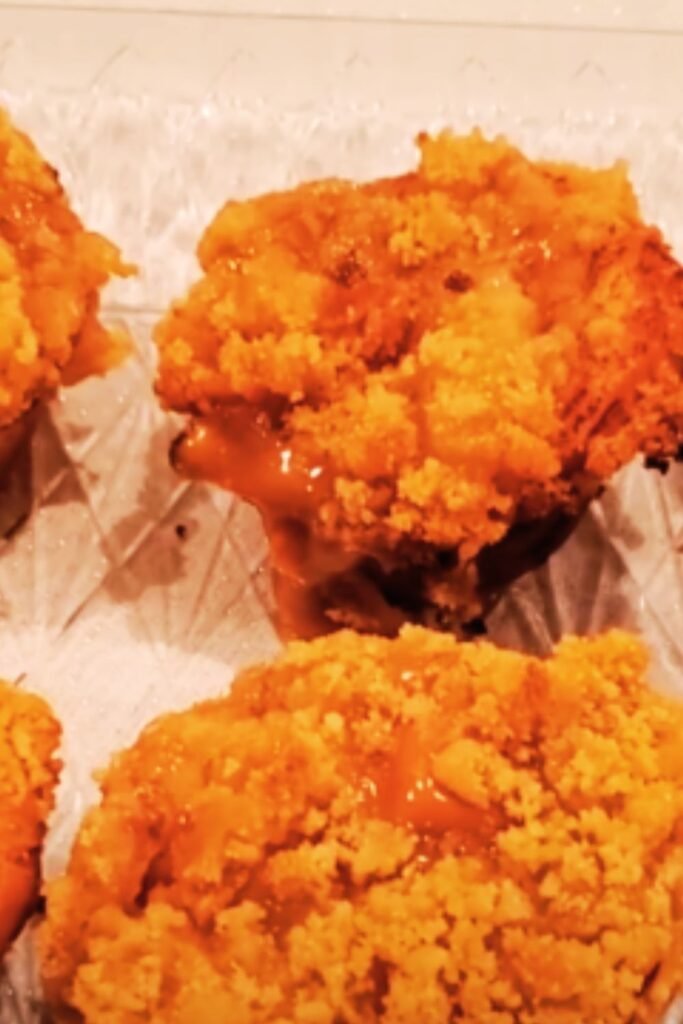
Mastering Homemade Caramel Sauce
The caramel sauce elevates these buns from good to extraordinary. I heat one cup of granulated sugar in a heavy-bottomed saucepan over medium heat, stirring constantly with a wooden spoon. The sugar melts and transforms into a deep amber liquid, a process that requires complete attention to prevent burning.
Once the desired color develops, I remove the pan from heat and immediately whisk in six tablespoons of heavy cream. The mixture bubbles vigorously—this reaction is normal and expected. After the bubbling subsides, I whisk in four tablespoons of cold butter and half a teaspoon of vanilla extract. The result should be smooth, glossy, and pourable.
Timing is crucial with caramel preparation. I make the sauce while the buns cool slightly from the oven, ensuring both components reach the ideal temperature for application. The buns should be warm but not hot, while the caramel should be fluid but not scalding.
Caramel Troubleshooting Guide
Crystallized Sugar : If sugar crystallizes during melting, add two tablespoons of water and continue heating while stirring gently.
Seized Caramel : When cream is added too quickly, caramel may seize. Return to low heat and whisk vigorously until smooth.
Too Thick Consistency : Thin overly thick caramel with additional cream, one tablespoon at a time.
Burned Flavor : Start over if the caramel develops a bitter taste—there’s no salvaging burned caramel.
Nutritional Information and Variations
| Nutrient | Per Serving | Daily Value % |
|---|---|---|
| Calories | 385 | 19% |
| Total Fat | 12g | 15% |
| Saturated Fat | 7g | 35% |
| Cholesterol | 65mg | 22% |
| Sodium | 180mg | 8% |
| Total Carbohydrates | 68g | 25% |
| Dietary Fiber | 3g | 11% |
| Sugars | 42g | – |
| Protein | 6g | 12% |
Based on 12 servings per recipe
These buns provide substantial energy while delivering beneficial nutrients from apples, including fiber and vitamin C. The enriched dough contributes protein and B vitamins, while the dairy components add calcium and vitamin D.
Creative Variations I’ve Developed
Maple-Pecan Version: I substitute maple syrup for half the brown sugar in the filling and add chopped pecans alongside the apples. The caramel sauce gets enhanced with two tablespoons of pure maple syrup.
Cranberry-Orange Twist: Dried cranberries replace half the apple pieces, while orange zest brightens both the filling and caramel sauce. This combination creates a festive holiday variation.
Healthier Alternative: Whole wheat pastry flour can replace up to half the all-purpose flour, while Greek yogurt substitutes for some of the butter in the dough. These modifications reduce calories while maintaining acceptable texture.
Storage and Reheating Methods
Proper storage maintains the buns’ quality for several days. I cover leftover buns tightly with plastic wrap or store them in an airtight container at room temperature for up to three days. For longer storage, individual buns can be wrapped and frozen for up to three months.
Reheating requires gentle warmth to prevent drying. I warm individual buns in the microwave for 20-30 seconds or reheat multiple buns in a 300°F oven for 10-15 minutes. Covering with foil prevents over-browning during oven reheating.
Make-Ahead Strategies
These buns adapt well to advance preparation. I can complete the recipe through the second rise, then refrigerate overnight before baking. Cold dough requires an additional 15-20 minutes of rising time before baking. Alternatively, fully baked buns freeze beautifully and can be thawed and reheated as needed.
Serving Suggestions and Pairings
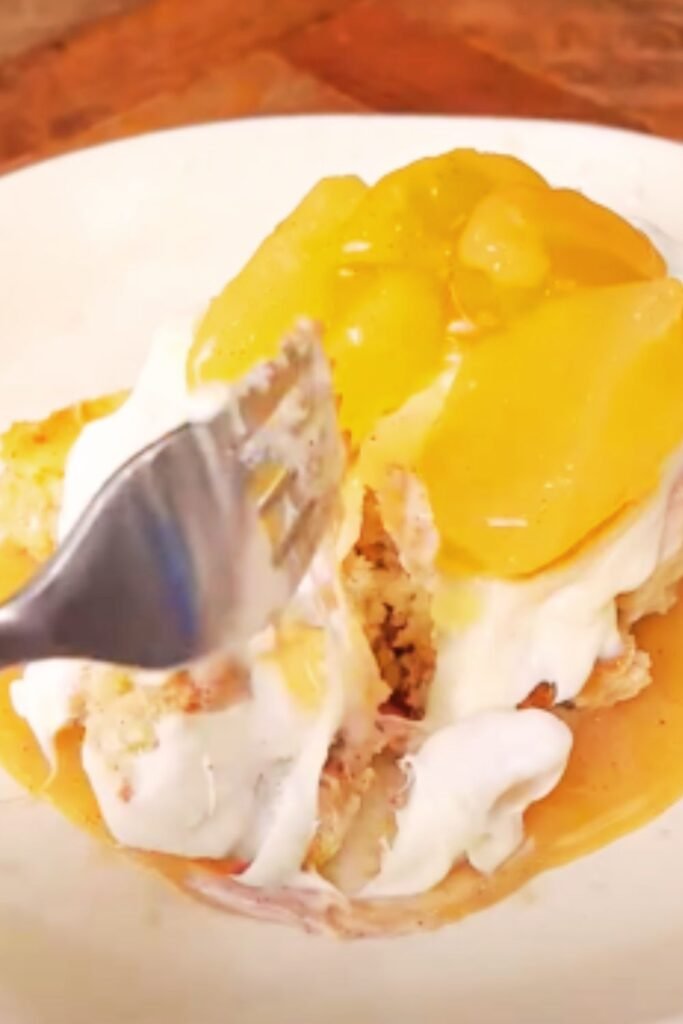
My favorite serving approach involves plating warm buns with a generous drizzle of caramel sauce and a light dusting of powdered sugar. The contrast between the warm, spiced bun and cool caramel creates textural interest that enhances the eating experience.
For special occasions, I serve these alongside vanilla ice cream or freshly whipped cream. The temperature contrast amplifies the flavors while providing richness that complements the fruit and spice elements.
Morning coffee or afternoon tea pairs beautifully with these buns. The caramel sweetness balances coffee’s bitterness, while the cinnamon spice complements tea’s warmth. Hot chocolate creates an indulgent combination perfect for cold weather enjoyment.
Common Mistakes and Solutions
Through years of making these buns, I’ve identified frequent pitfalls that can derail success. Over-flouring the work surface creates tough, dry buns, while under-kneading results in dense texture. I measure flour by weight when possible, using 120 grams per cup for consistency.
Temperature errors cause the most problems. Too-hot liquid kills yeast, while too-cool environments prevent proper rising. I maintain detailed notes about timing and temperatures, adjusting for seasonal variations in my kitchen.
Rolling technique affects the final product significantly. Rolling too tightly creates dense centers, while loose rolling allows filling to escape during baking. I aim for firm but gentle pressure, ensuring even distribution without compressing the dough excessively.
Q&A Section
Q: Can I use instant yeast instead of active dry yeast? Yes, you can substitute instant yeast at a 1:1 ratio. However, you can skip the proofing step and mix it directly with the dry ingredients. The rising times may be slightly shorter.
Q: What’s the best way to tell if my caramel is ready? The caramel should reach a deep amber color, similar to an old penny. It will smell nutty and sweet, not burned. If you have a candy thermometer, aim for 340°F (171°C).
Q: My dough isn’t rising properly. What went wrong? Check your yeast expiration date first. The liquid temperature might have been too hot (over 115°F kills yeast) or your kitchen might be too cold. Try placing the dough in a slightly warm oven (turned off) with a bowl of hot water.
Q: Can I make these buns dairy-free? Absolutely! Substitute plant-based milk, vegan butter, and coconut cream for the dairy ingredients. The texture will be slightly different but still delicious.
Q: How do I prevent my apples from making the buns soggy? Pre-cooking the apples removes excess moisture. Make sure they’re completely cooled before adding to the dough, and don’t skip the sautéing step—it concentrates flavors and prevents sogginess.
Q: Can I prepare these the night before? Yes! After shaping and placing in the pan, cover tightly and refrigerate overnight. In the morning, let them come to room temperature and rise for about 30-45 minutes before baking.
Q: What if my caramel seizes when I add the cream? Don’t panic! Return the pan to low heat and whisk vigorously. The seized caramel will gradually smooth out. Adding the cream slowly and ensuring it’s at room temperature helps prevent this issue.
Q: How can I tell when the buns are fully baked? The tops should be golden brown, and an instant-read thermometer inserted into the center should read 190°F (88°C). They should also sound hollow when tapped lightly.
These Caramel-Apple Cinnamon Buns represent more than just a recipe—they’re a testament to the joy of baking from scratch. Every element, from the tender enriched dough to the luscious caramel drizzle, works in harmony to create something truly special. I hope this detailed guide empowers you to create your own batch of these autumn-inspired treats, filling your home with their irresistible aroma and your family with smiles.