There’s something almost magical about the recipes that come from our mothers’ kitchens. The familiar scents, the comforting flavors, and the memories they evoke are irreplaceable. This Chocolate Espresso Mascarpone Tart is my modern interpretation of my mom’s classic chocolate dessert that made an appearance at every special family gathering. I’ve elevated it with rich espresso notes and creamy mascarpone, but the heart of the recipe – that intense chocolate flavor and buttery crust – remains a tribute to her culinary wisdom.
When I was growing up, watching my mom prepare desserts was like witnessing a small miracle. She never measured precisely, always going by feel and intuition. Yet somehow, everything turned out perfectly. This tart combines her instinctive approach with some professional techniques I’ve picked up along my own culinary journey. The result is a sophisticated dessert that still carries the warmth of home in every bite.
What Makes This Tart Special
This isn’t just any chocolate tart. The combination of deep chocolate flavor infused with espresso and lightened with mascarpone creates a dessert that’s simultaneously intense and delicate. The contrast between the crisp, buttery crust and the silky, truffle-like filling makes each bite a textural delight. And while it looks impressively sophisticated, the recipe is actually quite straightforward – perfect for both special occasions and those moments when you simply need a chocolate fix that goes beyond ordinary.
Ingredients
For the Chocolate Crust:
- 1½ cups all-purpose flour
- ⅓ cup unsweetened cocoa powder
- ½ cup powdered sugar
- ¼ teaspoon salt
- ¾ cup cold unsalted butter, cubed
- 1 large egg yolk
- 2-3 tablespoons ice water
For the Espresso Chocolate Filling:
- 12 ounces high-quality dark chocolate (70% cocoa), chopped
- 1 cup heavy cream
- ¼ cup espresso or strong coffee
- 2 tablespoons unsalted butter
- 2 teaspoons pure vanilla extract
- ¼ teaspoon salt
For the Mascarpone Topping:
- 8 ounces mascarpone cheese, room temperature
- ½ cup heavy cream
- 3 tablespoons powdered sugar
- 1 teaspoon vanilla extract
- 2 teaspoons instant espresso powder (optional, for deeper coffee flavor)
For Garnish:
- Cocoa powder for dusting
- Chocolate-covered espresso beans
- Chocolate shavings
- Fresh berries (optional)
Equipment Needed
- 9-inch tart pan with removable bottom
- Food processor (optional, but helpful for the crust)
- Mixing bowls (various sizes)
- Rubber spatula
- Whisk
- Rolling pin
- Pie weights or dried beans
- Parchment paper
- Electric mixer (hand or stand)
- Sieve for dusting cocoa powder
Step-by-Step Instructions
Preparing the Chocolate Crust
- In a food processor, combine the flour, cocoa powder, powdered sugar, and salt. Pulse several times to mix thoroughly.
- Add the cold, cubed butter and pulse until the mixture resembles coarse meal with pea-sized pieces of butter visible.
- Add the egg yolk and pulse to combine. Then, while pulsing, add ice water one tablespoon at a time until the dough just begins to come together when pinched.
- Turn the dough out onto a lightly floured surface and form it into a disk. Wrap in plastic wrap and refrigerate for at least 1 hour, or up to 2 days.
- When ready to bake, preheat your oven to 350°F (175°C).
- Remove the dough from the refrigerator and let it sit for about 10 minutes to slightly soften. Roll it out on a lightly floured surface to about ⅛-inch thickness and large enough to fit your tart pan.
- Carefully transfer the dough to the tart pan, pressing it into the corners and up the sides. Trim any excess dough.
- Prick the bottom of the crust all over with a fork. Line the crust with parchment paper and fill with pie weights or dried beans.
- Blind bake for 15 minutes. Remove the weights and parchment, then bake for an additional 5-7 minutes until the crust is set but not browned. Let cool completely.
Creating the Espresso Chocolate Filling

- Place the chopped chocolate in a medium heat-proof bowl.
- In a small saucepan, heat the heavy cream and espresso until it just begins to simmer (don’t let it boil).
- Pour the hot cream mixture over the chocolate and let it sit undisturbed for 2-3 minutes.
- Gently whisk until the chocolate is completely melted and the mixture is smooth.
- Add the butter, vanilla extract, and salt. Whisk until fully incorporated and the mixture is glossy.
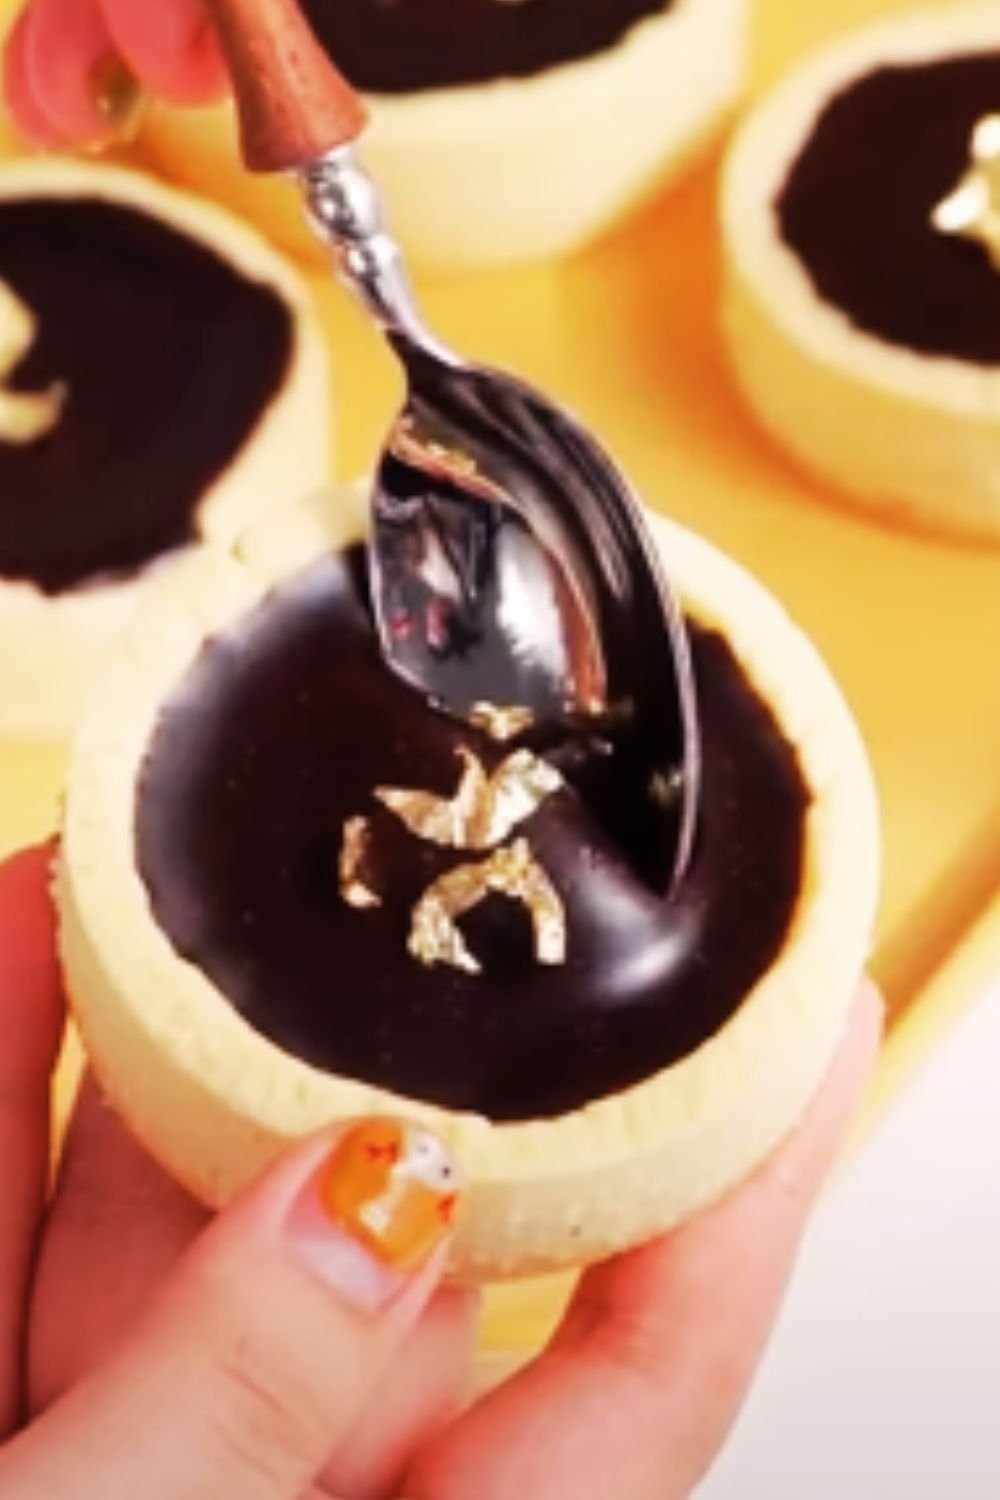
- Pour the filling into the cooled tart crust, smoothing the top with a spatula.
- Refrigerate for at least 2 hours, or until the filling is set.
Whipping Up the Mascarpone Topping
- In a medium bowl, combine the mascarpone cheese, heavy cream, powdered sugar, vanilla extract, and espresso powder (if using).
- Beat with an electric mixer on medium speed until soft peaks form. Be careful not to overbeat, as mascarpone can separate if mixed too much.
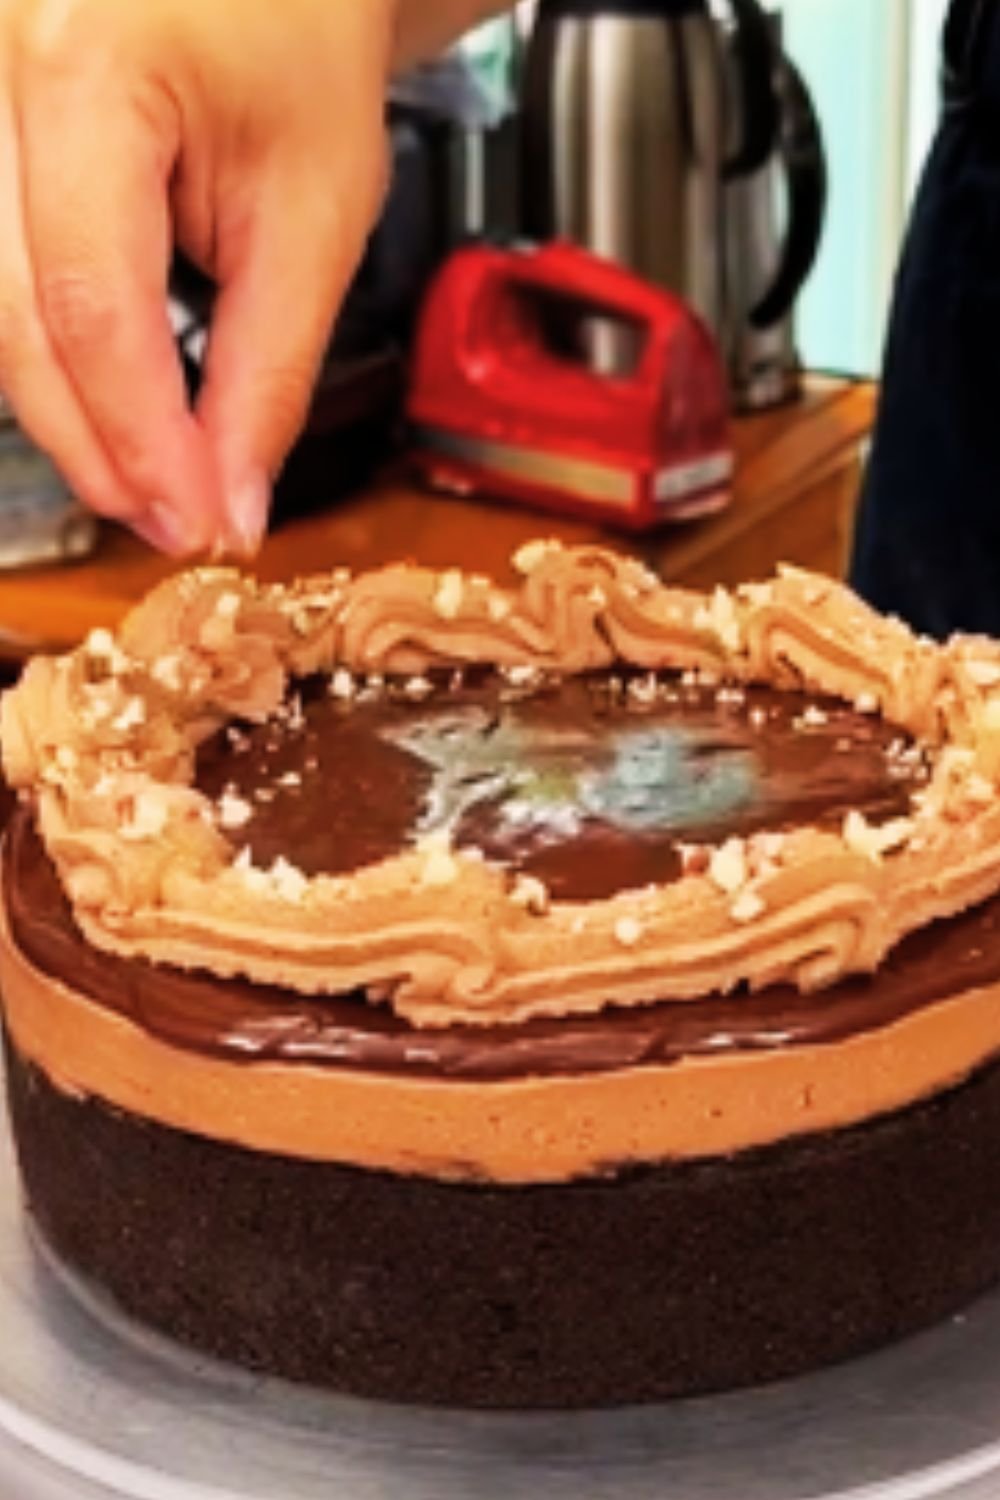
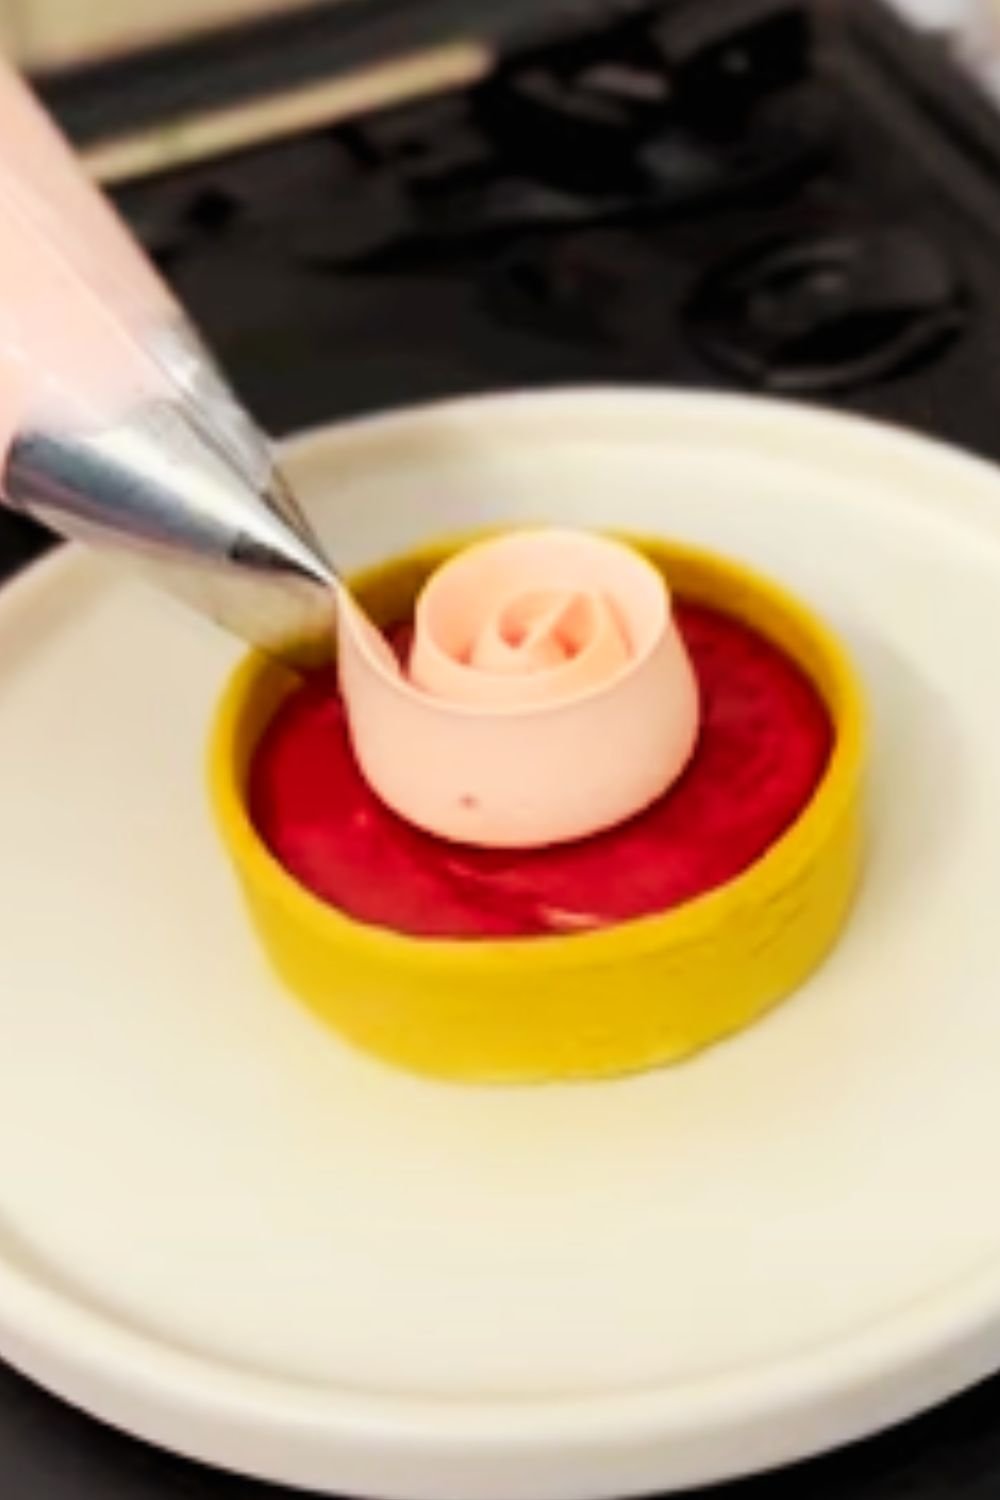
- Once the chocolate filling has set, spread or pipe the mascarpone topping over the tart. You can cover the entire surface or create a decorative border, depending on your preference.
Garnishing the Tart
- Dust the top lightly with cocoa powder using a fine-mesh sieve.
- Arrange chocolate-covered espresso beans around the edge or in a decorative pattern.
- Add chocolate shavings and/or fresh berries if desired.
- Refrigerate the tart for at least 30 minutes to allow the topping to set before serving.
Storage and Make-Ahead Tips
This tart keeps beautifully in the refrigerator for up to 3 days, making it perfect for preparing ahead of time for special occasions. If you’re planning to make it more than a day in advance, I recommend waiting to add the mascarpone topping and garnishes until within 24 hours of serving.
The crust dough can be made up to 3 days in advance and kept refrigerated, or frozen for up to a month. The baked crust can be prepared a day ahead and stored at room temperature, covered loosely.
The chocolate filling can be prepared up to 2 days ahead and refrigerated separately, then gently rewarmed to a pourable consistency before adding to the crust.
Serving Suggestions
This tart is rich and satisfying on its own, but there are several ways to elevate it even further:
- Serve with a dollop of lightly sweetened whipped cream if you opted not to use the mascarpone topping.
- Add a scoop of high-quality vanilla bean ice cream for contrast.
- Pair with fresh berries – raspberries and strawberries work particularly well with the chocolate-espresso flavor profile.
- Offer a small glass of iced coffee or a hot espresso alongside for coffee lovers.
- For special occasions, a small glass of dessert coffee liqueur makes an elegant accompaniment.
- A sprinkle of flaky sea salt just before serving can intensify the chocolate flavor.
Variations to Try
One of the things I love most about this recipe is its adaptability. Here are some variations I’ve tried over the years:
Orange-Infused Chocolate Tart
Add the zest of one orange to the chocolate filling for a refreshing citrus note. You can also replace the espresso with 2 tablespoons of orange liqueur.
Hazelnut Crust
Replace ¼ cup of the flour with finely ground hazelnuts to add a nutty dimension to the crust.
Spiced Chocolate Version
Add ½ teaspoon of cinnamon and a pinch of cayenne pepper to the chocolate filling for a warming, Mexican-inspired variation.
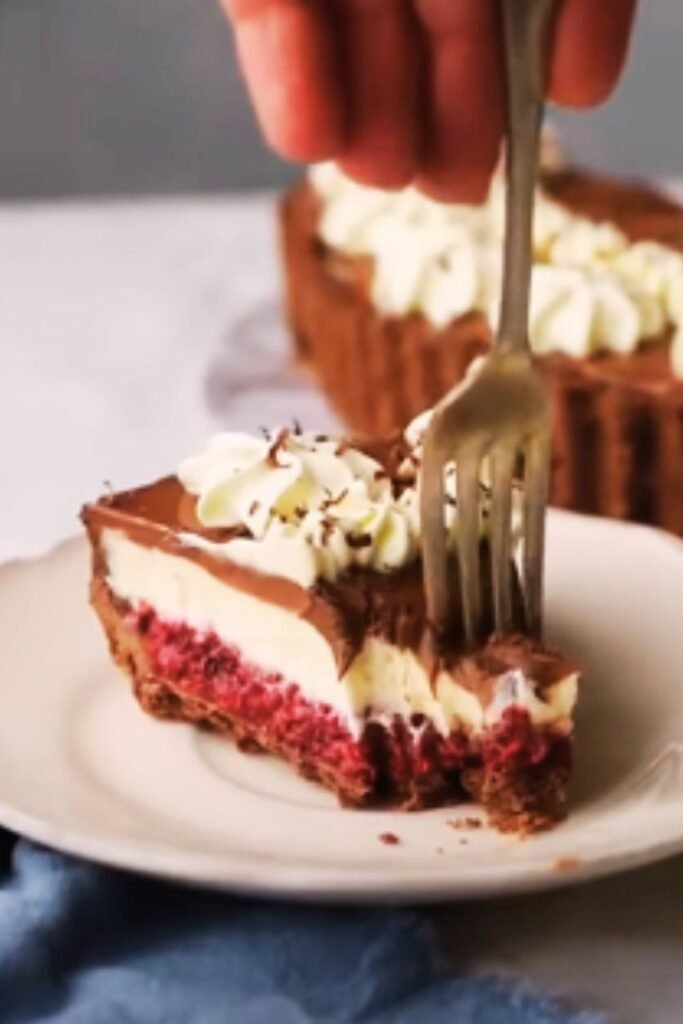
Raspberry Chocolate Tart
Spread a thin layer of raspberry preserves on the cooled crust before adding the chocolate filling, or swirl raspberry puree through the filling before it sets.
White Chocolate Mascarpone
For a striking visual contrast, use white chocolate in the mascarpone topping by melting 4 ounces of white chocolate and folding it into the mixture.
Nutritional Information
| Nutrient | Amount per Serving |
|---|---|
| Calories | 485 |
| Total Fat | 36g |
| Saturated Fat | 22g |
| Cholesterol | 105mg |
| Sodium | 170mg |
| Total Carbohydrates | 38g |
| Dietary Fiber | 3g |
| Sugars | 23g |
| Protein | 6g |
Note: Nutritional values are approximate and based on 10 servings per tart.
Common Mistakes to Avoid
Throughout my years of making this tart, I’ve learned some valuable lessons (often the hard way). Here are some pitfalls to watch out for:
Crust Issues
- Overworking the dough: This develops too much gluten, resulting in a tough crust. Handle the dough minimally and stop processing as soon as it comes together.
- Skipping the blind bake: The blind baking step ensures a crisp base that doesn’t get soggy from the filling.
- Using warm butter: Always use cold butter for the crust to achieve that perfect flaky texture.
Filling Failures
- Overheating the chocolate: This can cause the chocolate to seize or become grainy. Always melt chocolate gently and remove from heat before fully melted.
- Using poor quality chocolate: The chocolate is the star here, so use the best you can afford. I recommend at least 70% cocoa for depth of flavor.
- Rushing the setting time: Give the filling adequate time to set completely before adding the topping or attempting to slice.
Mascarpone Mishaps
- Overbeating the mascarpone: This can cause it to curdle or become grainy. Beat just until soft peaks form and no more.
- Using cold mascarpone: Always bring mascarpone to room temperature before beating to avoid lumps.
- Adding hot espresso: If using actual espresso instead of powder in the topping, ensure it’s cooled completely to avoid melting the mascarpone.
The Story Behind This Recipe
My mom wasn’t a professional baker by any means, but she had an incredible instinct for desserts. Her original chocolate tart was simpler – a basic shortcrust pastry filled with a rich chocolate ganache that she would sometimes spike with a little coffee “to bring out the chocolate,” as she would say.
I remember standing on a stool in our kitchen, watching her hands work deftly with the dough, never measuring anything but somehow achieving perfect results every time. She would let me help by sprinkling cocoa powder on top, a task I took very seriously as a child.
When I began developing my own version of her recipe, I wanted to honor those memories while adding my own touch. The espresso is a nod to her coffee addition, but intensified. The mascarpone topping was inspired by a trip to Italy where I fell in love with the delicate cheese that balanced so beautifully with strong coffee flavors.
Every time I make this tart, I feel connected to those kitchen moments with my mom. Food has that magical quality – it can transport us through time and space to the people and places we love. I hope this recipe brings a little bit of that magic to your kitchen too.
Troubleshooting Guide
| Problem | Possible Cause | Solution |
|---|---|---|
| Crust is too crumbly | Not enough liquid or butter | Add another tablespoon of ice water to the dough |
| Crust shrinks when baking | Dough was stretched when fitting into pan | Let dough relax before baking; chill filled tart pan for 30 minutes before baking |
| Filling is too firm | Too much chocolate relative to cream | Adjust ratio slightly with more cream; don’t refrigerate for too long before serving |
| Filling won’t set properly | Not enough chocolate or filling too warm when poured | Use correct chocolate-to-cream ratio; ensure tart shell is completely cool before adding filling |
| Mascarpone topping is runny | Overbeaten or cream was too warm | Beat just until soft peaks form; ensure all ingredients are properly chilled |
| Mascarpone curdles | Overbeaten or ingredients at different temperatures | Bring all topping ingredients to room temperature before mixing; beat minimally |
Q&A Section
Q: Can I make this tart without the coffee flavor for those who don’t enjoy coffee?
Absolutely! You can simply omit the espresso from both the filling and the topping. Replace the liquid with additional heavy cream in the filling. The tart will still be delicious as a pure chocolate dessert. You might want to add an extra teaspoon of vanilla extract to enhance the chocolate flavor.
Q: Is there a way to make this tart gluten-free?
Yes, you can substitute the all-purpose flour in the crust with a gluten-free flour blend. Look for one that’s formulated for pastry baking. You may need to add ½ teaspoon of xanthan gum if your blend doesn’t already include it, and possibly a bit more liquid as gluten-free flours tend to absorb more moisture.
Q: How far in advance can I make this for a dinner party?
This tart is perfect for making ahead! You can prepare it completely up to 2 days before your event. If you want it to look its absolute best, I recommend making the crust and filling 1-2 days ahead, then adding the mascarpone topping and garnishes the day of your party.
Q: Can I freeze this tart?
The tart base and chocolate filling freeze beautifully for up to a month. Wrap well in plastic wrap and then aluminum foil before freezing. Thaw overnight in the refrigerator. However, I don’t recommend freezing the mascarpone topping as it can separate when thawed. Add fresh topping after the tart has thawed.
Q: What can I substitute for mascarpone if I can’t find it?
If mascarpone isn’t available, you can create a similar topping using 8 ounces of cream cheese blended with 2 tablespoons of heavy cream and an extra tablespoon of powdered sugar. The flavor will be slightly tangier than mascarpone, but still delicious. Alternatively, simple whipped cream makes a lovely topping as well.
Q: I don’t have a tart pan. Can I use something else?
A 9-inch pie plate works as an alternative, though the presentation won’t be quite the same. You can also use a springform pan for easy removal. If using a pie plate, you might not need all of the crust dough – just trim any excess. The baking time remains the same.
Q: How do I know when the mascarpone topping is properly whipped?
The mascarpone topping is ready when it holds soft peaks – meaning when you lift the beater, the peaks should form but then slightly curl at the tips. If the peaks stand straight and look grainy, you’ve gone too far. If the mixture is still runny, continue beating a bit more. Remember that mascarpone thickens more when chilled.
Q: My chocolate seized when making the filling. Can I save it?
If your chocolate seizes (becomes grainy or stiff), you can often rescue it by adding 1-2 teaspoons of hot cream and gently stirring until smooth again. Make sure all your utensils are completely dry, as even a drop of water can cause chocolate to seize.
Final Thoughts
This Chocolate Espresso Mascarpone Tart isn’t just a dessert – it’s a celebration of culinary heritage and personal creativity. While I’ve added my own touches to my mom’s original recipe, the essence of her wisdom remains in every bite. The rich chocolate depth, the subtle coffee notes, and the creamy finish create a symphony of flavors that never fails to impress both family and friends.
What I love most about sharing this recipe is knowing that it might become part of someone else’s kitchen traditions. Perhaps you’ll add your own twist to it, or maybe it will inspire your own child to stand beside you as you bake, absorbing those precious culinary moments just as I did with my mom.
Desserts like this remind us that baking is about more than following instructions – it’s about creating experiences and memories. So when you slice into this tart and savor that first bite, I hope you taste not just the chocolate and espresso, but also the joy that comes from creating something special with your own hands.
Happy baking!