There’s something absolutely magical about watching those tiny, fluffy spheres of joy sizzle and puff up in their special pan. I’ve been fascinated by poffertjes—those delightful little Dutch pancakes—ever since my first encounter with them at a street market in Amsterdam years ago. The way they practically melt in your mouth, dusted with powdered sugar and topped with butter, creates an experience that’s both nostalgic and utterly satisfying.
These miniature pancakes represent more than just a sweet treat; they’re a window into Dutch culinary tradition that dates back centuries. What makes them so special isn’t just their adorable size, but the unique texture achieved through a carefully crafted batter and specialized cooking technique that transforms simple ingredients into something extraordinary.
What Are Poffertjes?
Poffertjes are traditional Dutch pancakes that measure roughly one to two inches in diameter. Unlike regular pancakes, these tiny treats are cooked in a special cast-iron pan with multiple shallow, round indentations that give them their characteristic shape and texture.
Traditional Dutch Street Food – Originally sold by street vendors throughout the Netherlands, poffertjes have been delighting locals and tourists for generations. The cooking process creates a crispy exterior while maintaining an incredibly fluffy, almost custard-like interior.
Buckwheat Foundation – What sets authentic poffertjes apart from regular pancakes is the inclusion of buckwheat flour in the batter, which contributes to their distinctive nutty flavor and unique texture profile.
The Rich History Behind These Tiny Treasures
My research into poffertjes history revealed fascinating details about their origins. These delightful pancakes trace their roots back to the 17th century, when Catholic monks in the southern Netherlands began making them as a way to use up leftover communion wafer batter. The word “poffertje” itself comes from the Dutch word “poffen,” meaning to puff up—which perfectly describes what happens when the batter hits the hot pan.
During the industrial revolution, poffertjes became increasingly popular as street food, particularly at markets and fairs. Vendors would set up their specialized pans and cook hundreds of these tiny pancakes throughout the day, filling the air with their irresistible aroma. The tradition became so ingrained in Dutch culture that today, you’ll find poffertjes stands in virtually every Dutch city and town.
Essential Equipment and Ingredients
The Poffertjes Pan: Your Most Important Tool
The success of perfect poffertjes depends entirely on having the right equipment. A traditional poffertjes pan features 19 shallow, round indentations that allow the batter to form those perfect spherical shapes. I’ve experimented with various alternatives over the years, but nothing compares to an authentic cast-iron poffertjes pan.
Cast Iron vs. Non-Stick Options
- Cast iron retains heat better and creates superior browning
- Non-stick versions are easier to clean but may not achieve the same texture
- Electric poffertjes makers are convenient for beginners but lack temperature control
Ingredients Breakdown
The beauty of poffertjes lies in their simplicity. My go-to recipe uses just a handful of ingredients, each playing a crucial role in achieving the perfect texture and flavor.
| Ingredient | Quantity | Purpose | Quality Tips |
|---|---|---|---|
| All-purpose flour | 1 cup | Structure and body | Use fresh, sifted flour |
| Buckwheat flour | ½ cup | Authentic flavor and texture | Essential for traditional taste |
| Whole milk | 1¼ cups | Moisture and richness | Room temperature works best |
| Active dry yeast | 1 tsp | Creates light, airy texture | Proof first in warm milk |
| Sugar | 2 tbsp | Sweetness and browning | Fine granulated sugar |
| Salt | ½ tsp | Flavor enhancement | Sea salt preferred |
| Egg | 1 large | Binding and richness | Room temperature |
| Butter | 2 tbsp melted | Flavor and texture | Unsalted, high quality |
Additional Tools You’ll Need
Squeeze Bottle or Batter Dispenser – This makes filling the pan indentations much easier and more precise than using a spoon.
Two Knitting Needles or Skewers – Traditional tools for flipping the poffertjes as they cook.
Fine-Mesh Sifter – For dusting with powdered sugar before serving.
Step-by-Step Preparation Method
Preparing the Perfect Batter
Creating the ideal poffertjes batter requires patience and attention to detail. I’ve refined this process through countless batches, and I can tell you that the key lies in proper mixing technique and timing.
Start by warming ¼ cup of milk to about 110°F—it should feel comfortably warm to the touch, not hot. Sprinkle the yeast over this warm milk and add a pinch of sugar. Let it sit for 5-10 minutes until it becomes foamy and bubbly. This proofing step ensures your yeast is active and will create the light, airy texture that makes poffertjes special.
In a large mixing bowl, whisk together both flours and salt. Create a well in the center and add the egg, melted butter, remaining sugar, and the foamy yeast mixture. Gradually pour in the remaining milk while whisking continuously to prevent lumps from forming.
The batter should have the consistency of thick cream—not as thin as regular pancake batter, but not as thick as cake batter either. If it seems too thick, add milk one tablespoon at a time. If too thin, whisk in a bit more all-purpose flour.
The Crucial Rising Period
Cover the bowl with a clean kitchen towel and let the batter rest in a warm, draft-free location for 45 minutes to 1 hour. During this time, the yeast will work its magic, creating bubbles throughout the batter that will result in those perfectly fluffy poffertjes.
I often place the bowl on top of my refrigerator or near a sunny window during this resting period. You’ll know the batter is ready when it has increased in volume and you can see bubbles throughout the mixture.
Mastering the Cooking Technique
Preparing Your Pan
Before cooking your first batch, the poffertjes pan needs proper preparation. Place it over medium heat and add a small amount of butter to each indentation. I use a pastry brush to ensure even distribution. The pan is ready when the butter sizzles gently but doesn’t brown immediately.
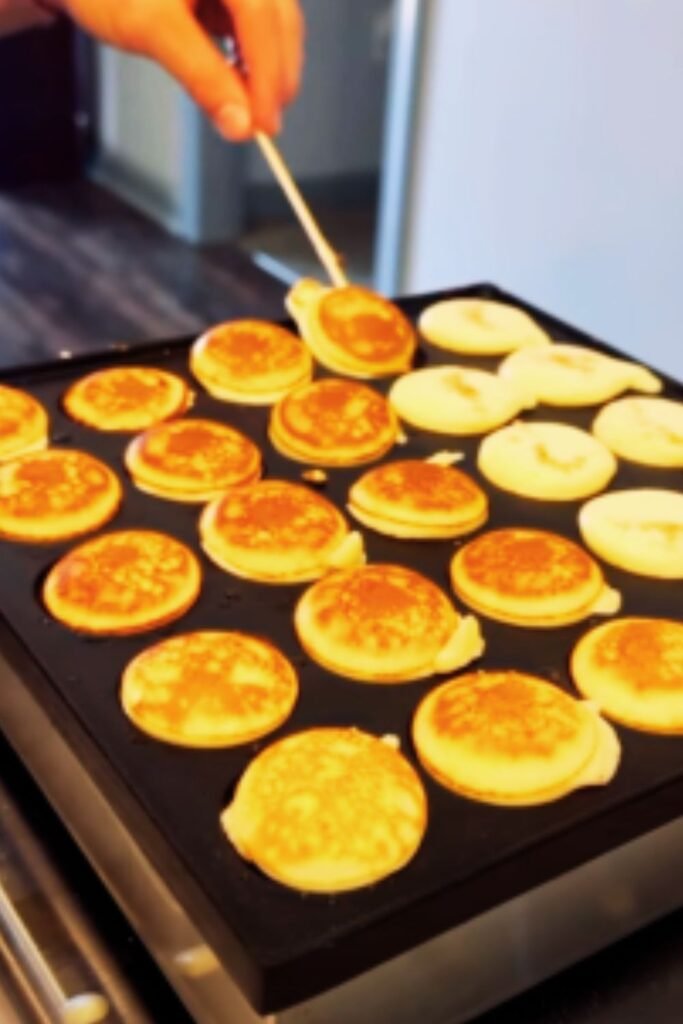
The Cooking Process
Using your squeeze bottle or batter dispenser, fill each indentation about ¾ full with batter. Don’t overfill, as the poffertjes need room to puff up during cooking. Watch as the magic happens—within 30-60 seconds, you’ll see the edges begin to set and the centers start to bubble.
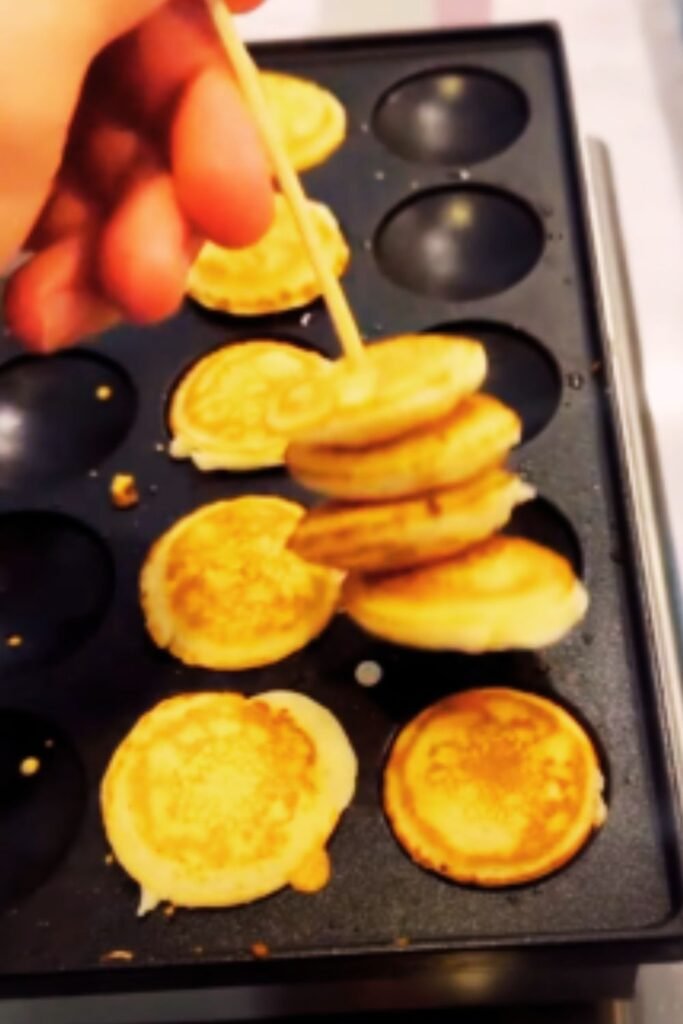
This is where those knitting needles come in handy. Gently insert them into each poffertje and flip them over in one smooth motion. The cooked side should be golden brown with a slightly crispy exterior. Cook for another 1-2 minutes until the second side achieves the same beautiful golden color.
Temperature Control Tips
| Heat Level | Result | Adjustment Needed |
|---|---|---|
| Too High | Dark exterior, raw interior | Reduce heat, let pan cool slightly |
| Too Low | Pale color, dense texture | Increase heat gradually |
| Just Right | Golden brown, fluffy interior | Maintain consistent temperature |
Serving Suggestions and Traditional Toppings
Classic Dutch Style
The traditional way to serve poffertjes is beautifully simple yet incredibly satisfying. I dust them generously with powdered sugar using a fine-mesh sifter, creating a snow-white coating that contrasts beautifully with their golden exterior. Then comes a pat of butter placed right on top while they’re still warm, allowing it to melt and create little pools of richness.
Creative Modern Variations
While I respect tradition, I’ve also enjoyed experimenting with different toppings and flavors over the years:
Fresh Berry Combinations
- Strawberries and whipped cream
- Blueberries with lemon zest
- Raspberries and vanilla Greek yogurt
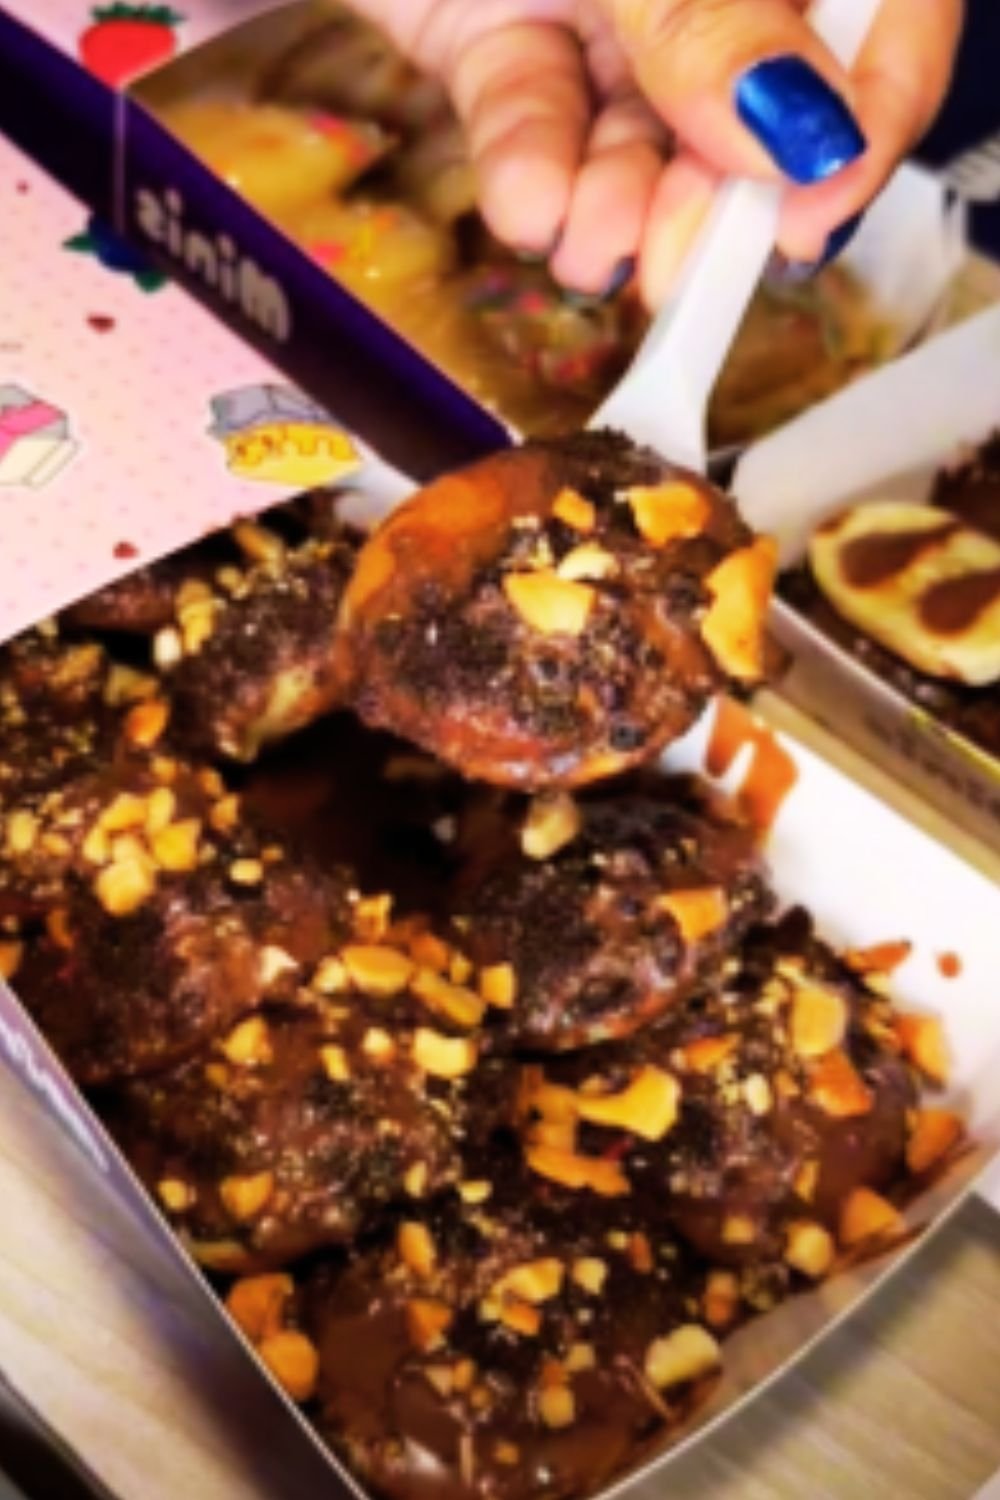
Decadent Sweet Options
- Nutella and sliced bananas
- Caramel sauce and chopped pecans
- Maple syrup and crispy bacon bits
Seasonal Specialties
- Apple cinnamon in fall
- Pumpkin spice during autumn
- Fresh peach and mint in summer
Presentation Ideas
I’ve found that poffertjes look absolutely stunning when served on a wooden board or cast-iron platter. Arrange them in groups and provide small bowls of various toppings so everyone can customize their own. Small spoons or cocktail forks make eating them more elegant and prevent messy fingers.
Troubleshooting Common Issues
Dense or Heavy Poffertjes
Problem: Your poffertjes turn out dense instead of light and fluffy.
Solutions:
- Check yeast expiration date and ensure proper proofing
- Allow adequate rising time for the batter
- Avoid overmixing, which can develop gluten
- Ensure milk temperature isn’t too hot when adding yeast
Uneven Cooking
Problem: Some poffertjes cook faster than others.
Solutions:
- Maintain consistent heat across the pan
- Rotate pan occasionally during cooking
- Use the same amount of batter in each indentation
- Consider investing in a higher-quality pan with better heat distribution
Sticking to the Pan
Problem: Poffertjes stick and tear when flipping.
Solutions:
- Ensure adequate butter in each indentation
- Wait until edges are properly set before flipping
- Use proper flipping technique with knitting needles
- Season cast-iron pan properly if using
Nutritional Information and Dietary Considerations
| Nutrient | Per Serving (5 poffertjes) | % Daily Value |
|---|---|---|
| Calories | 185 | 9% |
| Total Fat | 6g | 8% |
| Saturated Fat | 3.5g | 18% |
| Cholesterol | 45mg | 15% |
| Sodium | 220mg | 10% |
| Total Carbohydrates | 28g | 10% |
| Dietary Fiber | 2g | 7% |
| Sugars | 8g | – |
| Protein | 6g | 12% |
Dietary Modifications
Gluten-Free Version: Replace regular flours with a 1:1 gluten-free baking blend. The texture will be slightly different, but still delicious.
Dairy-Free Option: Substitute plant-based milk and vegan butter. Oat milk works particularly well for richness.
Reduced Sugar: Cut sugar in half and rely on toppings for sweetness.
Storage and Make-Ahead Tips
Fresh poffertjes are undeniably best, but I’ve developed some strategies for preparing them ahead of time or storing leftovers.
Short-Term Storage
Cooked poffertjes can be kept warm in a low oven (200°F) for up to 30 minutes before serving. Place them on a parchment-lined baking sheet and cover lightly with foil to prevent drying out.
Freezing Instructions
I’ve successfully frozen both batter and cooked poffertjes:
Freezing Batter: Prepare batter through the rising stage, then freeze in portions. Thaw overnight in refrigerator and bring to room temperature before cooking.
Freezing Cooked Poffertjes: Cool completely, then freeze in single layers. Reheat in a 350°F oven for 5-7 minutes until warmed through.
Reheating Methods
| Method | Time | Result Quality |
|---|---|---|
| Oven (350°F) | 5-7 minutes | Best texture retention |
| Toaster | 2-3 minutes | Quick, slightly crispy |
| Microwave | 30-45 seconds | Fast but may become chewy |
Questions and Answers
Q: Can I make poffertjes without a special pan?
I get this question frequently, and while a traditional poffertjes pan produces the best results, you can create similar treats using an aebleskiver pan or even a mini muffin tin. The shape won’t be perfectly spherical, but the flavor and texture will still be delightful. Some people have had success using cake pop makers as well.
Q: Why do my poffertjes turn out flat instead of puffy?
This usually indicates an issue with the yeast or rising process. Make sure your yeast is fresh and properly activated in warm (not hot) milk. The batter needs adequate rising time—I never rush this step. Also, avoid overmixing the batter, which can knock out the air bubbles that create that lovely puffiness.
Q: How do I know when the oil or butter temperature is just right?
The pan should be hot enough that butter sizzles gently when added but doesn’t immediately brown or smoke. I test by dropping a small amount of batter into one indentation—it should start cooking around the edges within 10-15 seconds. If it cooks too quickly, reduce the heat and let the pan cool slightly.
Q: Can I make the batter the night before?
While it’s possible to refrigerate the batter overnight, I find the results aren’t quite as light and fluffy as fresh batter. If you do prepare it ahead, let it come to room temperature and give it a gentle stir before cooking. You might need to thin it slightly with milk if it has thickened.
Q: What’s the difference between poffertjes and regular pancakes?
Beyond the obvious size difference, poffertjes have a unique texture thanks to the buckwheat flour and yeast in the batter. They’re more tender and custard-like inside with a slightly crispy exterior. The cooking method in specialized indented pans also creates their distinctive spherical shape and even cooking.
Q: How many poffertjes does one batch make?
A standard batch typically yields about 35-40 poffertjes, depending on the size of your pan’s indentations and how full you fill them. This usually serves 6-8 people as a dessert or 4-5 people as a substantial breakfast.
Q: Are poffertjes traditionally served at specific times of day?
In the Netherlands, poffertjes are enjoyed throughout the day. They’re popular as street food snacks, afternoon treats with coffee, and even as dessert after dinner. I’ve served them for brunch, and they make an impressive addition to breakfast spreads.
Q: Can I add flavors directly to the batter?
Absolutely! I’ve experimented with vanilla extract, almond extract, and even citrus zest in the batter. Start with small amounts—½ teaspoon of extract or 1 teaspoon of zest per batch. Spices like cinnamon or nutmeg also work beautifully.
The art of making perfect poffertjes combines technique, patience, and a little bit of Dutch tradition. Once you master the basic method, you’ll find yourself returning to this recipe again and again. There’s something deeply satisfying about creating these tiny, perfect spheres of joy that bring smiles to everyone who tries them. Whether you stick to the traditional powdered sugar and butter or venture into creative topping combinations, poffertjes represent the beautiful simplicity of Dutch cuisine at its finest.