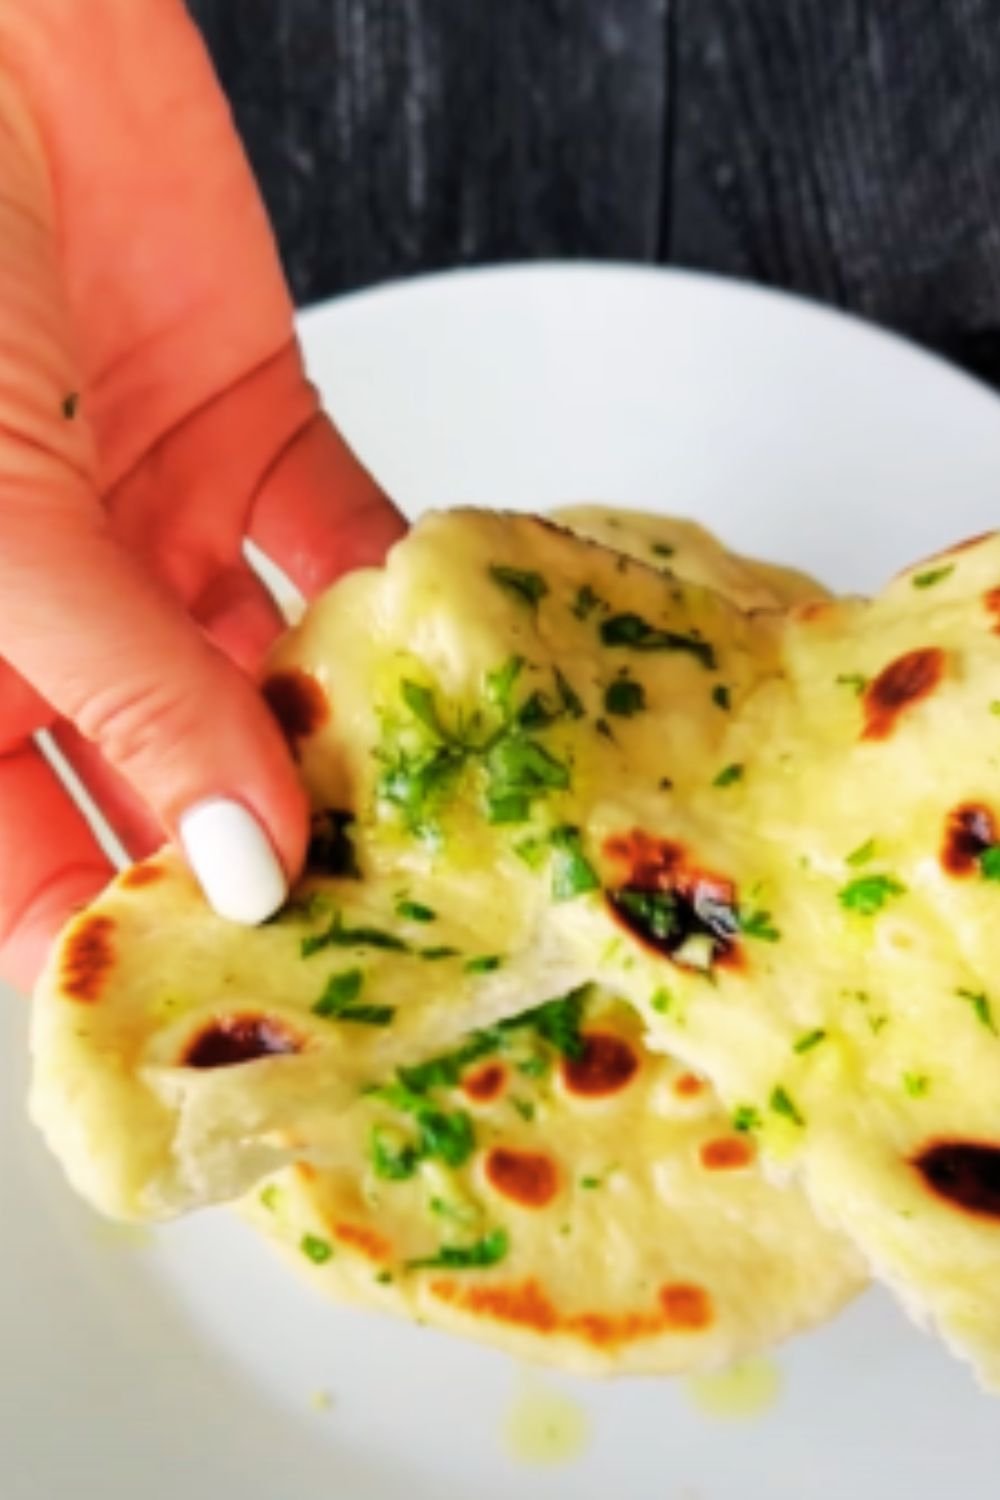
There’s something magical about biting into a freshly pan-fried Chinese chive pocket. The crispy golden exterior gives way to a fragrant, juicy filling that’s packed with the distinctive flavor of Chinese chives. Every time I make these at home, the aroma transports me straight to the bustling street food markets of Northern China where vendors skillfully craft these savory parcels for hungry customers.
Chinese chive pockets, or “jiucai hezi” (韭菜盒子) in Mandarin, are a beloved staple in Northern Chinese cuisine, particularly popular in regions like Beijing, Shandong, and parts of Northeastern China. Unlike dumplings, these half-moon shaped pockets feature a thicker, chewier dough that’s pan-fried to perfection, creating a contrast of textures that’s absolutely irresistible.
Today, I’m excited to share my family’s time-tested recipe for making authentic Chinese chive pockets from scratch. Whether you’re already familiar with this delightful dish or trying it for the first time, I promise that mastering these savory pockets will be well worth the effort.
The History and Cultural Significance
Chinese chive pockets have a rich history dating back centuries. Traditional Chinese medicine values Chinese chives (jiucai) for their warming properties, making chive pockets particularly popular during the colder months and seasonal transitions. In Northern China, these pockets are often enjoyed as a hearty breakfast or snack, though they’re substantial enough to serve as a main course as well.
The dish represents the resourcefulness of Northern Chinese cuisine, making the most of simple, locally available ingredients. Farmers would often grow Chinese chives in their home gardens, using them to create filling, affordable meals that could sustain their families through long days of physical labor.
What I find most fascinating is how each family develops their own special version of this recipe. Some add dried shrimp for umami depth, others incorporate scrambled eggs for added richness, while some prefer a purely vegetarian filling. The recipe I’m sharing today includes my favorite combination of ingredients that I’ve perfected over years of cooking.
Understanding Chinese Chives

Before diving into the recipe, let’s talk about the star ingredient: Chinese chives. Unlike the more delicate common chives familiar in Western cooking, Chinese chives (also called garlic chives) have flat, broader leaves and a stronger, more pronounced garlic-like flavor.
Chinese chives are classified into several varieties based on their color and growing methods:
- Regular Chinese chives (韭菜): Green with flat leaves, these have the strongest flavor
- Yellow Chinese chives (韭黄): Grown without sunlight, these are milder and more tender
- Flowering Chinese chives (韭菜花): These include the flower buds and stems, offering a more complex flavor
For authentic chive pockets, I recommend using regular green Chinese chives for their robust flavor. You’ll find them in most Asian grocery stores, often in large bundles. When selecting them, look for vibrant green, firm leaves without any wilting or yellowing.
Essential Ingredients for Authentic Chinese Chive Pockets
For the Dough:
- All-purpose flour – 2½ cups (350g)
- Warm water – ¾ cup (180ml)
- Salt – ½ teaspoon
- Vegetable oil – 2 tablespoons
For the Traditional Filling:
- Chinese chives – 1 large bunch (about 500g), finely chopped
- Ground pork – 250g (omit for vegetarian version)
- Chinese dried shrimp – 2 tablespoons, soaked and minced (optional)
- Eggs – 2, scrambled and cooled (optional)
- Fresh ginger – 1 tablespoon, minced
- Garlic – 3 cloves, minced
- Sesame oil – 2 tablespoons
- Light soy sauce – 1 tablespoon
- Shaoxing wine – 1 tablespoon
- White pepper – ½ teaspoon
- Salt – to taste
- MSG – ¼ teaspoon (optional but authentic)
For Cooking:
- Vegetable oil – 3-4 tablespoons for pan-frying
- Water – ¼ cup for steam-frying
For Dipping Sauce:
- Chinese black vinegar – 2 tablespoons
- Light soy sauce – 1 tablespoon
- Fresh garlic – 1 clove, minced
- Chili oil – 1 teaspoon (optional)
Step-by-Step Preparation Process
Preparing the Perfect Dough
The dough for Chinese chive pockets is critical to their success. Unlike thin dumpling wrappers, these pockets require a sturdier, slightly chewy dough that can hold up to the juicy filling and develop a crispy exterior when pan-fried.
- Mix the dry ingredients: In a large bowl, combine the flour and salt.
- Create the dough: Make a well in the center of the flour and gradually add the warm water while mixing with chopsticks or a fork. Once the mixture starts to come together, add the vegetable oil.
- Knead thoroughly: Turn the dough onto a floured surface and knead for 5-7 minutes until smooth and elastic. The dough should feel slightly soft but not sticky.
- Rest the dough: Form the dough into a ball, place it back in the bowl, cover with a damp kitchen towel, and let it rest for at least 30 minutes. This relaxes the gluten and makes the dough easier to work with.
The resting period is non-negotiable! I’ve learned the hard way that skipping this step results in dough that’s too springy and difficult to roll out properly.
Creating the Flavorful Filling
The filling is where the magic happens. The combination of aromatic Chinese chives with savory ingredients creates an explosion of flavor in every bite.
- Prepare the Chinese chives:
- Thoroughly wash the chives and shake off excess water
- Chop finely, discarding any tough ends
- Place in a large bowl and set aside
- If using pork:
- Combine ground pork with 1 teaspoon salt, white pepper, minced ginger, and Shaoxing wine
- Mix in one direction until slightly sticky and well-combined
- If using dried shrimp:
- Soak in warm water for 20 minutes until softened
- Drain and mince finely
- If using eggs:
- Beat eggs with a pinch of salt
- Scramble over medium heat until just set but still soft
- Cool and chop coarsely
- Combine all filling ingredients:
- Add the prepared pork, shrimp, and/or eggs to the chopped chives
- Add minced garlic, sesame oil, soy sauce, and any remaining seasonings
- Mix thoroughly until well combined
- Critical step: Let the filling rest for 10-15 minutes to allow the flavors to meld. During this time, the salt will draw out some moisture from the chives, creating a juicier filling.
Assembly: Bringing It All Together
Creating perfectly shaped chive pockets requires some practice, but the technique is straightforward once you get the hang of it.
- Divide the dough: After resting, divide the dough into 12 equal portions and roll each into a ball.
- Roll out the wrappers:
- On a lightly floured surface, roll each ball into a thin round disc about 5-6 inches in diameter
- The center should be slightly thicker than the edges
- Work with one piece at a time, keeping the rest covered to prevent drying
- Fill and fold:
- Place about 2-3 tablespoons of filling in the center of each wrapper
- Fold the wrapper in half to create a half-moon shape
- Press the edges firmly to seal, then use your fingers to crimp the edges decoratively
- Sealing technique: For a secure seal, press from the center outward to push out any air bubbles, then firmly pinch the edges together.
Remember: Don’t overfill! This is perhaps the most common mistake I see people make. Too much filling makes the pockets difficult to seal and may cause them to burst during cooking.
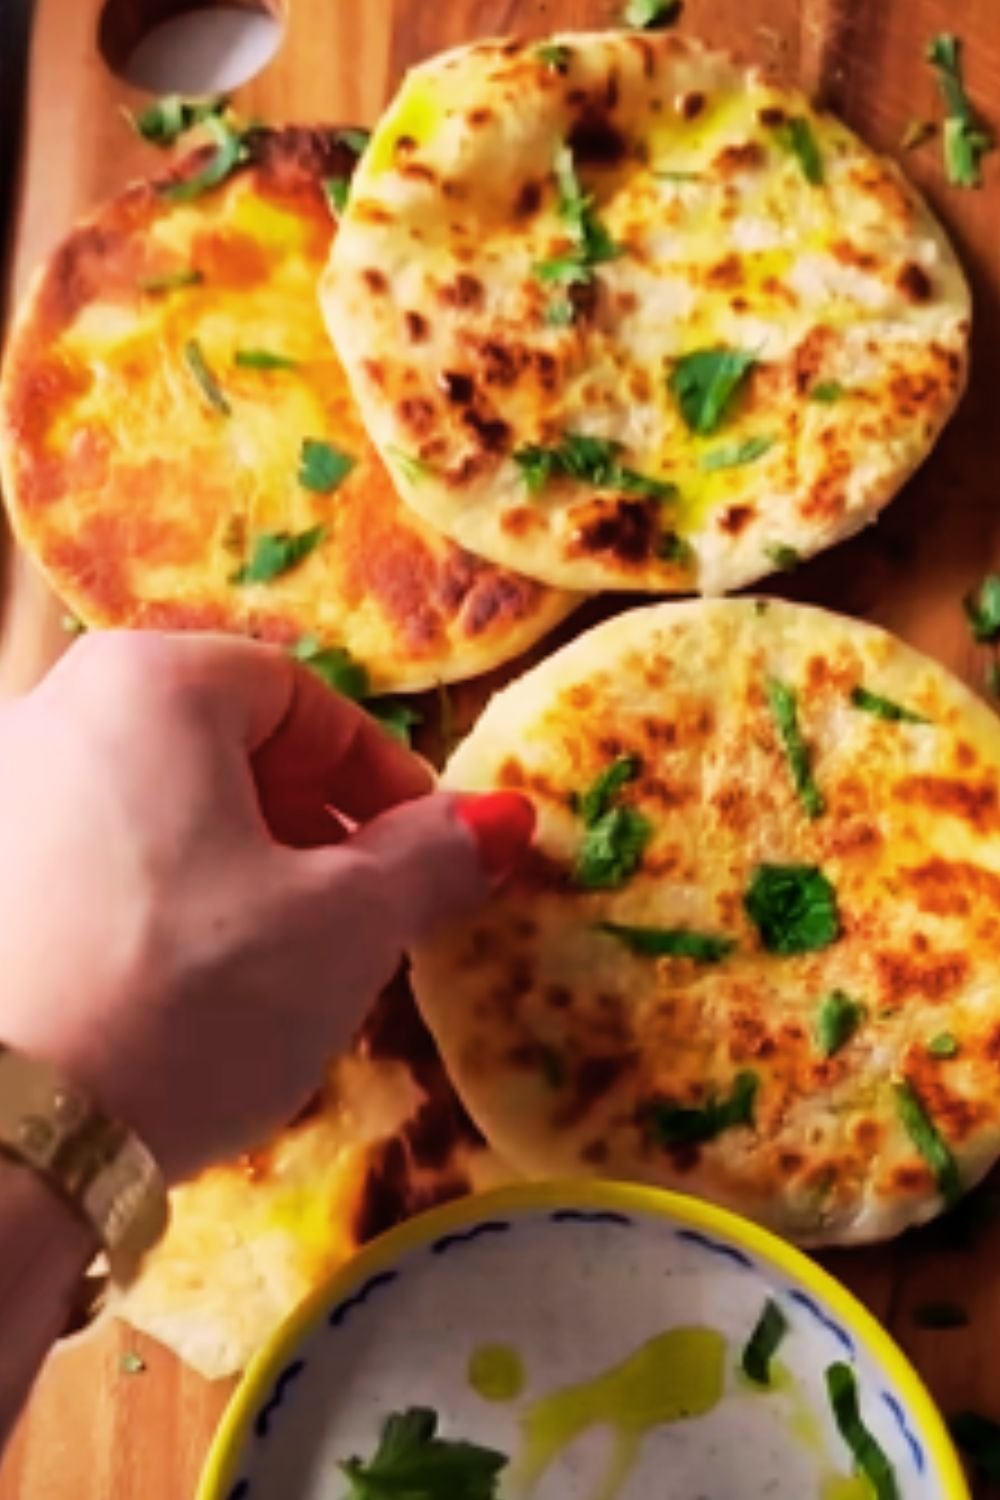
Cooking to Crispy Perfection
The cooking process combines pan-frying and steam-frying to achieve the perfect texture: crispy on the outside while ensuring the filling is thoroughly cooked.
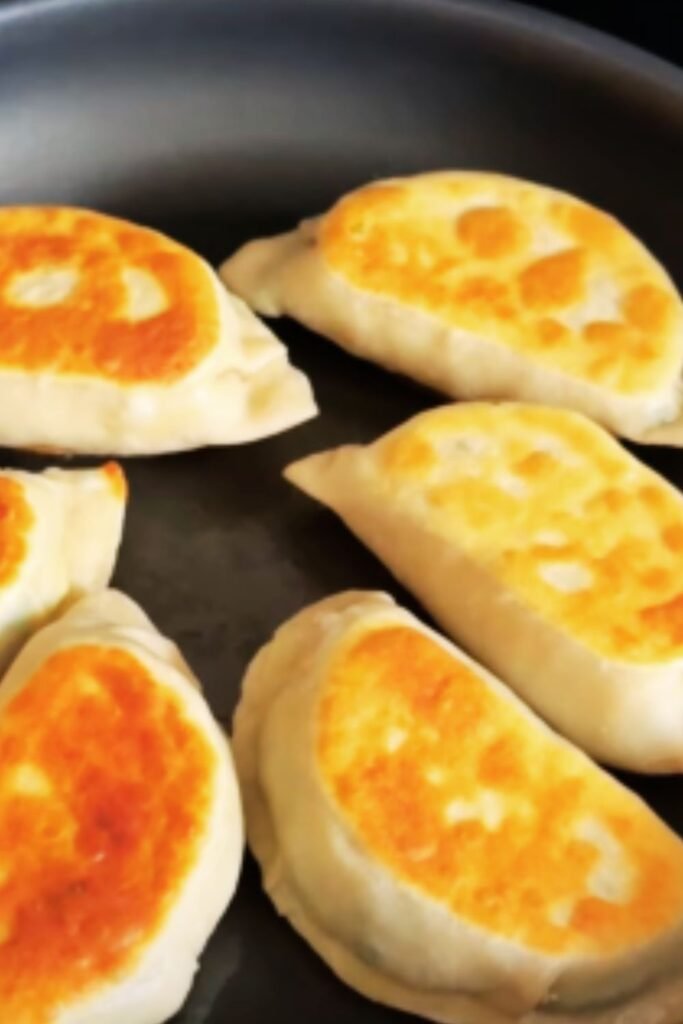
- Heat the pan: Add 2 tablespoons of vegetable oil to a large non-stick skillet or cast-iron pan over medium heat.
- Arrange the pockets: When the oil is hot, place the chive pockets in the pan with the crimped edge facing up, leaving some space between each pocket.
- The initial fry: Cook until the bottoms turn golden brown, about 2-3 minutes.
- The steam-fry method:
- Add ¼ cup of water to the pan and immediately cover with a lid
- Reduce heat to medium-low and let steam for 5-6 minutes
- Remove the lid and continue cooking until all water has evaporated
- Final crisping: Add another tablespoon of oil around the edges of the pan and increase heat to medium. Cook for another 1-2 minutes until the bottoms are crispy and deep golden brown.
- Flip and repeat: For extra crispiness, carefully flip the pockets and cook the crimped side for 1-2 minutes until golden.
This steam-frying technique is my secret to perfect chive pockets. The steam ensures that the filling and dough cook through completely, while the final dry-frying step creates that irresistible crispy texture.
Troubleshooting Common Issues
| Problem | Possible Cause | Solution |
|---|---|---|
| Filling leaks during cooking | Overfilled pockets or inadequate sealing | Use less filling and ensure edges are firmly sealed |
| Dough too sticky | Too much water in the dough | Add a little more flour when kneading |
| Dough too stiff | Not enough water | Add a teaspoon of water at a time while kneading |
| Pale, soggy bottoms | Pan not hot enough or too much water added | Ensure oil is hot before adding pockets; use less water |
| Burnt exterior with raw filling | Heat too high or inadequate steaming | Lower heat and ensure proper steaming time |
| Tough or chewy dough | Overworked dough or insufficient resting | Knead more gently and allow full resting time |
| Bland filling | Inadequate seasoning or water content in chives | Add more seasonings and properly drain chives |
Variations and Adaptations
One of the joys of cooking is adapting recipes to suit your taste preferences and dietary needs. Here are some delicious variations you might want to try:
Vegetarian Chive Pockets
- Replace ground pork with finely chopped firm tofu or tempeh
- Add 1/4 cup chopped shiitake mushrooms for umami flavor
- Increase sesame oil to 3 tablespoons for added richness
Seafood Chive Pockets
- Substitute ground pork with finely chopped shrimp or a mixture of shrimp and scallops
- Add 1 tablespoon of oyster sauce to the filling
- Include 2 tablespoons of finely diced water chestnuts for crunch
Extra Spicy Version
- Add 1-2 tablespoons of chili oil to the filling
- Include 1 tablespoon of doubanjiang (fermented chili bean paste)
- Mix in 1 teaspoon of Sichuan peppercorns, ground
Whole Wheat Option
- Replace half the all-purpose flour with whole wheat flour
- Increase water by 2 tablespoons to account for the higher absorption
- Rest the dough for 45 minutes instead of 30
Detailed Nutritional Information
| Nutrient | Amount (Per Pocket) | % Daily Value* |
|---|---|---|
| Calories | 220 | – |
| Total Fat | 12g | 15% |
| Saturated Fat | 3g | 15% |
| Trans Fat | 0g | – |
| Cholesterol | 45mg | 15% |
| Sodium | 380mg | 17% |
| Total Carbohydrate | 22g | 8% |
| Dietary Fiber | 1.5g | 5% |
| Total Sugars | 0.5g | – |
| Protein | 8g | 16% |
| Vitamin D | 0.2mcg | 1% |
| Calcium | 30mg | 2% |
| Iron | 2mg | 11% |
| Potassium | 150mg | 3% |
*Percent Daily Values are based on a 2,000 calorie diet. Your daily values may be higher or lower depending on your calorie needs.
Storage and Make-Ahead Tips

Chinese chive pockets are perfect for batch cooking and meal prep. Here’s how to store them properly:
Refrigeration
- Cooked pockets: Store in an airtight container for up to 3 days
- Uncooked assembled pockets: Can be refrigerated for 24 hours before cooking
- Prepared filling: Keeps in the refrigerator for up to 2 days
Freezing
- Method 1 – Freeze before cooking:
- Arrange uncooked pockets on a baking sheet without touching
- Freeze until solid (about 2 hours)
- Transfer to freezer bags or containers
- Store for up to 3 months
- Method 2 – Freeze after cooking:
- Cool completely
- Wrap individually in plastic wrap
- Place in freezer bags
- Store for up to 2 months
Reheating Instructions
- From refrigerated (cooked):
- Pan-fry over medium heat with a tablespoon of oil until heated through and crispy (about 5 minutes)
- Alternatively, microwave for 1 minute, then pan-fry briefly to restore crispness
- From frozen (uncooked):
- Do not thaw
- Follow regular cooking instructions, but increase the steaming time by 3-4 minutes
- From frozen (cooked):
- Thaw overnight in the refrigerator
- Reheat in a pan with a touch of oil
- Or bake in a 350°F (175°C) oven for 10-12 minutes
Serving Suggestions
Chinese chive pockets are delicious on their own, but they can also be part of a larger meal spread. Here are some ideal pairings:
As Part of a Chinese Breakfast
- Hot soy milk or congee
- Century egg preserved duck egg
- Quick-pickled vegetables
For a Satisfying Lunch
- Hot and sour soup
- Cucumber salad with garlic dressing
- Steamed greens with oyster sauce
For a Complete Dinner
- Chinese clear broth soup
- Stir-fried vegetables with garlic
- Steamed rice
- Fruit platter for dessert
Dipping Sauce Options
Try these alternatives to the classic black vinegar sauce:
- Chili oil with a splash of Zhenjiang vinegar
- Minced garlic in light soy sauce with a touch of sugar
- Sesame paste thinned with water and a dash of rice vinegar
Tips from My Kitchen to Yours
After years of making chive pockets, I’ve gathered some invaluable tips that can help you achieve the best results:
- The water test for filling: Take a small amount of filling and squeeze it in your palm. If water droplets form but the mixture still holds together, the moisture content is perfect.
- Wrapper thickness matters: The ideal thickness for the wrapper is about 2-3mm. Too thin and it might break; too thick and it will be doughy when cooked.
- Rest between steps: Not only should the dough rest, but also the assembled pockets. Let them rest for 10 minutes before cooking to relax the dough and prevent shrinkage.
- The heat management rule: Start with medium-high heat for the initial fry, medium-low for steaming, then back to medium for the final crisping.
- The ‘tap test’: To check if your pockets are cooked through, tap the center with chopsticks. If it sounds slightly hollow rather than dull, they’re ready.
- Season generously: The filling may taste slightly too salty before cooking, but remember that the bland dough will balance it out in the final product.
- Chive preparation: Wash chives well in advance and let them dry completely. Wet chives will create a soggy filling.
Q&A Section
Q: Can I use regular chives instead of Chinese chives? A: Regular chives are much milder and thinner than Chinese chives, so the flavor profile would be significantly different. If you can’t find Chinese chives, consider using a mixture of regular chives and finely chopped green onions with a touch of minced garlic to approximate the flavor.
Q: My pockets always burst open during cooking. What am I doing wrong? A: This typically happens for three reasons: overfilling, inadequate sealing, or too much moisture in the filling. Try using less filling, crimping the edges more firmly, and if your chives are very fresh and wet, consider salting them and letting them sit in a colander for 20 minutes to draw out excess moisture before mixing with other ingredients.
Q: Is there a gluten-free alternative for the dough? A: Yes, you can use a combination of rice flour and tapioca starch (2:1 ratio) with a teaspoon of xanthan gum. The texture will be different—slightly more crispy and less chewy—but still delicious.
Q: How can I tell if my Chinese chives are fresh? A: Fresh Chinese chives should have firm, vibrant green leaves without any yellowing or wilting. They should smell strongly of garlic when chopped. Avoid any bunches that look slimy or have a sour smell.
Q: Can I make sweet chive pockets? A: While unconventional, you could make a sweet version by reducing the savory seasonings and adding a mixture of chopped Chinese dates (jujubes) and walnuts with a touch of honey to the filling. However, this would be a creative adaptation rather than a traditional recipe.
Q: How finely should I chop the chives? A: Chives should be chopped into small pieces about 1/4 inch (0.5 cm) long. Too fine and they’ll become mushy; too coarse and the pockets may be difficult to seal.
Q: My dough keeps shrinking when I try to roll it out. How can I fix this? A: This happens when the gluten is too activated. Make sure you’re allowing the dough to rest properly (at least 30 minutes), and consider covering it with a slightly damp cloth to prevent it from drying out. If it’s still springing back, let it rest for another 15 minutes before trying again.
A Cultural Note to Conclude
Chinese chive pockets represent more than just a delicious meal; they embody the spirit of Northern Chinese cuisine—resourceful, hearty, and deeply flavorful. In many families, making these pockets is a communal activity, with multiple generations gathering around the kitchen table to prepare them together.
I hope this recipe allows you to bring a taste of this cultural tradition into your own kitchen. Whether you’re making these pockets for a weekend breakfast, a lunch box addition, or as part of a larger Chinese feast, they’re sure to bring joy to your table.
Remember that like any traditional recipe, perfection comes with practice. Your first batch may not look picture-perfect, but the flavors will still be delicious. Each time you make them, your technique will improve, and soon you’ll be crafting chive pockets that would make any Chinese grandmother proud.
Enjoy the process, embrace the aromatic journey, and most importantly, savor every bite of these wonderful chive pockets!