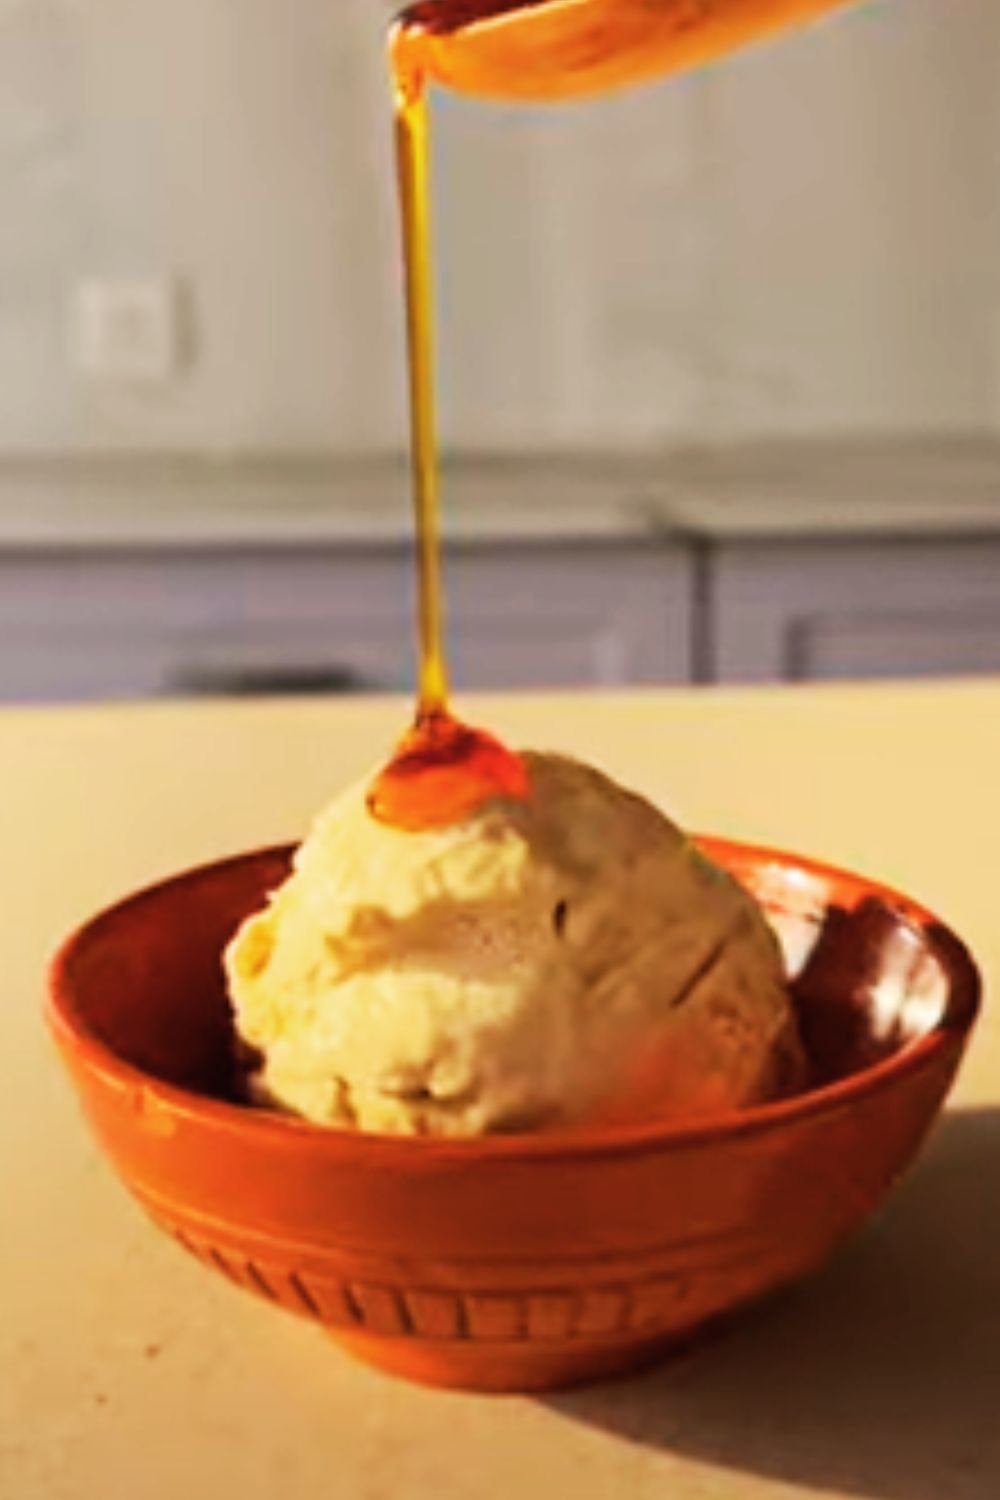
There’s something magical about the moment a spoon breaks through the delicate surface of a perfectly set panna cotta. That gentle resistance followed by the yielding of silky, creamy custard is one of dessert’s most sublime pleasures. When crowned with a glossy layer of salted caramel that offers both sweetness and complexity, you’ve entered the realm of dessert perfection.
I’ve been perfecting my panna cotta recipe for years, searching for that elusive balance between firmness and wobble. Too much gelatin and you’re essentially serving vanilla-flavored rubber; too little and your guests are faced with vanilla soup. The recipe I’m sharing today represents countless hours of experimentation and refinement to achieve what I consider to be the ultimate texture—a gentle tremble that holds its shape when unmolded but melts effortlessly on the tongue.
The Origins of Panna Cotta
Panna cotta, which translates to “cooked cream” in Italian, hails from the northern region of Piedmont, Italy. Despite its elegant appearance and sophisticated taste, it’s remarkably simple in its composition—primarily cream set with gelatin and delicately flavored, traditionally with vanilla.
What fascinates me about panna cotta is how such a straightforward dessert has become a canvas for culinary creativity across the globe. While remaining true to its humble origins, this dessert has found its way onto the menus of Michelin-starred restaurants and family dinner tables alike.
The beauty of panna cotta lies in its versatility. The creamy base welcomes an array of flavors, from fruit purées to herbs and spices. But for me, nothing complements the silky vanilla base quite like the bittersweet complexity of salted caramel. The contrast in flavors and textures creates a dessert that’s greater than the sum of its parts.
The Science Behind the Perfect Set
Before diving into the recipe, I want to share what I’ve learned about the science that makes panna cotta so special. Understanding these principles will help you achieve consistent results and empower you to troubleshoot if things don’t go exactly as planned.
Gelatin, the key setting agent in panna cotta, is a protein derived from collagen. When gelatin is dissolved in liquid and then cooled, it forms a matrix that traps water molecules, creating a structure that transforms liquid into a semi-solid state.
The ideal panna cotta texture comes down to the precise ratio of gelatin to liquid. Through extensive testing, I’ve found that 1.5 to 2 grams of gelatin per cup of dairy creates that perfect wobble without becoming rubbery. This translates to roughly 1 teaspoon of powdered gelatin per cup of liquid.
Temperature control is equally important. Gelatin begins to set at around It doesn’t “activate” simply by being added to liquid—it needs to be bloomed in cold water, then dissolved completely in hot liquid. If your panna cotta ever develops a grainy texture, incomplete dissolution of gelatin is usually the culprit.
Fat content also plays a critical role in creating that luxurious mouthfeel. While you can make panna cotta with all heavy cream, I prefer a combination of heavy cream and whole milk for a slightly lighter texture that still feels indulgent.
Ingredients That Make the Difference

For the Panna Cotta:
- 2 cups heavy cream
- 1 cup whole milk
- 1/2 cup granulated sugar
- 2 1/4 teaspoons unflavored gelatin powder (about 7 grams or one standard envelope)
- 3 tablespoons cold water
- 2 vanilla beans, split and seeds scraped
- 1 teaspoon pure vanilla extract
- Pinch of fine sea salt
For the Salted Caramel:
- 1 cup granulated sugar
- 1/4 cup water
- 3/4 cup heavy cream, at room temperature
- 4 tablespoons unsalted butter, cubed and at room temperature
- 1 teaspoon flaky sea salt (such as Maldon) plus more for garnish
- 1/2 teaspoon pure vanilla extract
When it comes to ingredients, quality matters tremendously for a dessert with so few components. Let me walk through some key considerations:
Vanilla Beans: This is where I refuse to compromise. Madagascar bourbon vanilla beans offer the most intense flavor and abundant seeds, though Tahitian beans bring a more floral note that works beautifully here. If vanilla beans are prohibitively expensive in your area, you can substitute with 1 tablespoon of high-quality vanilla bean paste.
Gelatin: I recommend using sheet gelatin (silver or gold strength) if available, as it dissolves more cleanly and reliably than powdered. However, the recipe includes measurements for powdered since it’s more widely available. If using sheet gelatin, you’ll need approximately 4 silver-strength sheets.
Dairy: The fat content of your dairy products has a significant impact on the final texture. Using all heavy cream creates a richer panna cotta, while increasing the proportion of milk lightens the dessert. I find the 2:1 ratio of cream to milk creates the perfect balance—indulgent but not overwhelmingly rich.
Sugar: Regular granulated sugar works perfectly for this recipe. I’ve experimented with alternatives like cane sugar and light brown sugar, which add interesting dimensions but can overpower the delicate vanilla flavor.
Salt: Don’t skip the pinch of salt in the panna cotta base—it enhances the vanilla flavor without making the dessert taste salty. For the caramel, flaky sea salt creates little pockets of salinity that contrast beautifully with the sweet caramel.
Equipment Essentials
Having the right tools makes preparing panna cotta much more straightforward:
- Ramekins or dessert glasses (4-6 oz capacity)
- Heavy-bottomed saucepan
- Silicone spatula
- Fine-mesh strainer
- Mixing bowls
- Measuring cups and spoons
- Instant-read thermometer (optional but helpful for caramel)
Step-by-Step Method for Vanilla Bean Panna Cotta
Preparing the Gelatin:
- Pour the cold water into a small bowl and sprinkle the gelatin evenly over the surface.
- Allow the gelatin to sit undisturbed for 5-10 minutes to bloom. It should become translucent and swell as it absorbs the water.
Making the Panna Cotta Base:
- Combine the heavy cream, milk, sugar, split vanilla beans with scraped seeds, and salt in a medium saucepan.
- Heat the mixture over medium-low heat, stirring occasionally until the sugar completely dissolves and tiny bubbles form around the edges. Do not let it boil vigorously.
- Remove from heat when the mixture reaches about 180°F (82°C) or when steam rises steadily from the surface.
- Add the bloomed gelatin to the hot cream mixture and stir continuously until the gelatin completely dissolves, about 2-3 minutes.
- Remove the vanilla bean pods and stir in the vanilla extract.
- Pour the mixture through a fine-mesh strainer into a clean container to remove any undissolved gelatin or vanilla bean fragments.
Setting the Panna Cotta:
- Lightly grease 6 ramekins or dessert glasses with a neutral oil if you plan to unmold the panna cotta. Skip this step if serving directly in the vessels.
- Divide the mixture evenly among the prepared containers.
- Allow to cool at room temperature for 20 minutes, then cover with plastic wrap and refrigerate for at least 4 hours, preferably overnight.
Crafting the Perfect Salted Caramel

Making caramel can be intimidating, but once you understand the process, it becomes second nature. Here’s my foolproof method:
- Combine the sugar and water in a heavy-bottomed saucepan, stirring just until the sugar is moistened.
- Heat over medium-high heat without stirring. Swirl the pan occasionally to promote even heating.
- As the mixture begins to boil, you can gently brush down any sugar crystals on the sides of the pan with a wet pastry brush.
- Watch carefully as the color changes from clear to golden to amber. This process takes about 8-10 minutes. For the most complex flavor, aim for a deep amber color, but be vigilant as caramel can burn quickly.
- Once you’ve reached your desired color, immediately remove the pan from heat.
- Very carefully add the cream in a slow stream while stirring constantly with a wooden spoon or silicone spatula. The mixture will bubble vigorously, so be cautious.
- Once the bubbling subsides, return the pan to low heat and add the butter, stirring until smooth.
- Stir in the sea salt and vanilla extract.
- Allow the caramel to cool to room temperature before using it to top the panna cotta.
The caramel can be made up to a week in advance and stored in an airtight container in the refrigerator. Gently warm before serving to achieve a pourable consistency.
The Art of Assembly and Presentation

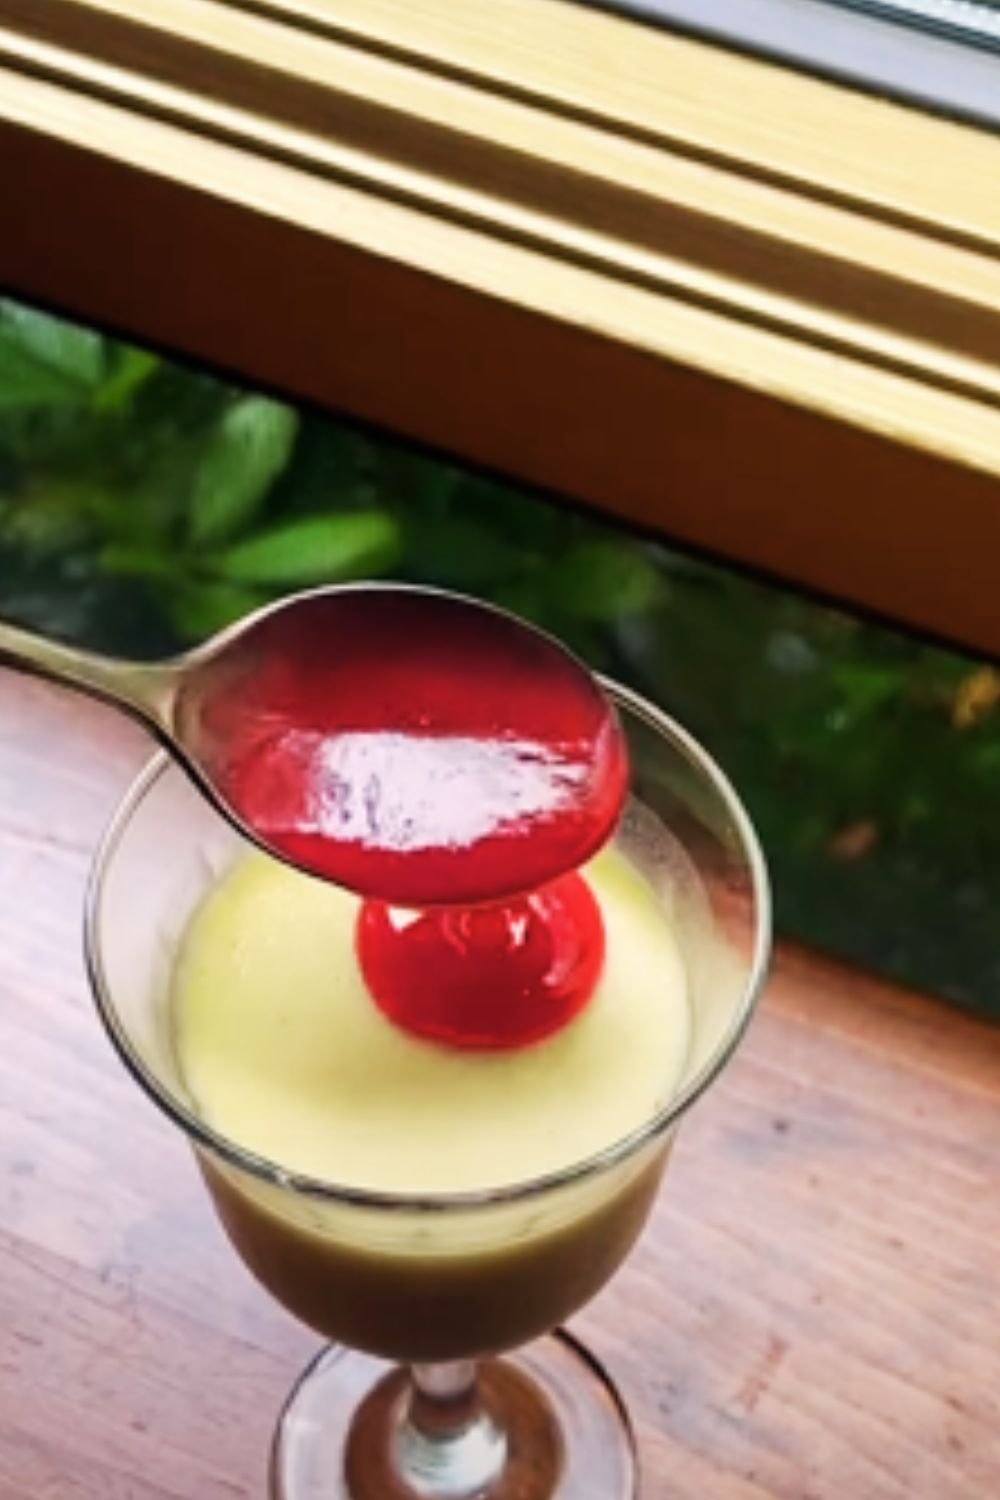
For an impressive presentation, I like to create layers:
- If unmolding, dip the ramekins briefly in hot water and run a thin knife around the edges. Invert onto serving plates.
- Pour a thin layer of slightly cooled but still pourable salted caramel over each panna cotta.
- Allow the caramel to set slightly in the refrigerator for about 15 minutes.
- Just before serving, sprinkle with a few additional flakes of sea salt.
Alternatively, for a more casual presentation, serve the panna cotta in their setting vessels with the warm caramel poured over the top at the table, allowing guests to witness the beautiful cascade of amber syrup.
Troubleshooting Common Issues
| Issue | Possible Cause | Solution |
|---|---|---|
| Panna cotta didn’t set properly | Too little gelatin or insufficient chilling time | Increase gelatin slightly in your next batch (add 1/4 teaspoon more); ensure at least 6 hours of refrigeration |
| Panna cotta is too firm | Too much gelatin or over-chilling | Reduce gelatin by 1/4 teaspoon in your next batch; serve slightly less chilled |
| Caramel is too thick | Cooked too long or cooled too much | Gently reheat with a tablespoon or two of cream until desired consistency is achieved |
| Grainy texture in panna cotta | Gelatin not fully dissolved or milk proteins curdled | Ensure gelatin is completely dissolved before cooling; don’t let dairy mixture boil |
| Caramel crystallized | Sugar crystals formed during cooking | Don’t stir once the sugar begins to cook; use a wet brush to wash down sides of pan |
| Caramel too bitter | Cooked too long or burnt | Next time, remove from heat at a lighter amber color |
| Panna cotta won’t unmold | Insufficient greasing or chilling | Run a thin knife around edges and dip ramekin in warm water for 5-10 seconds |
Variations to Explore
While this classic vanilla bean version with salted caramel is my favorite, the basic recipe can be adapted in countless ways:
Flavor Infusions:
- Steep fresh herbs like basil, lavender, or rosemary in the warm cream mixture, then strain before adding gelatin
- Add citrus zest for a bright note
- Incorporate spices like cardamom, cinnamon, or saffron
Alternative Toppings:
- Fresh berry compote
- Roasted stone fruits
- Chocolate ganache
- Coffee syrup
- Amaretto-soaked cherries
Dietary Adaptations:
| Special Diet | Substitution | Notes |
|---|---|---|
| Lactose-Free | Lactose-free cream and milk | Results very similar to traditional version |
| Vegan | Full-fat coconut milk + agar-agar instead of gelatin | Use 1 teaspoon agar-agar powder per cup of liquid |
| Lower Fat | Half-and-half instead of heavy cream | Texture will be less rich but still enjoyable |
| Sugar-Free | Erythritol or allulose with a touch of stevia | Avoid pure artificial sweeteners as they affect texture |
| Gluten-Free | Already naturally gluten-free! | Just ensure vanilla extract is certified GF |
Make-Ahead and Storage Tips
One of the beauties of panna cotta is that it must be made ahead, making it perfect for entertaining:
- The panna cotta base can be refrigerated for up to 4 days before serving.
- Salted caramel sauce keeps for up to 2 weeks in an airtight container in the refrigerator.
- For the freshest presentation, add the caramel topping no more than 12 hours before serving.
- While technically possible to freeze panna cotta, I don’t recommend it as the texture can become compromised upon thawing.
Serving Suggestions
Panna cotta stands beautifully on its own, but I like to offer these accompaniments to enhance the experience:
- Buttery shortbread cookies for textural contrast
- Fresh berries or sliced stone fruits when in season
- A small espresso for the perfect bitter counterpoint
- Dark chocolate shavings as a sophisticated garnish
- A shot of amaretto or Frangelico for adult gatherings
Pairing Notes:
- A small glass of dessert wine like Moscato d’Asti
- Sparkling water with a twist of lemon
- Hot herbal tea, particularly chamomile or mint
- Freshly brewed coffee or espresso
- For a non-alcoholic option, elderflower cordial diluted with sparkling water
Nutritional Information
| Nutrient | Amount per Serving |
|---|---|
| Calories | 425 |
| Total Fat | 32g |
| Saturated Fat | 20g |
| Cholesterol | 115mg |
| Sodium | 210mg |
| Total Carbohydrates | 32g |
| Dietary Fiber | 0g |
| Sugars | 32g |
| Protein | 3g |
| Calcium | 10% DV |
| Iron | 2% DV |
*Based on 6 servings. Nutritional values are approximate.
The Cultural Significance of Panna Cotta
What I find fascinating about panna cotta is how this humble dessert has transcended its regional Italian origins to become a globally recognized dessert. Its elegant simplicity embodies the Italian culinary philosophy of letting a few quality ingredients shine.
In northern Italy, panna cotta was traditionally made with the rich cream from the region’s dairy farms. The dessert likely evolved as a way to showcase this exceptional product, much like how many regional specialties develop around particularly outstanding local ingredients.
Modern chefs around the world have embraced panna cotta as a vehicle for creativity while respecting its essential nature. From high-end restaurants to home kitchens, its adaptability makes it both accessible and infinitely customizable.
The Joy of Sharing

There’s something deeply satisfying about placing a tray of these silky desserts at the center of a table and watching as guests experience that first, perfect spoonful. The gentle wobble as the spoon breaks the surface, the way the caramel pools around the cream—these small details create moments of pure pleasure.
I’ve served this dessert at intimate dinner parties and large gatherings alike, and it never fails to elicit sighs of appreciation. The fact that it must be prepared in advance means I can be present with my guests rather than fussing in the kitchen at the last minute.
Perhaps that’s the true magic of a well-crafted panna cotta—it transforms simple ingredients into an experience that feels both luxurious and comforting, sophisticated yet unpretentious. It reminds us that sometimes the most memorable culinary pleasures come from embracing simplicity and executing it with care and attention.
Questions & Answers
Q: Can I make panna cotta without gelatin?
A: Yes, you can substitute agar-agar for a vegetarian version. Use about 1 teaspoon of agar-agar powder per cup of liquid (or follow package instructions). The texture will be slightly different—more firm and less jiggly than gelatin-set panna cotta, but still delicious. Carrageenan is another option, though less commonly available for home cooks.
Q: Why did my caramel crystallize and turn grainy?
A: Crystallization happens when sugar crystals form during the cooking process. To prevent this: 1) Make sure your saucepan is completely clean before starting, 2) Avoid stirring once the sugar begins to dissolve, 3) Use a wet pastry brush to wash down any crystals that form on the sides of the pan, and 4) Consider adding a small amount of corn syrup or lemon juice at the beginning, as acid helps prevent crystallization.
Q: Can I make this dessert in advance for a large party?
A: Absolutely! The panna cotta can be made up to 4 days in advance and kept covered in the refrigerator. The caramel sauce can be made up to 2 weeks ahead and stored in an airtight container. For the freshest presentation, I recommend adding the caramel topping within 12 hours of serving.
Q: Why does my panna cotta sometimes separate into layers?
A: Separation typically occurs when the mixture is cooling. To prevent this, let the panna cotta mixture cool slightly at room temperature before pouring into ramekins, and stir occasionally during this cooling period. Also, ensure your gelatin is completely and evenly dissolved in the warm cream mixture.
Q: Do I need special molds for panna cotta?
A: Not at all! While specialty molds can create beautiful shapes, panna cotta can be set in virtually any container: ramekins, wine glasses, teacups, small bowls, or even vintage tea cups for a charming presentation. If you plan to unmold the panna cotta, choose containers with smooth sides and a wide opening.
Q: How can I tell when my panna cotta is properly set?
A: A properly set panna cotta should have a gentle wobble when the container is lightly shaken—similar to the consistency of firm jelly. If you touch the surface lightly with your finger, it should feel firm but yield slightly to pressure. The panna cotta should hold its shape when unmolded but quiver when moved.
Q: Is it possible to make a lighter version of panna cotta?
A: Yes, you can create a lighter version by using equal parts whole milk and heavy cream instead of the 2:1 ratio in the recipe. You could even use all whole milk for the lightest version, though you’ll sacrifice some of the silky richness. Greek yogurt can also be substituted for some of the heavy cream for a tangier, lighter alternative.
Q: What’s the difference between panna cotta and crème brûlée?
A: While both are creamy desserts, they differ fundamentally in preparation and texture. Panna cotta is set with gelatin and served chilled, usually unmolded. Crème brûlée is a custard set with egg yolks, baked in a water bath, and topped with caramelized sugar. Panna cotta has a silkier, cleaner mouthfeel, while crème brûlée is richer and more custardy.
Q: Can I use vanilla extract instead of vanilla beans?
A: Yes, though the flavor won’t be as complex or intense. If substituting, use 1 tablespoon of pure vanilla extract or 1 tablespoon of vanilla bean paste. The paste is preferable as it contains vanilla bean seeds, which provide the characteristic speckled appearance.
Q: Why is my caramel sauce too thin or too thick?
A: The consistency of caramel sauce depends on the ratio of sugar to cream and how long it’s cooked. For a thicker sauce, you can cook it slightly longer after adding the cream and butter. For a thinner sauce, add a bit more cream. Remember that caramel thickens significantly as it cools, so it’s best to judge the final consistency after cooling slightly.