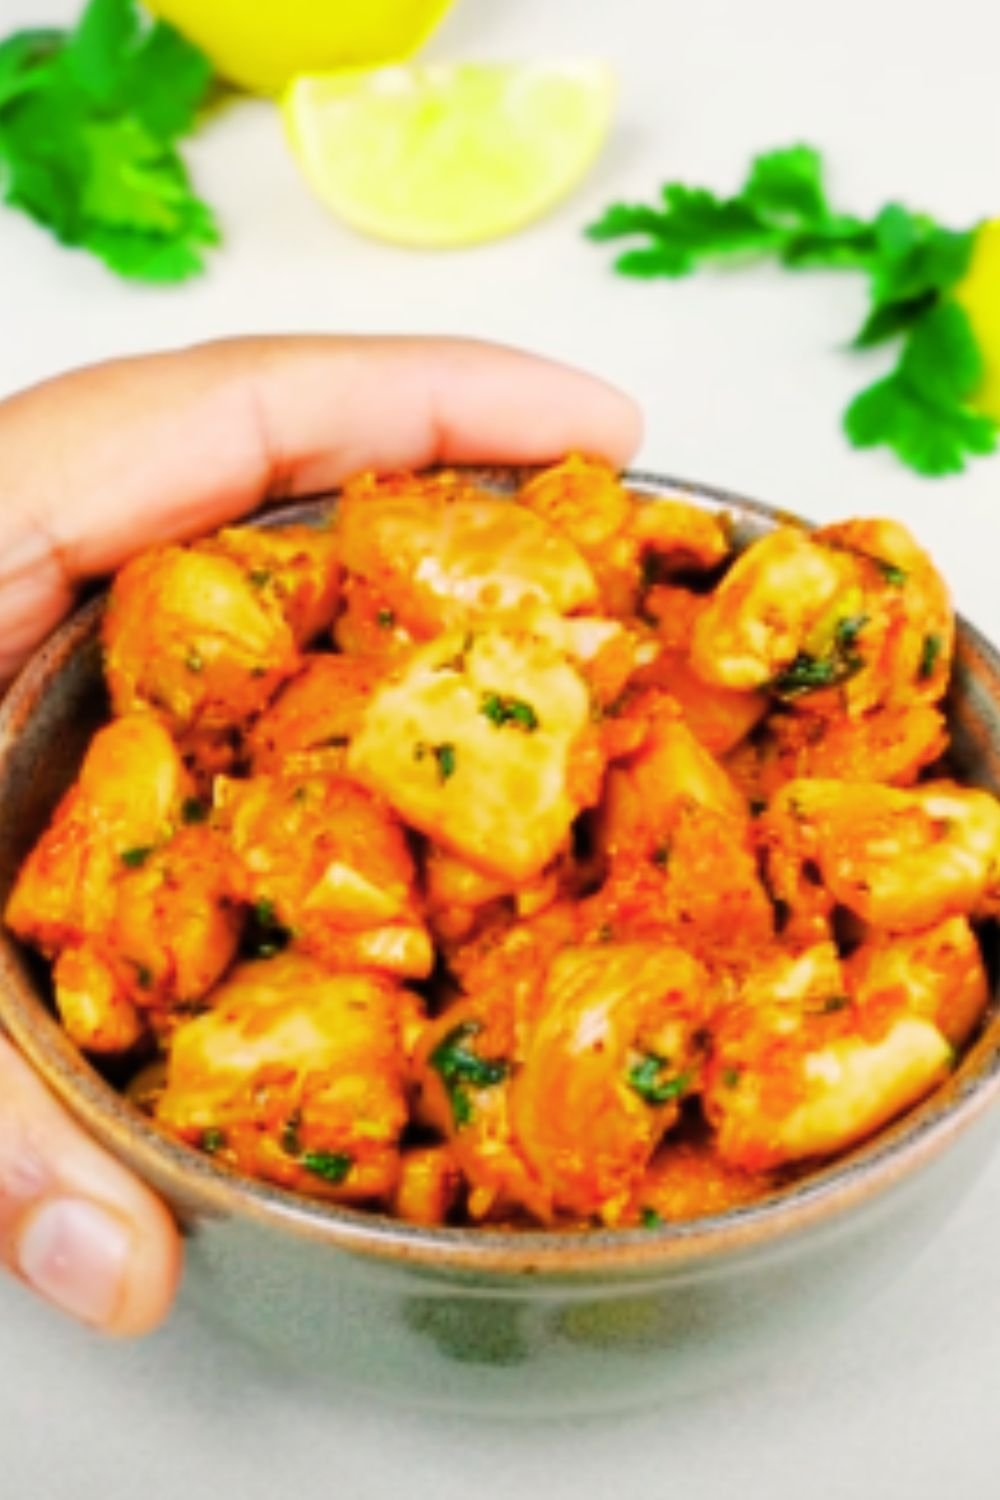
Have you ever had one of those evenings when you’re craving something delicious but don’t want to spend hours in the kitchen or clean a mountain of dishes afterward? I’ve been there more times than I can count, which is why this Lemon Garlic Butter Chicken and Green Beans Skillet has become my go-to weeknight dinner. It’s the perfect harmony of bright, zesty flavors and no-fuss cooking that delivers restaurant-quality results right at home.
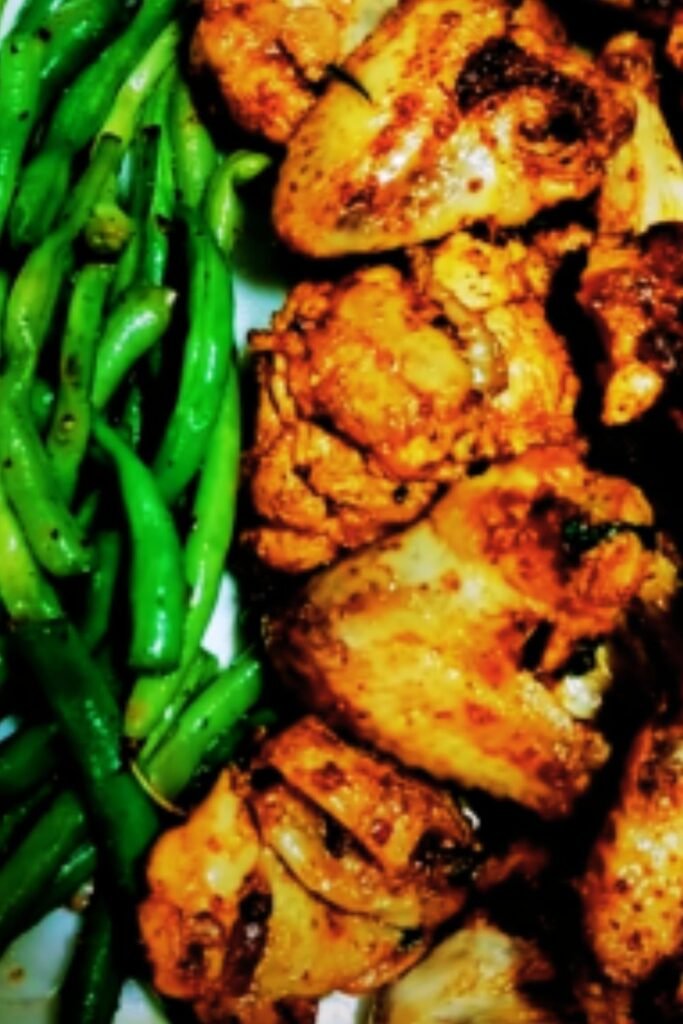
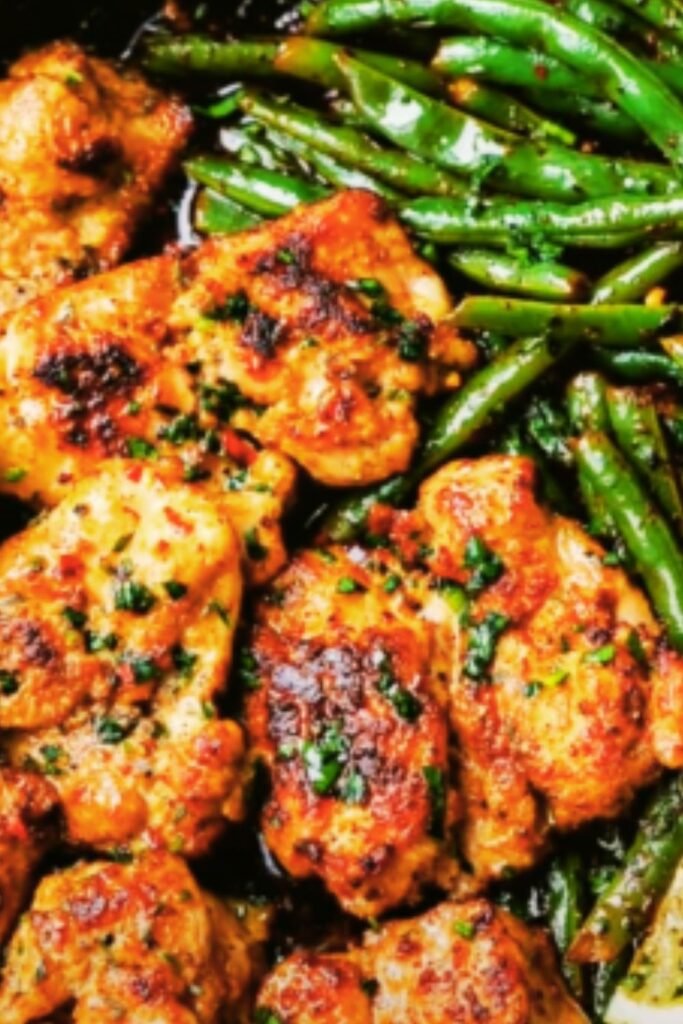
What I love most about this dish is how the tangy lemon juice cuts through the richness of the butter, while the garlic adds that unmistakable aromatic depth that makes your kitchen smell absolutely heavenly. The tender chicken thighs soak up all these flavors, and the crisp-tender green beans add just the right amount of texture and color to make this a complete, satisfying meal.
Today, I’m sharing my perfected recipe that I’ve fine-tuned over countless family dinners. Whether you’re cooking for picky eaters, entertaining guests, or simply treating yourself to a special meal on a busy weeknight, this skillet wonder is bound to impress. The best part? It all comes together in under 30 minutes using just one pan!
What Makes This Recipe Special
Before we dive into the cooking process, let me share what makes this recipe stand out from other chicken dishes:
- One-pan convenience: Everything cooks in a single skillet, minimizing cleanup while maximizing flavor as each ingredient builds upon the last.
- Perfect balance of flavors: The combination of bright lemon, aromatic garlic, and rich butter creates a sauce that’s both decadent and refreshing.
- Versatility: This dish pairs well with so many sides, from mashed potatoes to rice or crusty bread.
- Meal-prep friendly: It reheats beautifully, making it perfect for lunch the next day.
- Visually stunning: The vibrant green beans against the golden-brown chicken makes for an impressive presentation with minimal effort.
Essential Ingredients
For this recipe to truly shine, quality ingredients make all the difference. Here’s what you’ll need:
For the Chicken:
- 1.5 pounds boneless, skinless chicken thighs (about 6-8 thighs)
- 2 tablespoons olive oil
- Salt and freshly ground black pepper
- 1 teaspoon dried oregano
- ½ teaspoon paprika
- ¼ teaspoon red pepper flakes (optional, for heat)
For the Lemon Garlic Butter Sauce:
- 4 tablespoons unsalted butter
- 6 cloves garlic, minced (about 2 tablespoons)
- Zest of 1 lemon
- ¼ cup fresh lemon juice (about 1-2 lemons)
- ½ cup chicken broth
- 1 teaspoon honey
- 2 tablespoons fresh parsley, chopped
- 1 tablespoon fresh thyme leaves (or 1 teaspoon dried)
For the Green Beans:
- 1 pound fresh green beans, trimmed
- 2 cloves garlic, thinly sliced
- Pinch of red pepper flakes
- Salt and pepper to taste
Equipment You’ll Need
One of the beauties of this recipe is its simplicity in terms of equipment. Here’s what you’ll need:
- 12-inch cast iron skillet or heavy-bottomed stainless steel skillet
- Sharp knife and cutting board
- Measuring cups and spoons
- Tongs for flipping the chicken
- Small bowl for mixing seasoning
- Microplane or zester for the lemon
Step-by-Step Cooking Instructions
Preparing the Chicken
- Pat the chicken dry with paper towels. This is crucial for achieving that beautiful golden-brown crust we’re after.
- Season generously – In a small bowl, combine 1 teaspoon salt, ½ teaspoon black pepper, 1 teaspoon dried oregano, and ½ teaspoon paprika. Sprinkle this mixture evenly over both sides of the chicken thighs.
- Bring to room temperature – Allow the seasoned chicken to sit at room temperature for about 15 minutes. This helps it cook more evenly.
Cooking the Chicken
- Heat your skillet – Place your cast iron or stainless steel skillet over medium-high heat and add 2 tablespoons of olive oil. Allow it to heat until it’s shimmering but not smoking.
- Sear the chicken – Carefully add the seasoned chicken thighs to the hot skillet, presentation side down first. Don’t overcrowd the pan; work in batches if necessary.
- Cook until golden – Let the chicken cook undisturbed for 5-6 minutes until it develops a beautiful golden-brown crust.
- Flip and continue cooking – Turn the chicken thighs over and cook for another 4-5 minutes, or until the internal temperature reaches 165°F (74°C).
- Remove and rest – Transfer the chicken to a clean plate and tent loosely with foil to keep warm while you prepare the green beans and sauce.
Cooking the Green Beans
- Prep the pan – In the same skillet with the chicken drippings (don’t clean it!), reduce the heat to medium.
- Add the green beans – Add the trimmed green beans to the skillet along with a pinch of salt.
- Sauté until bright green – Cook the green beans, tossing occasionally, for about 3-4 minutes until they turn bright green but still maintain some crispness.
- Add flavor enhancers – Add the 2 cloves of thinly sliced garlic and a pinch of red pepper flakes. Stir constantly for about 30 seconds until fragrant, being careful not to burn the garlic.
- Transfer temporarily – Remove the green beans from the skillet and set aside on the plate with the chicken.
Creating the Lemon Garlic Butter Sauce
- Reduce heat to medium-low and add the 4 tablespoons of butter to the same skillet.
- Sauté garlic – Once the butter has melted, add the 6 cloves of minced garlic and cook for 30-45 seconds until fragrant, stirring constantly to prevent burning.
- Add liquid ingredients – Pour in the ¼ cup of fresh lemon juice, ½ cup of chicken broth, and 1 teaspoon of honey. Stir to combine, scraping up any browned bits from the bottom of the pan (these are flavor gold!).
- Reduce the sauce – Let the mixture simmer for about 2-3 minutes until it reduces slightly and begins to thicken.
- Add finishing touches – Stir in the lemon zest, 1 tablespoon of fresh thyme leaves, and 1 tablespoon of the chopped parsley, reserving some parsley for garnish.
Bringing It All Together
- Return chicken and green beans to the skillet, nestling the chicken into the sauce and distributing the green beans around it.
- Simmer together – Allow everything to simmer gently for 2-3 minutes to reheat and let the flavors meld.
- Final seasoning – Taste the sauce and adjust with salt and pepper if needed.
- Garnish – Sprinkle the remaining fresh parsley over the top for a pop of color and fresh flavor.
Nutritional Information
For those who are tracking their intake or just curious about what they’re consuming, here’s a detailed nutritional breakdown per serving (assuming 4 servings):
| Nutrient | Amount | % Daily Value* |
|---|---|---|
| Calories | 425 kcal | 21% |
| Total Fat | 28g | 36% |
| – Saturated Fat | 11g | 55% |
| – Trans Fat | 0g | – |
| Cholesterol | 185mg | 62% |
| Sodium | 720mg | 31% |
| Total Carbohydrates | 11g | 4% |
| – Dietary Fiber | 3g | 11% |
| – Sugars | 4g | – |
| Protein | 35g | 70% |
| Vitamin A | 15% | – |
| Vitamin C | 45% | – |
| Calcium | 4% | – |
| Iron | 15% | – |
*Percent Daily Values are based on a 2,000 calorie diet.
Serving Suggestions
This versatile dish pairs beautifully with a variety of sides. Here are some of my favorite ways to serve it:
- Carbohydrates: Serve over fluffy white rice, creamy mashed potatoes, or buttered egg noodles to soak up that incredible sauce.
- Bread: A crusty French baguette or warm garlic bread is perfect for mopping up every last drop of the lemon garlic butter sauce.
- Additional Vegetables: If you’re looking to add more vegetables, a simple side salad with a light vinaigrette complements the richness of the dish.
- Lighter Option: For a lower-carb meal, serve with cauliflower rice or zucchini noodles.
Make-Ahead and Storage Tips
This recipe is not only delicious fresh from the skillet but also works wonderfully for meal prep:
Make-Ahead Options:
- Prep Ingredients: Trim the green beans, mince the garlic, and portion out other ingredients up to 24 hours in advance.
- Season Chicken: The chicken can be seasoned up to 8 hours ahead and kept refrigerated until ready to cook.
Storage Guidelines:
- Refrigeration: Store leftovers in an airtight container in the refrigerator for up to 3 days.
- Freezing: While you can freeze this dish for up to 2 months, please note that the texture of the green beans will change after thawing. For best results, freeze just the chicken and sauce, then add fresh green beans when reheating.
Reheating Instructions:
- Stovetop: For the best results, reheat gently in a covered skillet over medium-low heat with a splash of chicken broth to revive the sauce.
- Microwave: For convenience, microwave in 30-second intervals, stirring between each until heated through.
Recipe Variations and Substitutions
Don’t have all the ingredients on hand? No problem! Here are some tested substitutions that work wonderfully:
Protein Options:
- Chicken breast: If you prefer white meat, use boneless, skinless chicken breasts instead of thighs. Just be careful not to overcook them as they can dry out more easily.
- Pork chops: Thin-cut boneless pork chops work beautifully with this sauce and can be prepared using the same method.
- Shrimp: For a quicker cooking option, large peeled and deveined shrimp are delicious and cook in just 2-3 minutes per side.
Vegetable Alternatives:
- Asparagus: Swap the green beans for asparagus spears, trimming off the woody ends before cooking.
- Broccoli florets: Cut into smaller pieces for even cooking.
- Sugar snap peas: These add a lovely sweetness and crunch.
Dietary Adaptations:
- Dairy-free: Replace butter with olive oil or a plant-based butter alternative.
- Low-carb: As is, this recipe is relatively low in carbohydrates, but you can reduce the honey or replace it with a sugar-free substitute.
- Gluten-free: This recipe is naturally gluten-free, just ensure your chicken broth is certified gluten-free if that’s a concern.
Pro Tips for Perfect Results
After making this dish countless times, I’ve gathered some insider tips that make all the difference:
- Don’t skip patting the chicken dry – This step is crucial for achieving that golden-brown crust we all love.
- Use a heavy-bottomed skillet – Cast iron or a quality stainless steel pan distributes heat evenly and creates the best sear.
- Don’t crowd the pan when cooking the chicken. If necessary, cook in batches to ensure each piece gets properly browned.
- Fresh lemon juice makes a difference – The bottled stuff just doesn’t have the same bright flavor as freshly squeezed.
- Monitor your garlic closely – It can go from perfectly golden to burnt in seconds. If your pan runs hot, reduce the heat before adding the garlic.
- Taste before serving – A final taste check allows you to adjust the seasoning, perhaps adding more lemon juice for brightness or a touch more honey to balance acidity.

Frequently Asked Questions
Q: Can I use bone-in chicken thighs instead? A: Absolutely! Bone-in thighs will take longer to cook (about 7-8 minutes per side), and you’ll want to ensure they reach an internal temperature of 165°F. The bone adds flavor but will increase cooking time.
Q: My sauce broke and looks separated. What happened? A: This can happen if the heat is too high when adding cold ingredients to the hot pan. To fix it, remove from heat momentarily and whisk in a teaspoon of cold butter until the sauce comes back together.
Q: Can I make this dish ahead for a dinner party? A: While it’s best served fresh, you can prepare it up to an hour ahead and keep it warm in a low oven (200°F). Just slightly undercook the green beans initially so they don’t become too soft when kept warm.
Q: How do I know when the chicken is done? A: The most reliable method is using an instant-read thermometer, which should register 165°F when inserted into the thickest part of the thigh. Without a thermometer, cut into the thickest part – the juices should run clear and there should be no pink remaining.
Q: My green beans turned out too tough. What did I do wrong? A: This typically happens with older green beans. You can blanch them in boiling water for 2 minutes before adding them to the skillet, or simply cook them a bit longer in the skillet, possibly adding a tablespoon or two of water and covering briefly to steam them.
Q: Can I double this recipe? A: Yes, but you’ll likely need to cook in batches to avoid overcrowding your pan. A better approach is to use two skillets simultaneously if serving a larger group.
Why This Recipe Works
Understanding the science behind cooking helps us appreciate why certain techniques yield better results:
- Patting the chicken dry removes surface moisture, allowing for proper browning through the Maillard reaction, which creates hundreds of new flavor compounds.
- Searing in a hot pan creates a flavorful crust while sealing in juices, resulting in more tender meat.
- Using chicken thighs instead of breasts provides more flavor due to higher fat content, and they’re more forgiving if slightly overcooked.
- Cooking components sequentially in the same pan builds layers of flavor, with each ingredient benefiting from the fond (browned bits) left by the previous one.
- The acid from lemon juice not only adds brightness but also helps tenderize the meat and cut through the richness of the butter.
- Adding honey balances the acidity of the lemon and helps the sauce achieve a slight caramelization and glaze-like consistency.
This dish represents what home cooking is all about – simple ingredients transformed into something extraordinary through thoughtful preparation. The combination of tender chicken, crisp-tender green beans, and a silky sauce that brings everything together creates a memorable meal that feels special enough for company but simple enough for a weeknight.
I hope this recipe becomes a favorite in your kitchen as it has in mine. There’s something magical about a dish that’s both comforting and elegant, familiar yet exciting. And when you can achieve all that with minimal cleanup? That’s what I call a cooking win.
Questions and Answers
Q: What’s the best type of skillet to use for this recipe? A: A 12-inch cast iron skillet is ideal because it retains heat exceptionally well and creates a beautiful sear on the chicken. However, any heavy-bottomed stainless steel skillet will also work great. Avoid non-stick pans for this recipe as they won’t develop the same fond (browned bits) that adds so much flavor to the sauce.
Q: Can I use dried herbs instead of fresh? A: Yes! As a general rule, substitute 1 teaspoon of dried herbs for each tablespoon of fresh. Dried herbs have more concentrated flavor, so you need less. That said, the fresh parsley garnish really adds brightness at the end that dried just can’t match, so try to use fresh for that final sprinkle if possible.
Q: How do I prevent the garlic from burning? A: Garlic can burn quickly, especially when minced. The key is to manage your heat properly. When adding garlic to the pan, especially when making the sauce, reduce the heat to medium-low and stir constantly. If your stove runs hot, you might even want to remove the pan from the heat for a few seconds while adding the garlic.
Q: What can I substitute for chicken broth if I don’t have any? A: You can use vegetable broth, a bouillon cube dissolved in water, or even white wine (reduce to ¼ cup if using wine). In a pinch, water with a pinch of salt will work, though the sauce won’t be quite as flavorful.
Q: My green beans always seem to come out either too crunchy or too mushy. How do I hit that perfect crisp-tender balance? A: The key is to start with fresh, not old, green beans and to watch them carefully as they cook. They should turn bright green within the first 2-3 minutes of cooking. Test one by biting into it at this point. If it’s still too crunchy for your taste, add 2 tablespoons of water to the pan and cover it for 1-2 minutes to steam them slightly. Remove the cover and continue cooking until the water evaporates.
Q: Can I use lemon juice from the bottle instead of fresh lemons? A: While fresh is always best for optimal flavor, bottled lemon juice can work in a pinch. Use a little less than the recipe calls for (about 3 tablespoons instead of ¼ cup), as bottled juice can sometimes have a more concentrated, slightly bitter taste. You’ll miss out on the fresh zest, though, which adds significant aroma and flavor.
Q: How can I make this recipe dairy-free? A: Replace the butter with olive oil or a plant-based butter alternative. The flavor profile will change slightly, but it will still be delicious. If using olive oil, you might want to add a bit more lemon zest to compensate for the richness that butter provides.
Q: Why did my sauce turn out thin and watery? A: The sauce needs time to reduce and slightly thicken. Make sure you’re simmering it for at least 2-3 minutes before adding the chicken and green beans back to the pan. If it’s still too thin, you can make a cornstarch slurry (1 teaspoon cornstarch mixed with 1 tablespoon cold water) and whisk it into the simmering sauce to thicken it up.